Resource Group Monitoring
Cloud Eye provides the resource group and alarm functions. How can we effectively group and monitor resources and receive alarm notifications of the resources in different groups?
Assume that there are four ECSs, namely ECS-01, ECS-02, ECS-03, and ECS-04. ECS-01 and ECS-02 are used by the development team. ECS-03 and ECS-04 are used by the test team. You need to obtain the running status of the two ECSs in the development team in a timely manner, including their CPU usage, idle CPU usage, average load, I/O usage, disk usage, memory usage, and percentage of total inode used.
| ECS Name | Group | Whether to Install the Agent | Department |
|---|---|---|---|
| ECS-01 | Development team resources | Yes | Development team |
| ECS-02 | Development team resources | Yes | Development team |
| ECS-03 | N/A | No | Test team |
| ECS-04 | N/A | No | Test team |
Table 1 ECS list and group planning
Prerequisites
The Agent has been installed on ECS-01 and ECS-02. For details, see Agent Installation and Configuration.
Creating a Resource Group
-
Log in to the management console.
-
In the upper left corner, select a region and a project.
-
Choose Service List -> Management & Deployment -> Cloud Eye.
-
In the navigation pane on the left, choose Resource Groups.
-
In the upper right corner, click Create Resource Group.
-
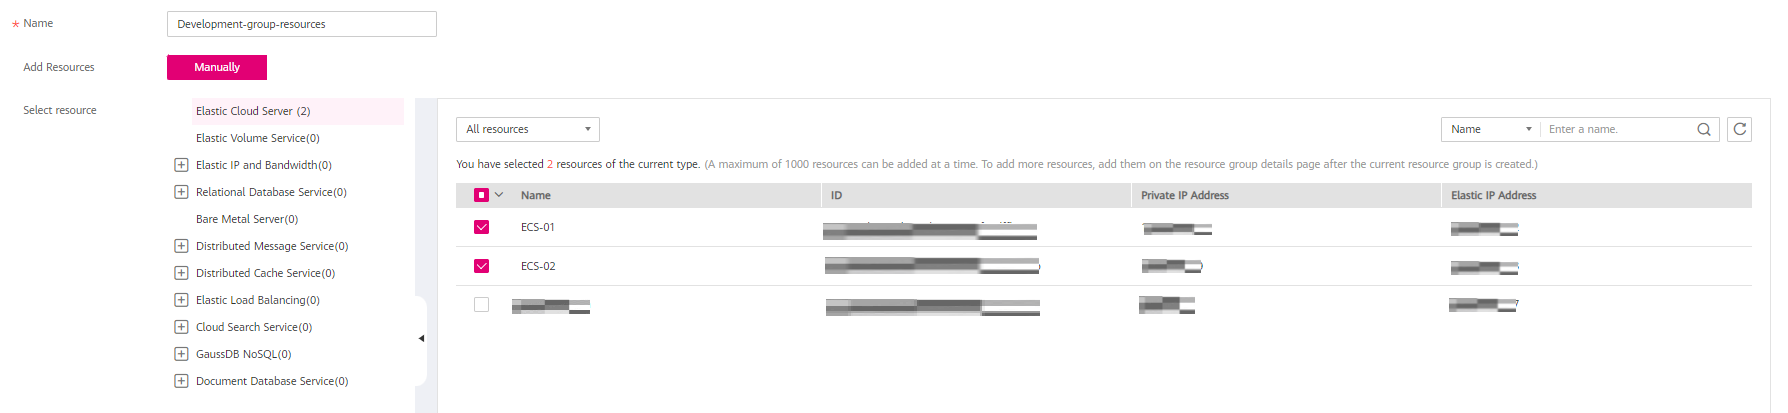
Enter the group name as prompted. In this example, enter Development-group-resources.
-
Select the target cloud service resources.
-
Click Create.
Creating a Topic and Configuring the Notification Object
When resource exceptions occur, an alarm notification can be sent to the configured topic subscribers.
-
Log in to the management console.
-
In the upper left corner, select a region and a project.
-
Under Application, select Simple Message Notification.
The SMN console is displayed.
-
In the navigation pane on the left, choose Topics.
The Topics page is displayed.
-
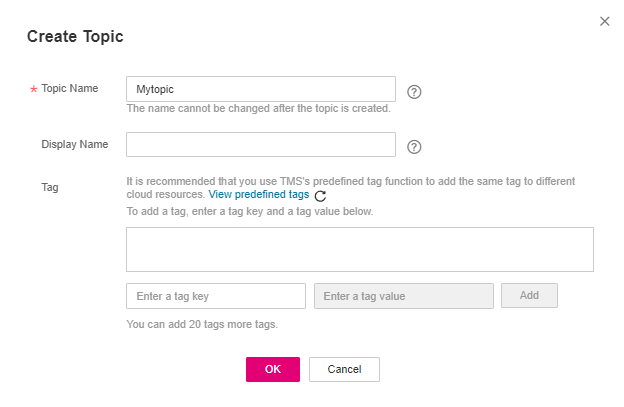
In the upper right corner, click Create Topic.
The Create Topic dialog box is displayed.
-
Enter a topic name and display name.
-
Click OK.
The topic you created is displayed in the topic list.
tipClick the topic name to view the topic details and the total number of topic subscriptions.
-
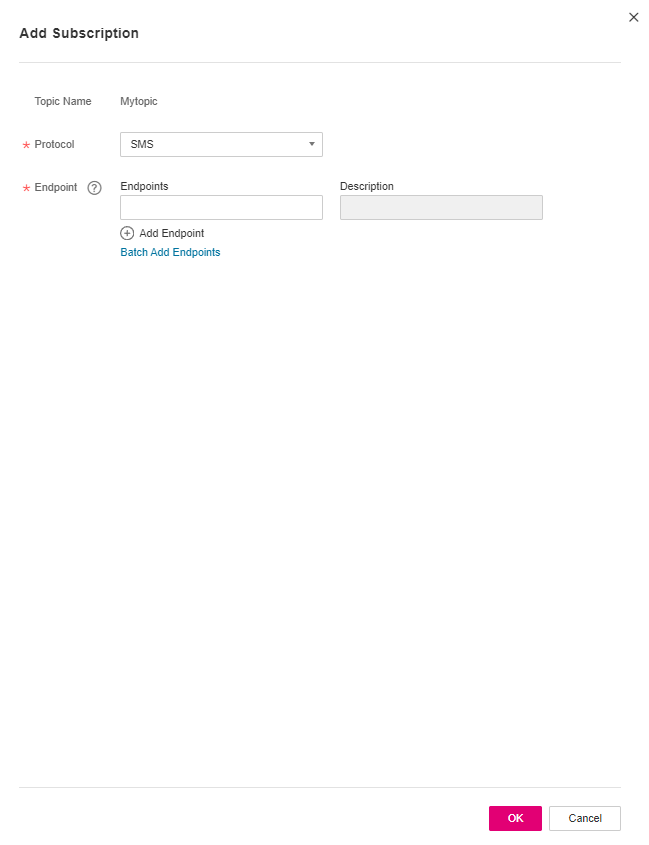
In the topic list, locate the new topic. Click the topic name and in the upper right corner, select Add Subscription.
-
Specify the subscription protocol and endpoints.
-
Click OK.
The subscriptions you added are displayed in the subscription list.
Creating an Alarm Rule
- Log in to the management console.
- In the upper left corner, select a region and a project.
- Choose Service List -> Management & Deployment -> Cloud Eye.
- In the navigation pane on the left, choose Alarm Management -> Alarm Rules.
- In the upper right corner, click Create Alarm Rule.
- On the Create Alarm Rule page, follow the prompts to set the parameters.
-
Set the alarm rule name.

-
Set the monitored object and alarm triggering conditions.
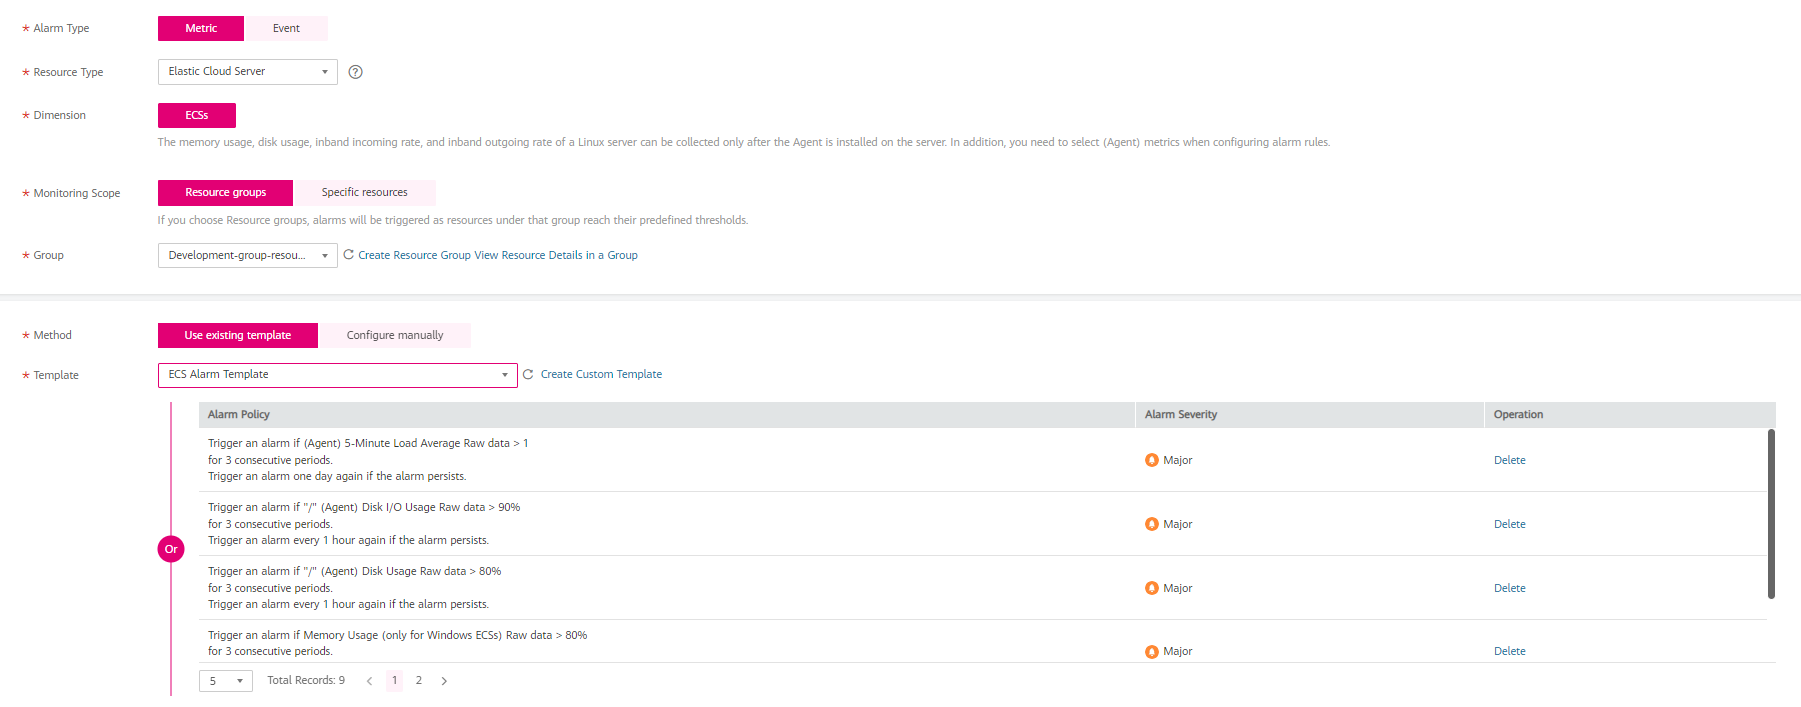
Set Group to Development group resources created in Step 1 Creating a Resource Group.
-
Set Alarm Notification parameters.
 note
noteNote: When configuring Notification Object, select Mytopic created in Step 2 Creating a Topic and Configuring the Notification Object.
-
Click Create.
-
After the alarm rule is added, if the metric data reaches the threshold, Cloud Eye immediately informs you that the metric data of group Development group resources (ECS-01 and ECS-02) is abnormal through SMN.