Accessing OBS Through an NGINX Reverse Proxy
Generally, you can access OBS using a bucket's access domain name (for example, https://bucketname.obs.eu-de.otc.t-systems.com) provided by OBS or using a user-defined domain name bound to an OBS bucket.
In some cases, you may need to use a fixed IP address to access OBS. For security purposes, some enterprises need to set a blacklist and a whitelist of external IP addresses. In this case, a fixed IP address is required. Also for security purposes, an OBS bucket does not have a fixed IP address, because the DNS service of T Cloud Public resolves the bucket access domain name to different IP addresses.
In this case, you can set up an NGINX reverse proxy server on an ECS so that you can access OBS through a fixed IP address.
Solution Design
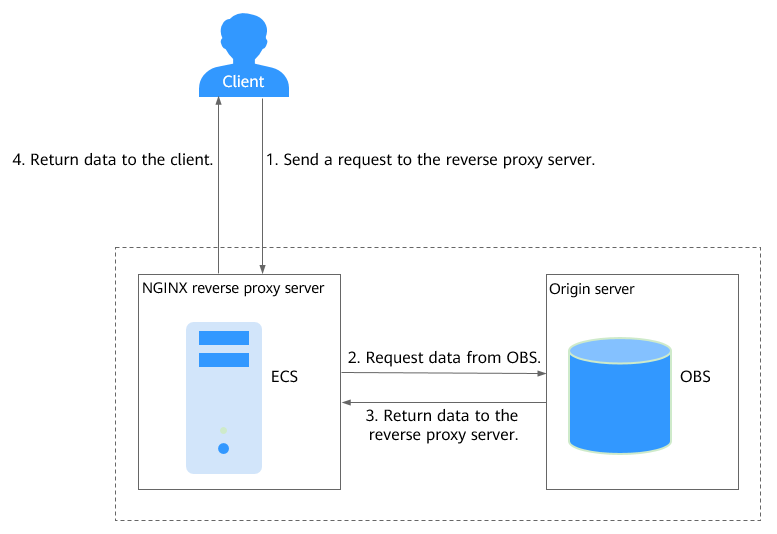
This part explains how to deploy NGINX on an ECS and set up an NGINX reverse proxy server. The proxy is imperceptible. Requests are sent to the reverse proxy server, which then obtains the required data from OBS and returns the data to users. The reverse proxy server and OBS work as a whole. Only the IP address of the proxy server is exposed, while the actual domain name or IP address of OBS is hidden.
Prerequisites
- You know the region and access domain name of the bucket. For example, the access domain name of a bucket named
nginx-obsin the eu-de region isnginx-obs.obs.eu-de.otc.t-systems.com. To obtain the information, see Querying Basic Information of a Bucket. - You have a Linux ECS in the same region. CentOS is used here as an example. For details, see Creating an ECS.
- The ECS is bound with an EIP, so that you can download the NGINX installation package over the public network.
Installing NGINX on an ECS
In this example, CentOS Stream 9 is used as an example.
a. Log in to the ECS where you will set up the NGINX reverse proxy server.
b. Run the following command to install NGINX:
sudo dnf install nginx
c. Run the following commands to start NGINX and configure NGINX to start upon system startup:
sudo systemctl start nginx
sudo systemctl enable nginx
d. Run the following commands to allow HTTP and HTTPS traffic and then restart the firewall:
sudo firewall-cmd --permanent --zone=public --add-service=http
sudo firewall-cmd --permanent --zone=public --add-service=https
sudo firewall-cmd --reload
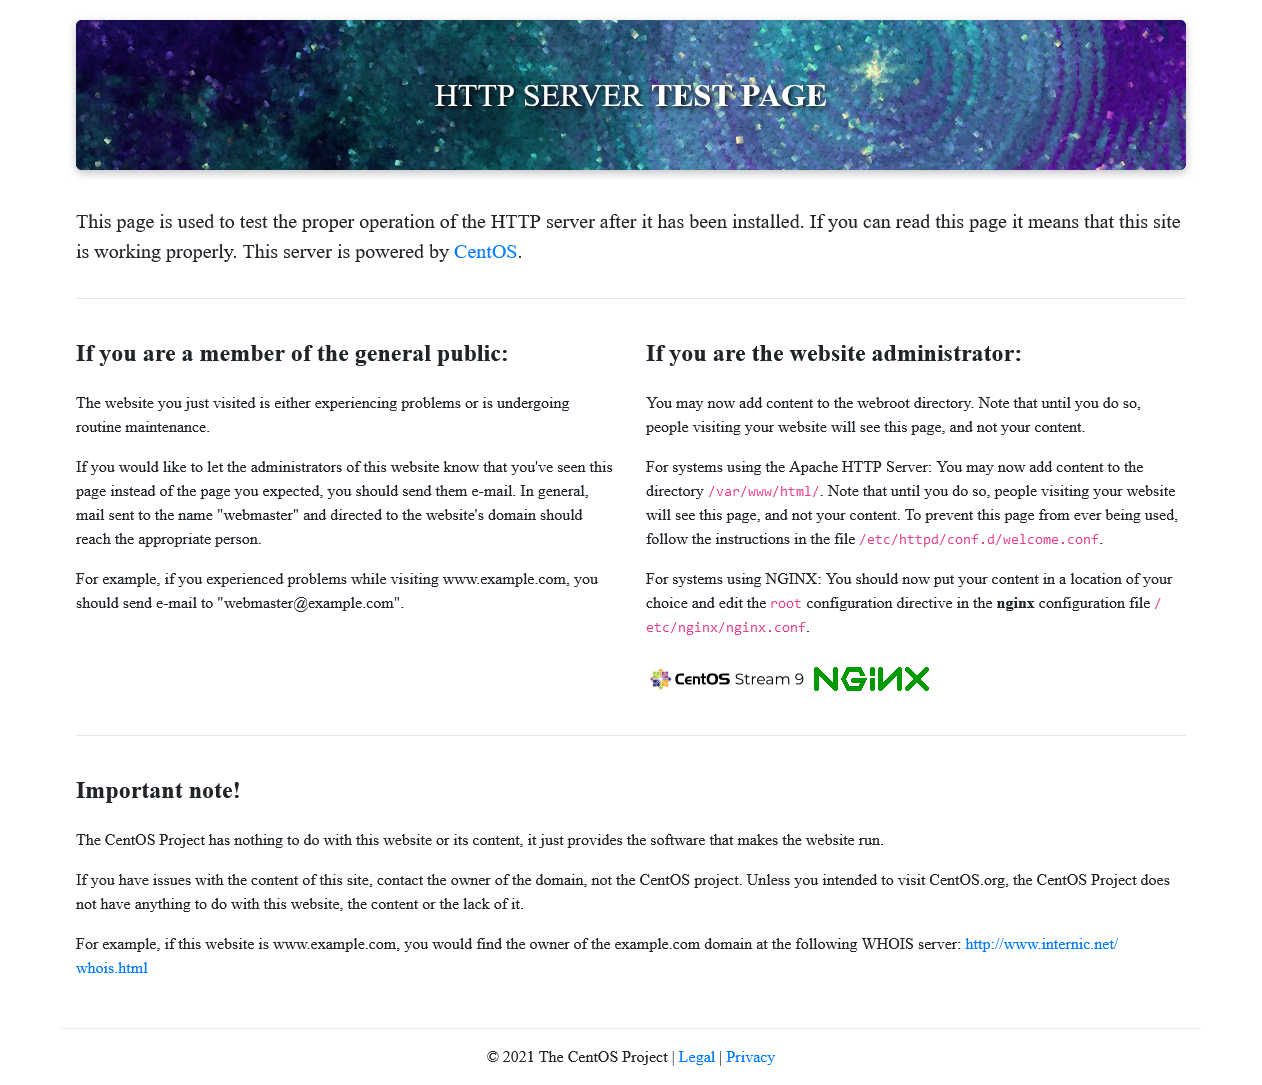
e. Use a browser on any device to access http://**ECS EIP/. If
the following information is displayed, NGINX is successfully
installed.
Configuring NGINX as reverse proxy for your OBS bucket
a. Run the following command to open the default.conf file:
vim /etc/nginx/conf.d/default.conf
b. Press the i key to go to the edit mode and modify the default.conf file.
server {
      listen       80;
      server_name  *.*.*.*;  # Enter the EIP of the ECS.
      proxy_buffering off;  # Disable the proxy buffer (memory).

      location / {
           proxy_pass  https://nginx-obs.obs.eu-de.otc.t-systems.com;  #Enter the OBS bucket domain name that starts with http:// or https://.
           index  index.html index.htm ;  #Specify the homepage of the website. If there are multiple files, Nginx checks the files based on their enumeration sequence.
        }
}
| Parameter | Description |
|---|---|
| server_name | IP address that provides the reverse proxy service. It is the fixed IP address that is exposed to end users for access. Enter the EIP of the ECS where the NGINX reverse proxy service is deployed. |
| proxy_pass | IP address of the proxied server. Enter the OBS bucket access domain name required in Prerequisites. The domain name must start with http:// or https://. Example: https://nginx-obs.obs.eu-de.otc.t-systems.com |
| proxy_buffering | Whether to enable the proxy buffer. The value can be on or off. If this parameter is set to on, Nginx stores the response returned by the backend in a buffer and then sends the data to the client. If this parameter is set to off, Nginx sends the response to the client as soon as it receives the data from the backend. Default value: on Example: proxy_buffering off |
When you use an API, SDK, or obsutil for calling, set proxy_pass to the region domain name. The following is an example: obs.eu-de.otc.t-systems.com.
c. Press the ESC key and enter :wq to save the configuration and exit.
d. Run the following command to check the status of the NGINX configuration file:
sudo nginx -t
e. Run the following command to restart the NGINX service for the configuration to take effect:
sudo systemctl restart nginx
Configuring an OBS bucket policy to allow the IP address of the NGINX proxy server to access OBS
This step is optional.
If your bucket is publicly read or the URL needs to have a signature contained when accessing objects in a private bucket, skip this step. For details, see Authentication of Signature in a URL.
If you do not want URLs containing a signature to access resources in your private bucket, configure the following bucket policy that allows only the IP address of the NGINX proxy server to access your bucket.
a. In the navigation pane of OBS Console, choose Object Storage.
b. In the bucket list, click the bucket you want to go to the Objects page.
c. In the navigation pane, choose Permissions -> Bucket Policies.
d. Click Create.
e. Choose a policy configuration method you like. Visual Editor is used here.
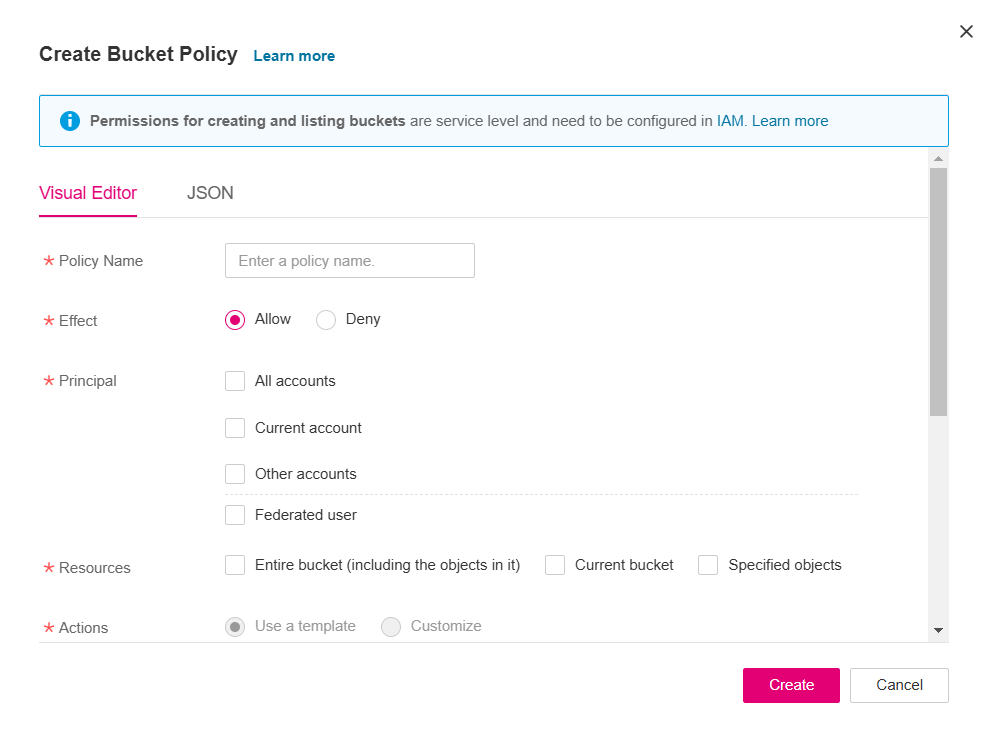
f. Configure the following parameters.
| Parameter | Description | |
|---|---|---|
| Policy Name | Enter a policy name. | |
| Policy content | Effect | Select Allow. |
| Principal |
| |
| Resources |
| |
| Actions |
| |
| Conditions (Optional) |
|
In conditions you can click Add to configure IP addresses (CIDR blocks). IP addresses in the range starting with 100 or 214 are for ECSs to access OBS through an internal network.
g. Click Create.
Verifying the reverse proxy configuration
On any device, use the ECS EIP and object name to access specified OBS resources. If the resources are properly accessed, the configuration is successful.
For example, visit http://**ECS EIP**/otc.jpg.
