Deploy the NVIDIA GPU Operator on CCE
The NVIDIA GPU Operator is a critical tool for effectively managing GPU resources in Kubernetes clusters. It serves as an abstraction layer over Kubernetes APIs, automating tasks such as dynamic provisioning, driver updates, resource allocation, and optimization for GPU-intensive workloads, thereby simplifying the deployment and management of GPU-accelerated applications. Its functionality extends to dynamic provisioning of GPUs on demand, managing driver updates, optimizing resource allocation for varied workloads, and integrating with monitoring tools for comprehensive insights into GPU usage and health. This guide outlines how to deploy the NVIDIA GPU Operator on CCE cluster. The process involves preparing GPU nodes, installing necessary components, configuring the cluster for GPU support, deploying an application leveraging GPUs, and verifying functionality.
At the time of writing, for the CCE AI Suite (NVIDIA GPU) add-on with version 2.8.4, the latest driver version used and validated is 550.163.01.
Driver compatibility may change over time, so always verify the currently supported driver versions in the official documentation before deploying to production.
Prerequisites
This blueprint requires:
- Access to the CCE cluster with kubectl.
- Helm installed on your system.
Preparing & Configuring a GPU Node Pool
Go to the T Cloud Public console and choose the specific cluster you want to add the GPU node pool to. At the left sidebar select Nodes and click Create Node Pool.
Node Pool Configuration
Use the following values to configure the newly created GPU Node Pool:
- Name: Assign a meaningful name to your GPU node pool, such as
gpu-workers. - Flavor Selection: Choose a flavor that includes GPU resources. Look for options like
pi2.2xlargeor similar GPU-accelerated instances available. - Annotations: If required by your cluster's configuration, add any necessary annotations.
- Taints or Tolerations: Set taints or tolerations to manage pod scheduling. For GPU nodes, you might set a taint like
nvidia.com/gpu=true:NoScheduleand ensure pods requiring GPUs have the appropriate toleration.

After creating the Node Pool scale it to the desired size.
Verification
Wait for some minutes until the nodes get provisioned and check if they have successfully joined the cluster with the following command:
kubectl get nodes --show-labels | grep "nvidia"
New GPU nodes should contain a label with accelerator as key and nvidia* as value (e.g. accelerator=nvidia-t4).
Installing the Driver with NVIDIA GPU Plugin
If your GPU nodes use Ubuntu or other major Linux distribution, you can bypass installing the CCE AI Suite plugin and install the NVIDIA driver directly on the nodes through the Nvidia GPU Operator (skip to Deploying via Helm) and the follow the instructions in the tab Driver managed by GPU Operator.
This method is recommended if none of your GPU nodes are using specialized distributions like HCE or openEuler, as it allows the operator to manage the entire driver lifecycle for a more streamlined setup.
Installation
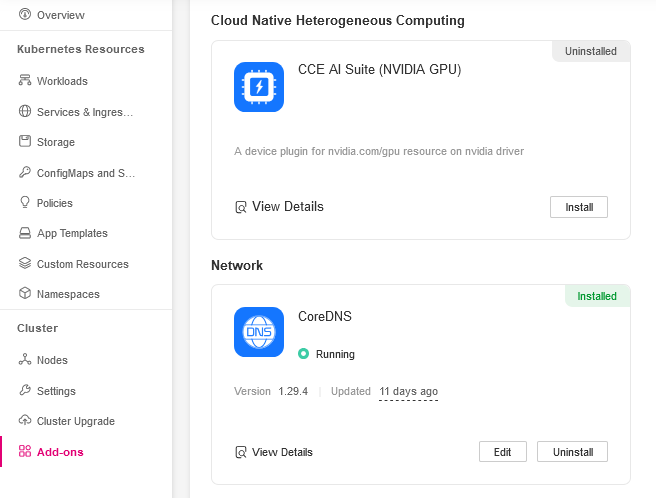
From sidebar select Add-ons and install the CCE AI Suite (NVIDIA GPU).
Plugin Configuration
When configuring the CCE AI Suite, you must provide a download link for the NVIDIA driver.
The selected driver must be compatible with both the GPU nodes and the NVIDIA GPU Operator; otherwise, the cluster will not be able to allocate GPU resources. It is crucial to check for the most compatible driver version on the NVIDIA GPU Operator Platform Support. You can find and download drivers from the NVIDIA Driver.
Follow these steps to find and provide the correct driver download link:
- Find a Compatible Driver Version:
- Navigate to the NVIDIA GPU Operator Platform Support
- Scroll down to GPU Operator Component Matrix. This table lists the specific component versions, including the recommended NVIDIA driver versions, that are tested and supported. For example for the NVIDIA GPU Operator v25.3.1, the recommended driver version is 570.158.01.

-
Get the Driver Download Link:
- Go to the official NVIDIA Driver page.
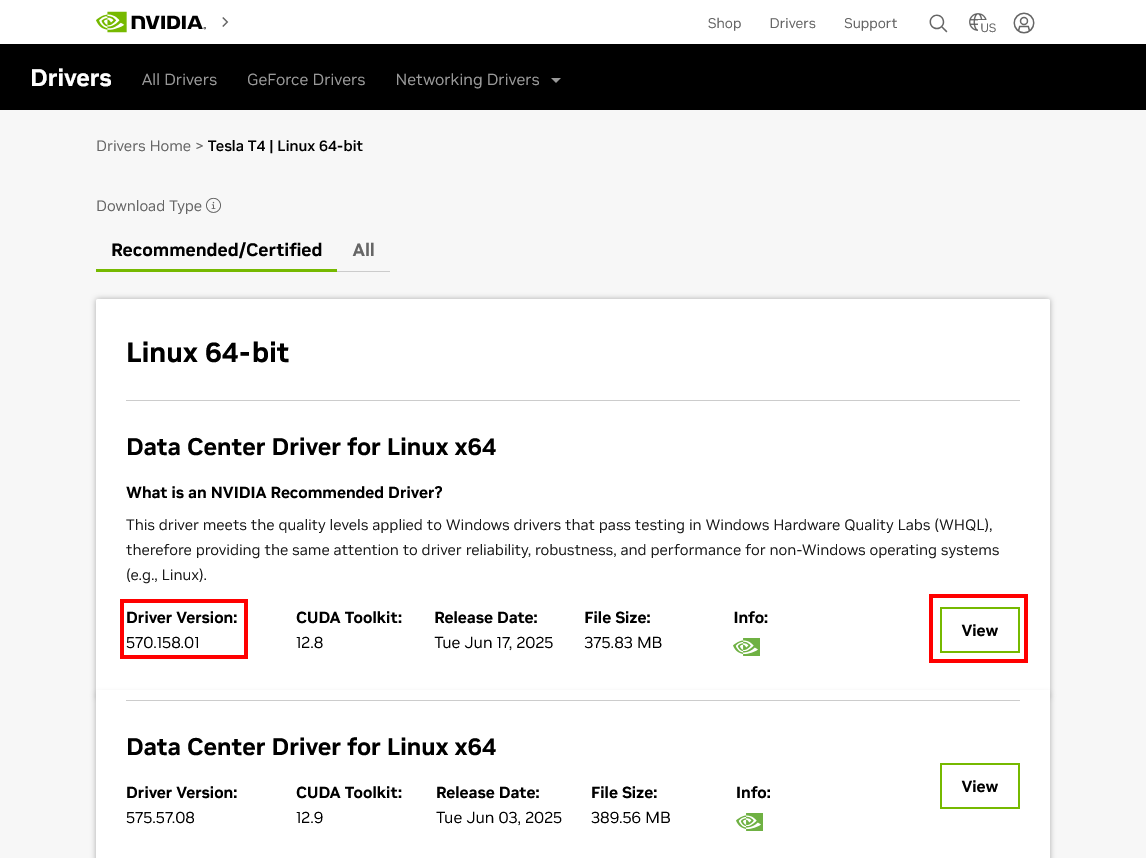
- Manually search for the driver by entering your GPU's specifications, such as Product Type (e.g., Tesla), Product Series, Operating System (Linux) based on the node flavor that you are using and click Find to search for drivers.

- On the next page search for the driver version you identified in the previous step. Once you find the correct driver, click the view button to view the download page. Then right-click the Download button and copy the link address. This is the direct download link you will provide to the plugin.
-
Configure the Plugin: Paste the driver download link you obtained in previous step into the Path to custom driver field of the plugin and click Install.

For more information about the CCE AI Suite (NVIDIA GPU) plugin, see CCE AI Suite (NVIDIA GPU).
NVIDIA GPU Operator
Deploying via Helm
Create a values.yaml file to include the required Helm Chart configuration values based on your setup:
-
If you installed the NVIDIA driver using the CCE AI Suite (typically for HCE or openEuler nodes), use the configuration under Driver managed by CCE AI Suite. This setup informs the GPU Operator that the driver and toolkit are already present on the node.
-
If you are using Ubuntu or other major Linux distribution and want the GPU Operator to manage the driver installation, use configurations under Driver managed by GPU Operator. This is the recommended approach for a streamlined setup on non-specialized operating systems.
- Driver managed by CCE AI Suite
- Driver managed by GPU Operator
hostPaths:
  driverInstallDir: "/usr/local/nvidia/"

driver:
  enabled: false

toolkit:
  enabled: false
hostPaths.driverInstallDir: The driver installation directory when managed by CCE AI Suite is different than default. Do not change this value!driver.enabled: Driver installation is disabled because it's already installed via CCE AI Suite.toolkit.enabled: The container toolkit installation is disabled because it's already installed via CCE AI Suite.
driver:
  enabled: true

toolkit:
  enabled: true
driver.enabled: true: Allows the operator to download and install the appropriate NVIDIA driver on the nodes.toolkit.enabled: true: Allows the operator to install the NVIDIA container toolkit, which is required for GPU-aware containers.
Now deploy the operator via helm:
helm repo add nvidia https://helm.ngc.nvidia.com/nvidia
helm repo update

helm install gpu-operator \
  -n gpu-operator --create-namespace \
  nvidia/gpu-operator \
  -f values.yaml \
  --version=v25.3.1
Multi-Instance GPU (MIG) - Optional
Multi-Instance GPU (MIG) allows a single physical GPU to be partitioned into multiple smaller, fully isolated GPU instances. Each instance has its own dedicated resources, including memory, cache, and compute cores, making it ideal for running multiple workloads in parallel without interference.
Verify MIG Support
Before configuring MIG, you must first ensure that the chosen GPU hardware supports this feature. MIG is available on GPUs from the NVIDIA Ampere architecture and newer.
To verify if your specific GPU model is compatible, you should consult MIG User Guide. This contains an up-to-date list of all supported GPUs.
Configure and Deploy with MIG
Set the mig.strategy value in your Helm values.yaml file. There are two strategies available:
- single: This strategy partitions the GPU into homogenous slices. All GPU instances will be of the same size.
- mixed: This strategy allows for a mix of different-sized GPU instances on the same physical GPU, providing more flexibility for varied workloads.
Update your Helm configuration and add the mig configuration to your existing values.yaml.
# ... other fields ...
mig:
  strategy: "single" # or "mixed"
After applying the changes, upgrade the GPU Operator with the MIG-enabled configuration.
helm upgrade --install gpu-operator \
  -n gpu-operator --create-namespace \
  nvidia/gpu-operator \
  -f values.yaml \
  --version=v25.3.1
When using MIG, you should configure the WITH_REBOOT environment variable for the MIG Manager so that it can properly update GPU profiles. MIG Manager requires the ability to reboot nodes when changing MIG configurations, as enabling MIG mode and reconfiguring GPU profiles requires stopping all GPU clients and modifying low-level GPU settings. For detailed information about configuring this environment variable, refer to the GPU Operator with MIG documentation.
Deploying an application with GPU Support
- Standard (Without MIG)
- MIG
- Create a Pod Manifest: For example, deploying a CUDA job.
apiVersion: v1
kind: Pod
metadata:
  name: cuda-vectoradd
spec:
  restartPolicy: OnFailure
  tolerations:
  - key: nvidia.com/gpu
    operator: Equal
    value: "true"
    effect: NoSchedule
  containers:
  - name: cuda-vectoradd
    image: "nvcr.io/nvidia/k8s/cuda-sample:vectoradd-cuda11.7.1-ubuntu20.04"
    resources:
      limits:
        nvidia.com/gpu: 1
- Apply the Manifest:
kubectl apply -f cuda-example.yaml
Label the Node with MIG Configuration
Before deploying a MIG-enabled workload, you must label the node to apply a specific MIG configuration profile. This triggers the MIG Manager to reconfigure the GPU into the desired partitions.
kubectl label nodes <node-name> nvidia.com/mig.config=all-1g.5gb --overwrite
Replace <node-name> with your actual node name and all-1g.5gb with your desired MIG profile (e.g., all-1g.10gb, all-3g.20gb, etc.).
Enable Automatic Reboot for MIG Configuration
The GPU Operator requires a GPU reset to apply MIG partition changes because enabling MIG mode and reconfiguring GPU profile requires stopping all GPU clients and modifying low-level GPU settings. To enable automatic node reboots, update your Helm values.yaml with the following configuration:
# ... other fields ...
migManager:
  env:
    - name: WITH_REBOOT
      value: "true"
After updating the configuration, upgrade the GPU Operator:
helm upgrade --install gpu-operator \
  -n gpu-operator --create-namespace \
  nvidia/gpu-operator \
  -f values.yaml \
  --version=v25.3.1
MIG mode changes require a system-level reconfiguration of the GPU hardware. On many systems, this process requires a full node reboot to properly initialize the new MIG profile.
Deploy a MIG-Enabled Pod
Create a pod manifest that requests MIG resources. The resource request depends on your configured mig.strategy:
apiVersion: v1
kind: Pod
metadata:
  name: cuda-vectoradd-mig
spec:
  restartPolicy: OnFailure
  tolerations:
  - key: nvidia.com/gpu
    operator: Equal
    value: "true"
    effect: NoSchedule
  containers:
  - name: cuda-vectoradd
    image: "nvcr.io/nvidia/k8s/cuda-sample:vectoradd-cuda11.7.1-ubuntu20.04"
    resources:
      limits:
        nvidia.com/gpu: 1  # Use this for 'single' strategy
        # nvidia.com/mig-1g.5gb: 1  # Use this for 'mixed' strategy
Apply the manifest:
kubectl apply -f cuda-mig-example.yaml
The way you request MIG resources in your pod manifest depends on the mig.strategy configured in your GPU Operator deployment:
-
Single Strategy (
mig.strategy: single): All MIG instances are exposed as homogeneous resources. Pods request GPUs using the standardnvidia.com/gpu: 1resource, and Kubernetes will allocate any available MIG partition of the configured size. -
Mixed Strategy (
mig.strategy: mixed): MIG instances are exposed as distinct resource types based on their profile (e.g.,nvidia.com/mig-1g.5gb,nvidia.com/mig-3g.20gb). Pods must explicitly request the specific MIG profile they need.
Validation
- Check Pod Status: Ensure pods are running.
kubectl get pods -n default
- Verify Logs: Check logs for GPU activity.
kubectl logs -f cuda-example-<pod-name> -n default
The containers' logs should indicate that the operation was succesfull, e.g.:
[Vector addition of 50000 elements]
Copy input data from the host memory to the CUDA device
CUDA kernel launch with 196 blocks of 256 threads
Copy output data from the CUDA device to the host memory
Test PASSED
Done
If you are looking for more sample workloads visit NVIDIA GPU Operator Verification: Running Sample GPU Applications.
Troubleshooting Tips
Verifying NVIDIA Drivers are Installed on Nodes
Ensuring that the GPU nodes have the correct NVIDIA drivers is a critical first step. SSH into one of your GPU nodes and run:
# If the add-on version is earlier than 2.0.0, run the following command:
cd /opt/cloud/cce/nvidia/bin && ./nvidia-smi

# If the add-on version is 2.0.0 or later and the driver installation path is changed, run the following command:
cd /usr/local/nvidia/bin && ./nvidia-smi
or directly on the Container:
cd /usr/local/nvidia/bin && ./nvidia-smi
This command should display details such as the driver version, GPU utilization, and any active processes. If it fails or shows an outdated driver, this indicates that the node isn’t properly set up.
You can find more information here.
Verifying Driver Compatibility
If drivers are missing or incompatible, verify that the CCE AI Suite is correctly installed and configured. Reinstalling or updating the suite might be necessary if the drivers aren’t correctly deployed. Follow the instructions.
Additionally, run the following command to check the CUDA version in the container:
cat /usr/local/cuda/version.txt
Check whether the CUDA version supported by the NVIDIA driver version of the node where the container is located contains the CUDA version of the container.
Reviewing Logs
Check whether the NVIDIA driver is running properly. Log in to the node where the add-on is running and view the driver installation log in the following path:
/opt/cloud/cce/nvidia/nvidia_installer.log
View standard output logs of the NVIDIA container. Filter the container ID by running the following command:
docker ps -a | grep nvidia
View logs by running the following command:
docker logs Container ID
Validating Pod Resource Requests
Make sure the nodes that have GPUs are properly decorated with the following, that instructs Kubernetes to schedule the pods only on nodes that have available GPUs.
resources:
  limits:
    nvidia.com/gpu: 1
Ensure that the requested number of GPUs does not exceed what’s available on any node.
Addressing Scheduling Conflicts
- Resource Overcommitment:
- If multiple pods are scheduled with GPU resource requests, ensure that the overall demand does not exceed the cluster’s capacity.
- Overcommitting resources might lead to scheduling failures.
- Taints and Tolerations:
- GPU nodes may have specific taints (e.g.,
nvidia.com/gpu=true:NoSchedule). - Verify that your GPU-enabled pods include the proper tolerations so that the scheduler can place the pods on the GPU nodes.
- GPU nodes may have specific taints (e.g.,
Checking Operator Status
Any errors here might indicate issues that indirectly affect GPU resource allocation:
helm list -n gpu-operator
kubectl get pods -n gpu-operator