Active Directory as Identity Provider for IAM
In this guide, we'll walk you through extending your on‑premises Microsoft Active Directory Domain Services (AD DS) and Active Directory Federation Services (AD FS) in order to establish a secure, claims‑based federation with Open Telekom Cloud's Identity and Access Management (IAM) platform. We are going to leverage the SAML 2.0 protocol to achieve seamless single‑sign‑on between your on-premises corporate directory and the T Cloud Public IAM, ensuring both strong security and a smooth user experience.
Prerequisites
Before initiating the integration process, make sure the following prerequisites are met:
- A fully deployed and accessible ADFS instance, reachable via a valid public domain. If an instance is not already available, you may create one by following the Deploy Active Directory Federation Services on ECS guide.
- Administrator-level access to both Microsoft ADFS and T Cloud Public's Identity and Access Management (IAM) console.
- A working knowledge of SAML 2.0, particularly around concepts such as assertions, metadata exchange, and service provider (SP) vs. identity provider (IdP) roles. If needed, refer to the SAML 2.0 specification for a foundational overview. These requirements ensure that you're equipped to configure and validate the trust relationship between the two platforms.
Creating a new Relying Party Trust in AD FS
First, retrieve the Service Provider metadata for Open Telekom Cloud:
- Launch your web browser and navigate to:
https://auth.otc.t-systems.com/authui/saml/metadata.xml - When the XML metadata loads, save the document locally under the filename sp-metadata.xml.
- Confirm that sp-metadata.xml is intact—its root element should be
<EntityDescriptor>—before proceeding.
You'll reference this file when establishing the Relying Party Trust in AD FS.
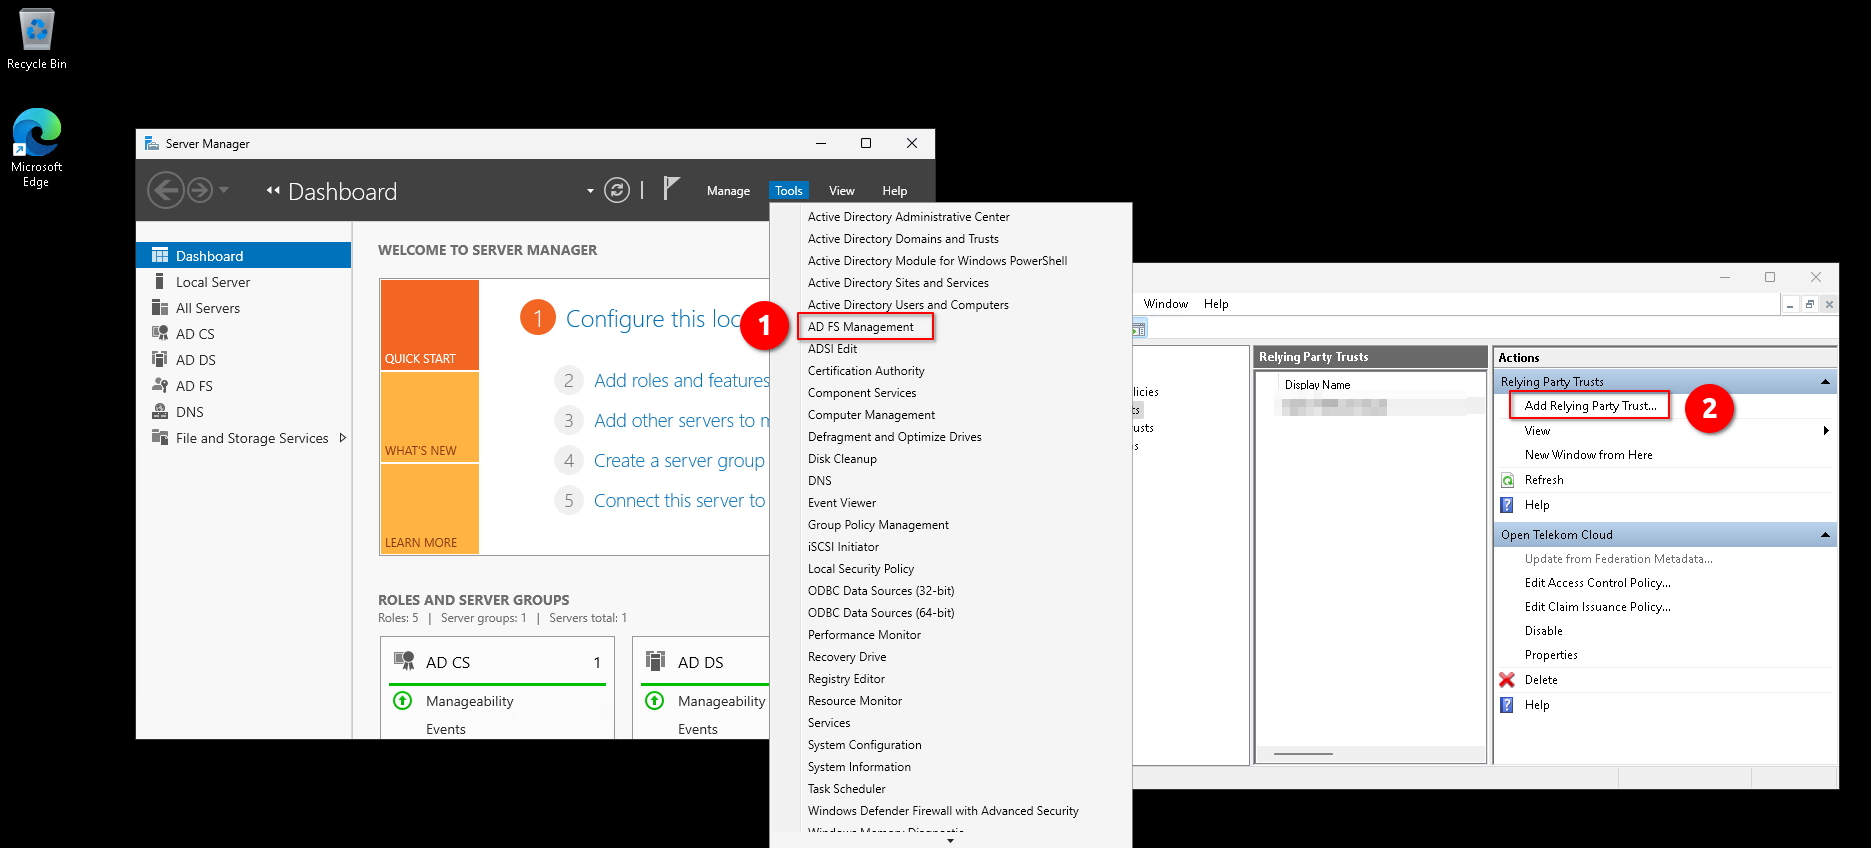
Then, go to Server Manager -> Tools -> AD FS Management -> Relying Party Trusts -> Add Relying Party Trust
Follow the wizard:
- Welcome: Choose "Claims-aware" and click Next.
- Select Data Source: Choose "Import data about the relying party from a file" and click Browse and pick sp-metadata.xml. Click Next.
- Specify Display Name: Enter T Cloud Public and click Next.
- Choose Access Control Policy: Choose "Permit everyone" and click Next.
- Ready to Add Trust: Click Next.
- Finish: Deselect "Configure claims issuance policy for this application" and click Close.
In Step 4 of the Relying Party Trust configuration, you'll specify the Access Control Policy that governs who can authenticate via this trust. For the purposes of this blueprint we've selected the built‑in "Permit everyone" policy to streamline testing and validation. In your environment, however, you should work closely with your security and platform architects to choose a policy that enforces the appropriate controls (for example, requiring MFA, restricting by AD group membership, or integrating with Conditional Access rules) in accordance with your organization's security guidelines.
Setting the Secure Hash Algorithm
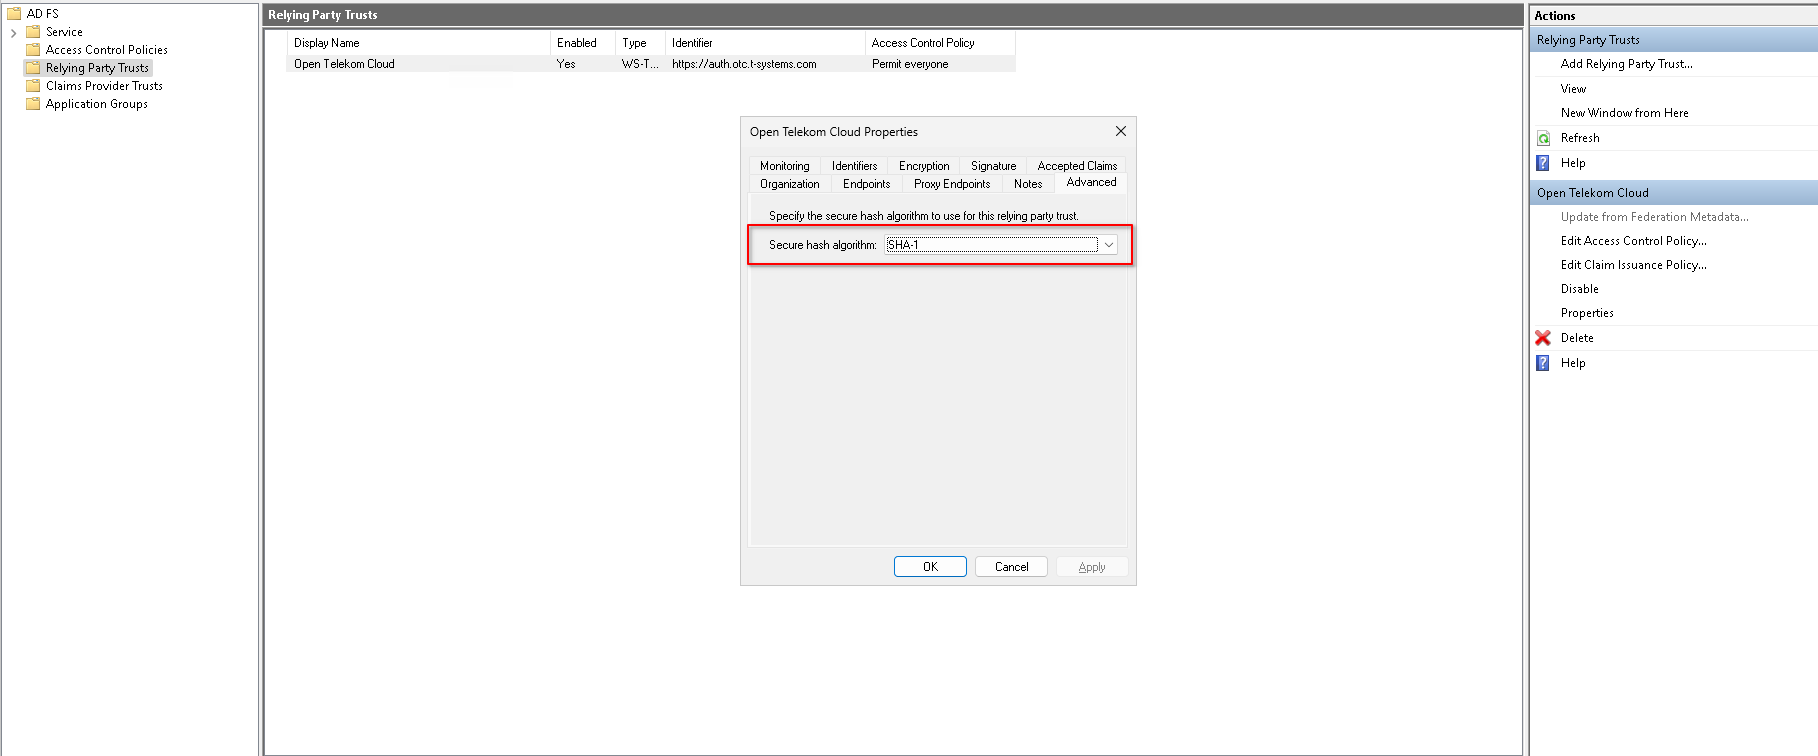
Finally, we need to set the secure hash algorith to RSA-SHA1. Go to Server Manager -> Tools -> AD FS Management -> Relying Party Trusts, right-click on T Cloud Public, click Properties and go to tab Advanced:
Editing Claim Issuance Policy
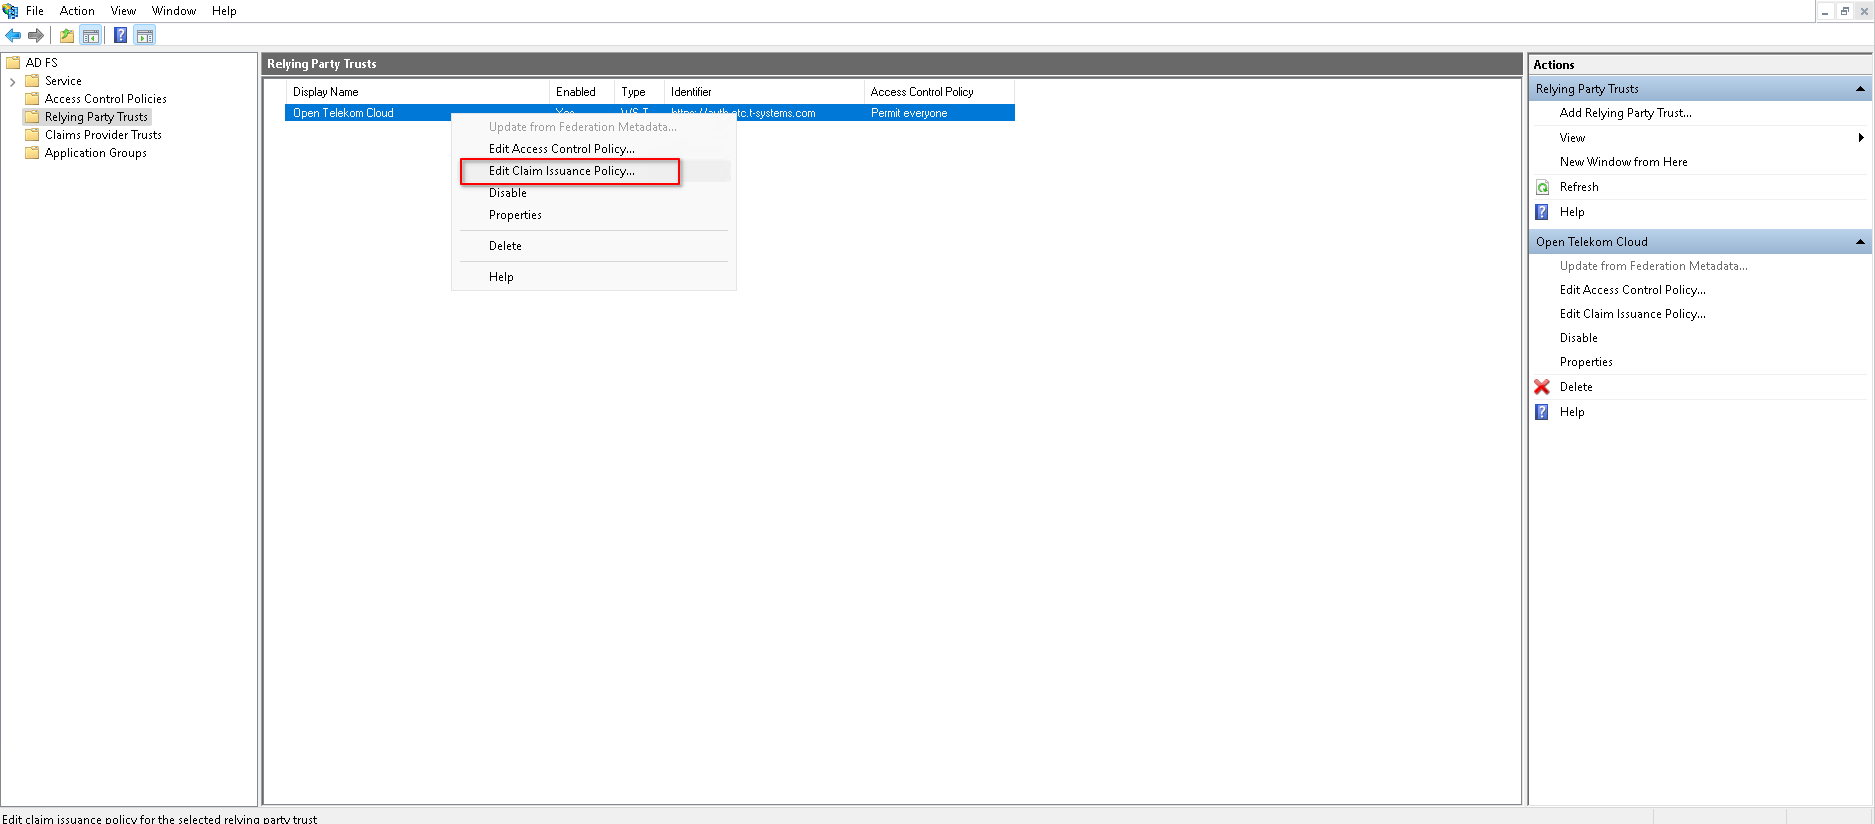
Next, let's configure the Claims Issuance Policy so that AD FS will emit the correct SAML assertions to Open Telekom Cloud. go to Server Manager -> Tools -> AD FS Management -> Relying Party Trusts, right-click on T Cloud Public and click Edit Claim Issuance Policy:
-
Rule 01: Click on Add Rule:
-
Claim rule template: "Send Claims using a Custom Rule"
-
Claim rule name: nameidentifier_custom_rule
-
Custom rule:
c:[Type == "http://schemas.microsoft.com/ws/2008/06/identity/claims/windowsaccountname", Issuer == "AD AUTHORITY"] => add(store = "Active Directory", types = ("http://schemas.xmlsoap.org/ws/2005/05/identity/claims/nameidentifier"), query = ";sAMAccountName;{0}", param = c.Value);
-
-
Rule 02: Click on Add Rule:
-
Claim rule template: "Send Claims using a Custom Rule"
-
Claim rule name: transient_nameidentifier_custom_rule
-
Custom rule:
c:[Type == "http://schemas.xmlsoap.org/ws/2005/05/identity/claims/nameidentifier"] => issue(Type = "http://schemas.xmlsoap.org/ws/2005/05/identity/claims/nameidentifier", Issuer = c.Issuer, OriginalIssuer = c.OriginalIssuer, Value = c.Value, ValueType = c.ValueType, Properties["http://schemas.xmlsoap.org/ws/2005/05/identity/claimproperties/format"] = "urn:oasis:names:tc:SAML:2.0:nameid-format:transient", Properties["http://schemas.xmlsoap.org/ws/2005/05/identity/claimproperties/spnamequalifier"] = "https://auth.otc.t-systems.com");warningBe extra cautious in case of entering
spnamequalifiermanually; there should be no trailing slash in the end of the URL otherwise it will be considered as a different Relying Party.
-
-
Rule 03: Click on Add Rule:
- Claim rule template: "Send Group Membership as Claim"
- Claim rule name: tenant_admins_group_membership_rule
- User's Group: MYCOMPANY\Tenant-Admins
- Outgoing claim type: "Group"
- Outgoing claim value: Tenant-Admins
-
Rule 04: Click on Add Rule:
- Claim rule template: "Send Group Membership as Claim"
- Claim rule name: ecs_admins_group_membership_rule
- User's Group: MYCOMPANY\ECS-Admins
- Outgoing claim type: "Group"
- Outgoing claim value: ECS-Admins
This blueprint assumes you have the following groups in Active Directory : Tenant-Admins and ECS-Admins. Adjust the settings in steps 3 & 4 according to your AD users and groups.
- Rule 05: Click on Add Rule:
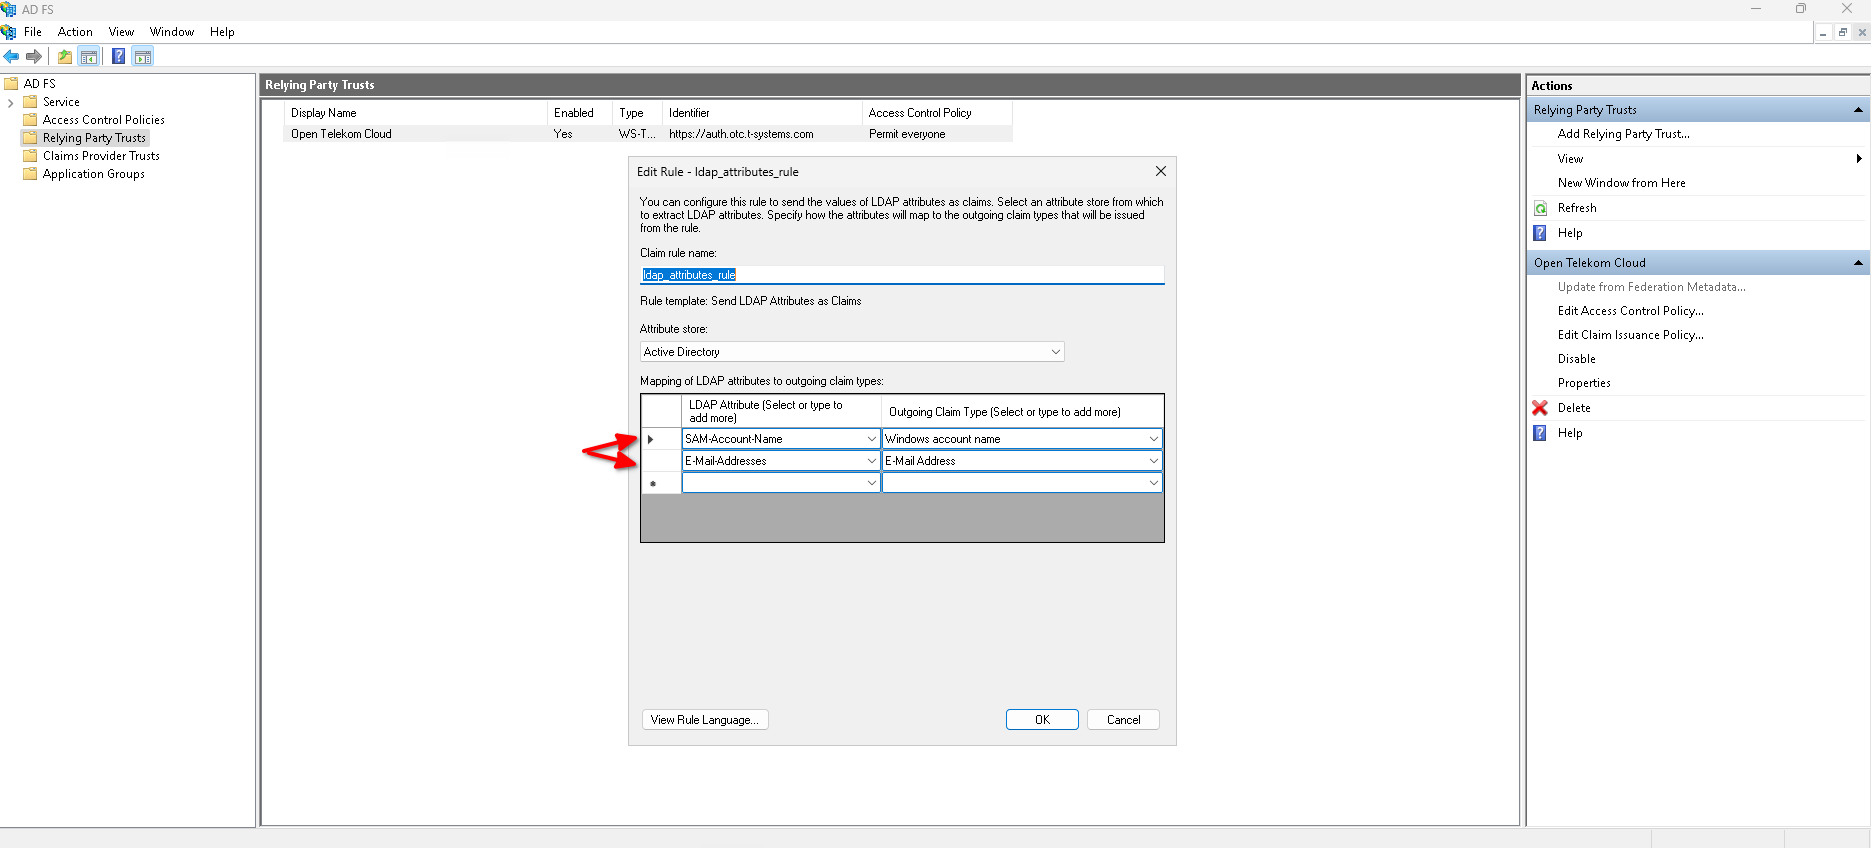
- Claim rule template: "Send LDAP Attributes as Claims"
- Claim rule name: ldap_attributes_rule
- Attribute store: "Active Directory"
Fill in the Mapping of LDAP attributes to outgoing claim types as depicted in the picture below:
Configuring IAM
Creating a new Identity Provider
Go to T Cloud Public Console -> IAM -> Identity Providers and click Create Identity Provider:
Set the following parameters and click OK.
- Protocol:
SAML - SSO Type:
Virtual user
Choosing Virtual user allows OTC to create ephemeral user sessions based on SAML assertions without requiring persistent user accounts in IAM. This mode is suitable for scenarios where user identity and group memberships are fully managed by the external IdP (in this case AD/AD FS). For more information about Virtual Users check the documentation in our Help Center.
Configure the new Identity Provider
First, retrieve the ADFS federation metadata:
- Launch your web browser and navigate to:
https://adfs.example.com/federationmetadata/2007-06/federationmetadata.xml - When the XML metadata loads, save the document locally under the filename idp-metadata.xml.
Replace example.com with the public domain named of your organization.
After your AD FS infrastructure and Relying Party configuration is in place correctly injecting the necessary assertions and the T Cloud Public Identity Provider has been created, navigate to the Identity Providers and click on Modify next to the provider to finalize the trust relationship by uploading AD FS's metadata to T Cloud Public IAM. Under the Metadata Configuration section click Upload and select the idp-metadata.xml file you retrieved earlier.
This file contains AD FS SAML configuration, including its public keys and SSO endpoints. Uploading it allows T Cloud Public IAM to trust and process incoming authentication responses from AD FS securely, based on signed and validated assertions. Once uploaded, save the configuration to apply the changes.
Configure the Conversion Rules
Now that the metadata exchange is complete and AD FS is trusted by T Cloud Public IAM, the next step is to define conversion rules. These rules map incoming SAML attributes, such as LDAP groups to IAM user groups within your T Cloud Public tenant. This mapping is essential for authorization. It ensures that users federated through AD FS are granted the correct level of access in OTC based on the attributes included in the SAML assertions.
Return to the IAM -> Identity Providers section in the T Cloud Public IAM Console, locate your configured AD FS SAML provider, and click Modify. Scroll to the bottom of the configuration page and click on the Edit Rule link under Identity Conversion Rules. This will open the rule editor where you can define how SAML attributes from AD FS are translated into T Cloud Public IAM group memberships.
In the Edit Rule popup, remove the default rule and paste the following conversion logic. This rule maps users from AD FS to the appropriate T Cloud Public IAM group(s) based on the Active Directory Group they belong to and was included as an attribute in the SAML assertions:
[
  {
    "remote": [
      {
        "type": "http://schemas.microsoft.com/ws/2008/06/identity/claims/windowsaccountname"
      },
      {
        "any_one_of": [ "Tenant-Admins"],
        "type": "http://schemas.xmlsoap.org/claims/Group"
      }
    ],
    "local": [
      {
        "user": { "name": "{0}@mycompany.com" }
      },
      {
        "group": { "name": "admin" }
      }
    ]
  },
  {
    "remote": [
      {
        "type": "http://schemas.microsoft.com/ws/2008/06/identity/claims/windowsaccountname"
      },
      {
        "any_one_of": [ "ECS-Admins" ],
        "type": "http://schemas.xmlsoap.org/claims/Group"
      }
    ],
    "local": [
      {
        "user": { "name": "{0}@mycompany.com" }
      },
      {
        "group": { "name": "ecs-admin" }
      }
    ]
  }
]
It will construct a federated username in the format: {windowsaccountname}@mycompany.com
This blueprint operates under the assumption that your T Cloud Public IAM environment includes the following two User Groups:
| Group | Policy/Role | Description |
|---|---|---|
| rds-admin | Tenant Guest | Tenant Guest (Exclude IAM) |
| RDS Administrator | RDS Administrator | |
| Server Administrator | Server Administrator | |
| ecs-admin | ECS Admin | All permissions of ECS service. |
Verification
Return to the IAM -> Identity Providers section in the T Cloud Public IAM Console, locate your configured AD FS SAML provider, Then click View next to your configured Identity Provider. In the details panel, locate the Login Link, copy its value, and open it in an incognito or private browsing session using your preferred browser:
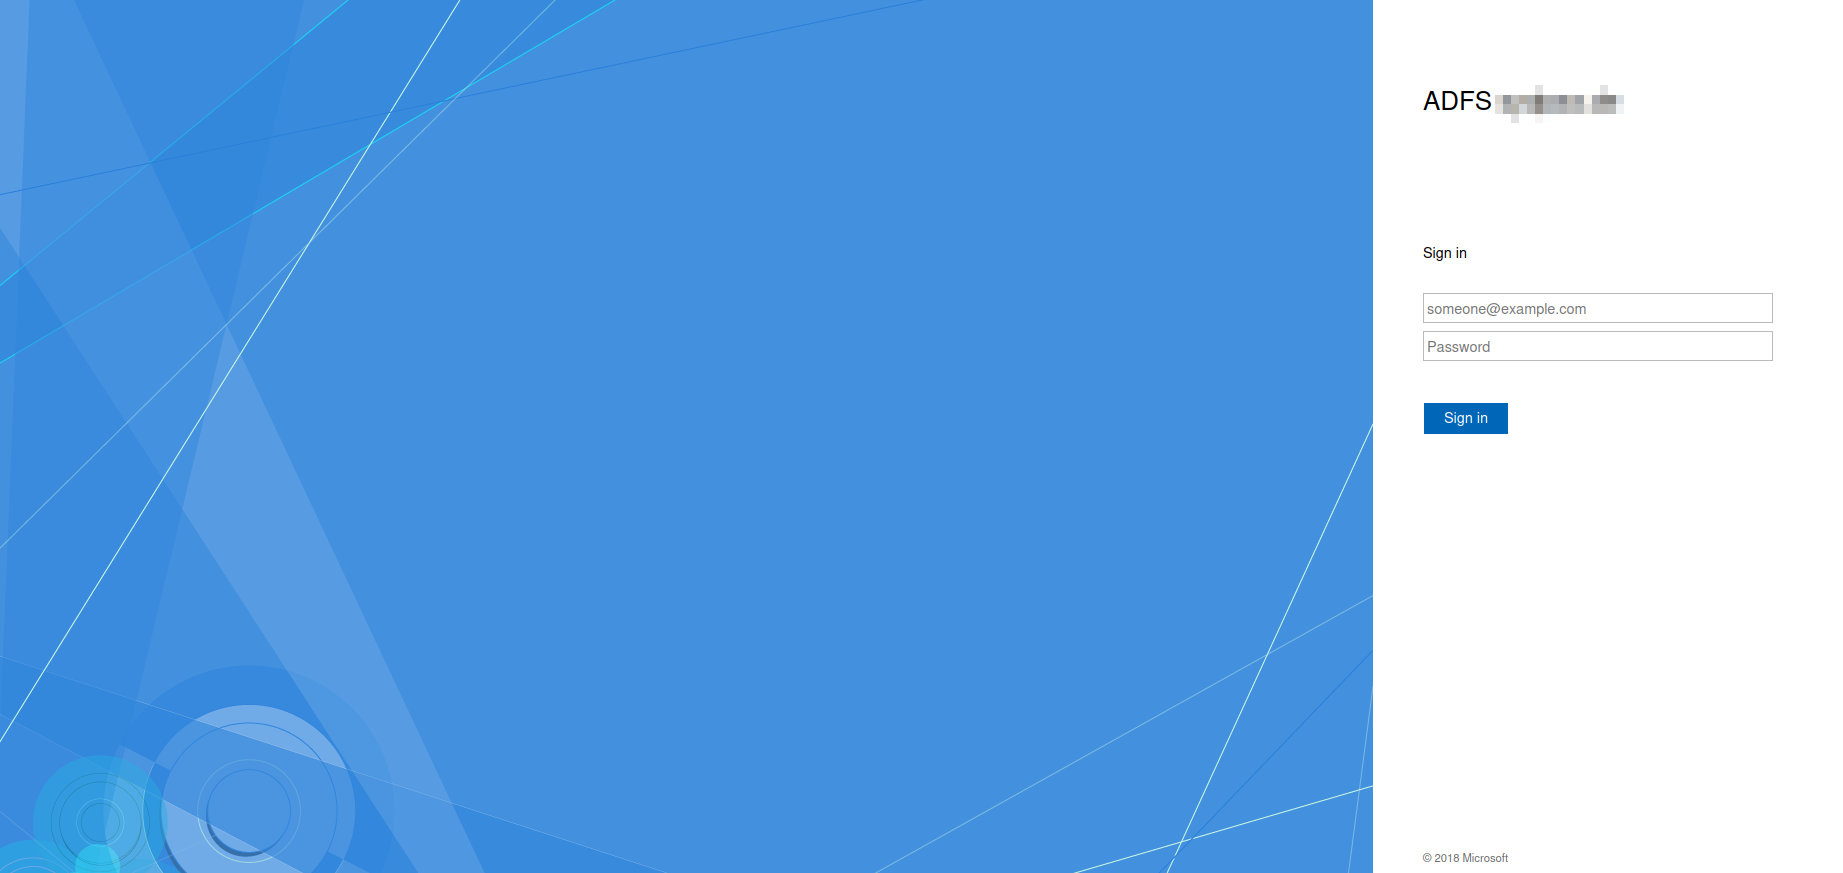
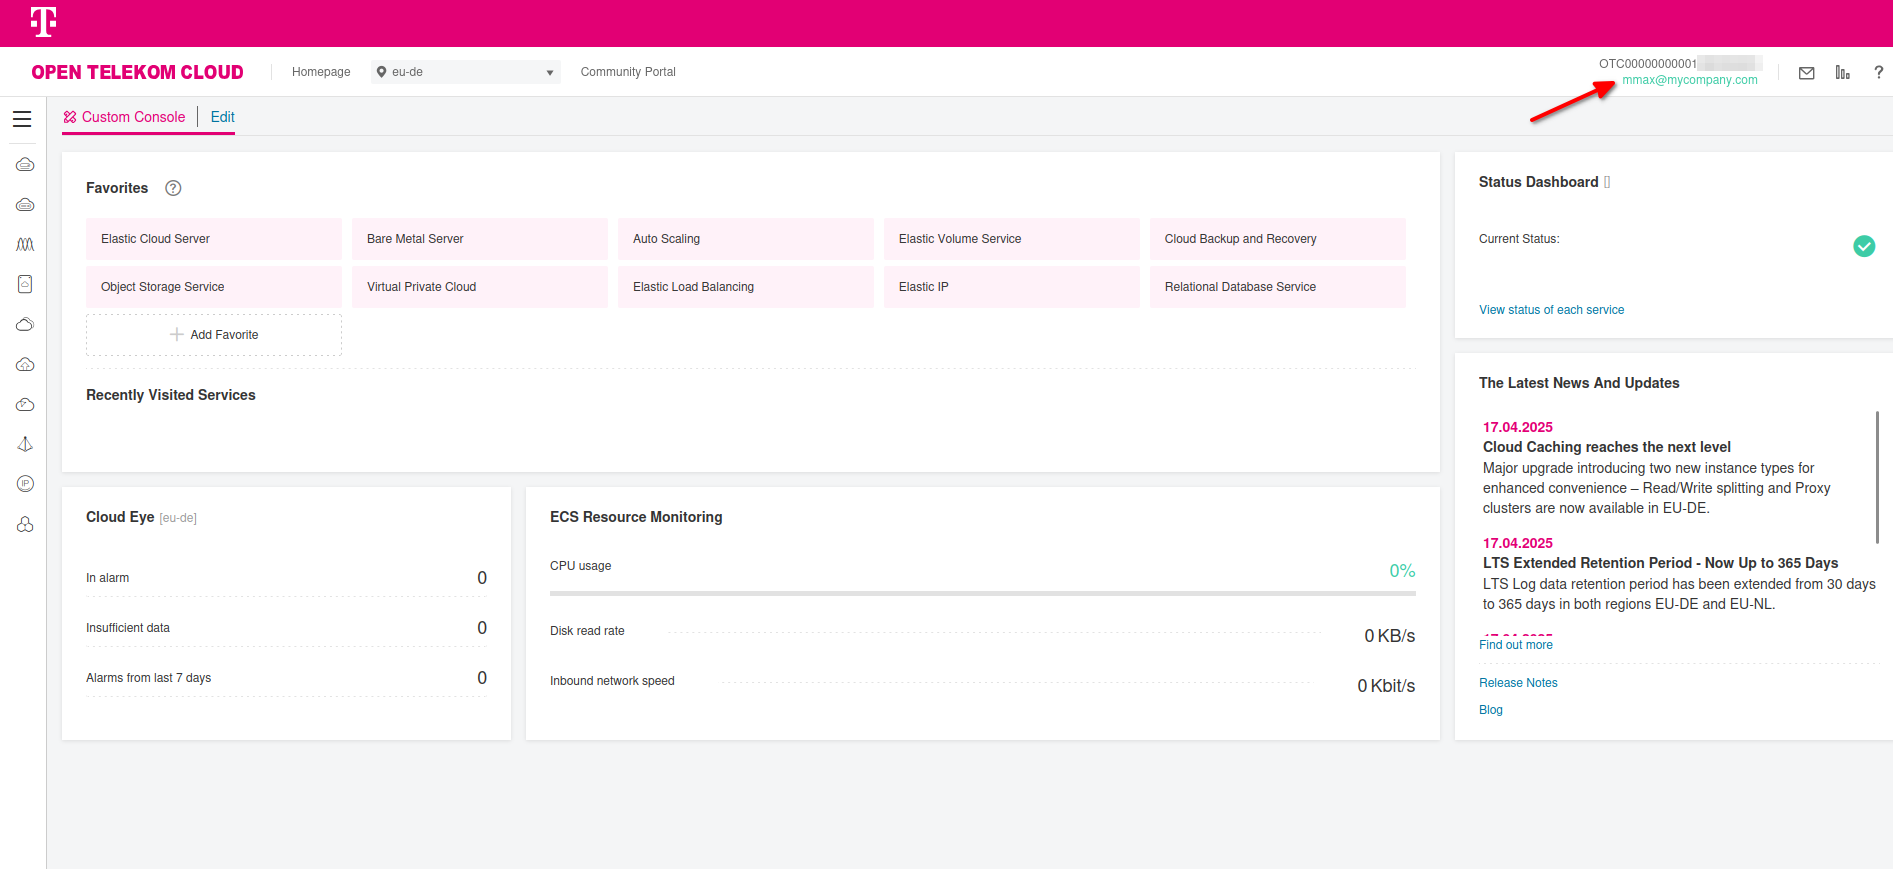
Enter your corporate credentials for a user who is a member of MYCOMPANY\ECS-Admins and verify that he is operating with reduced priviledges in T Cloud Public Console:
Troubleshooting
MSIS7093: The message is not signed with expected signature algorithm
Encountered error during federation passive request.

Additional Data

Protocol Name:
Saml

Relying Party:
https://auth.otc.t-systems.com

Exception details:
Microsoft.IdentityServer.Protocols.Saml.SamlProtocolSignatureAlgorithmMismatchException: MSIS7093: The message is not signed with expected signature algorithm. Message is signed with signature algorithm http://www.w3.org/2000/09/xmldsig#rsa-sha1. Expected signature algorithm http://www.w3.org/2001/04/xmldsig-more#rsa-sha256.
That exception is informing us that AD FS will only accept SAML messages signed with the algorithm it's been configured to expect—and in this case it was configured for RSA‑SHA256, but the Service Provider (T Cloud Public) is signing everything with RSA‑SHA1. In order to solve this error refer to Setting the Secure Hash Algorithm.