Migrating Service Data Across Accounts (Data Disks)
Generally, service data is stored on data disks. To migrate the data across accounts, you need to create data disk images and share them with the target account. This section uses Linux as an example to describe how to migrate service data (only data disks) across accounts in the same region.
Solution Design
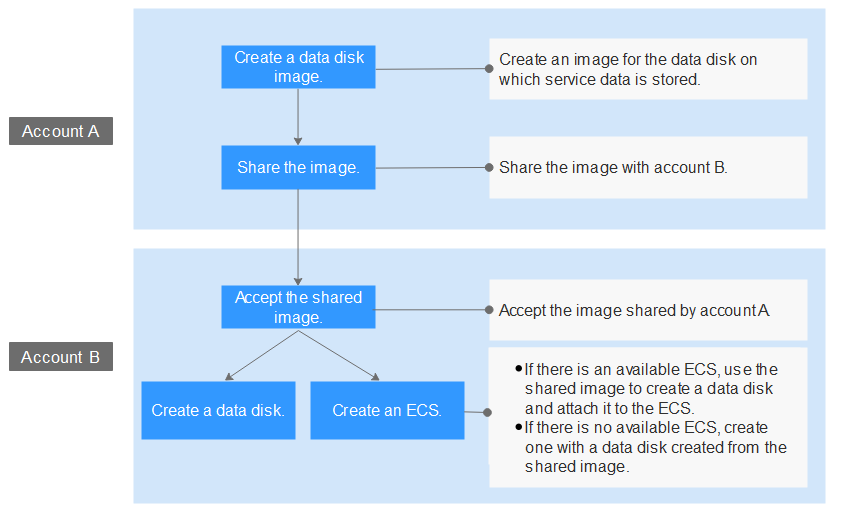
To migrate service data stored on a data disk across accounts, create an image for the data disk, share the image with the target account. The target account accepts the shared image and attaches the new data disk created from the shared image to an existing or new ECS.
Creating a Data Disk Image
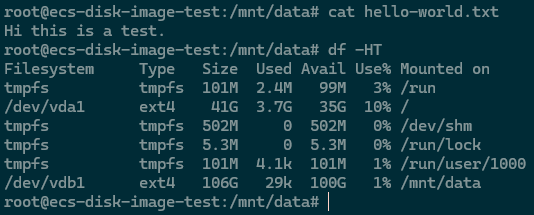
Assume that hello-world.txt is stored on the data disk of your ECS and you want to migrate the file to another account.
-
Log in to the management console and switch to the related region.
-
Under Service List, choose Compute -> Image ManagementService.
The Image Management Service page is displayed.
-
In the upper right corner, click Create Image.
The Create Image page is displayed.
-
Set parameters.
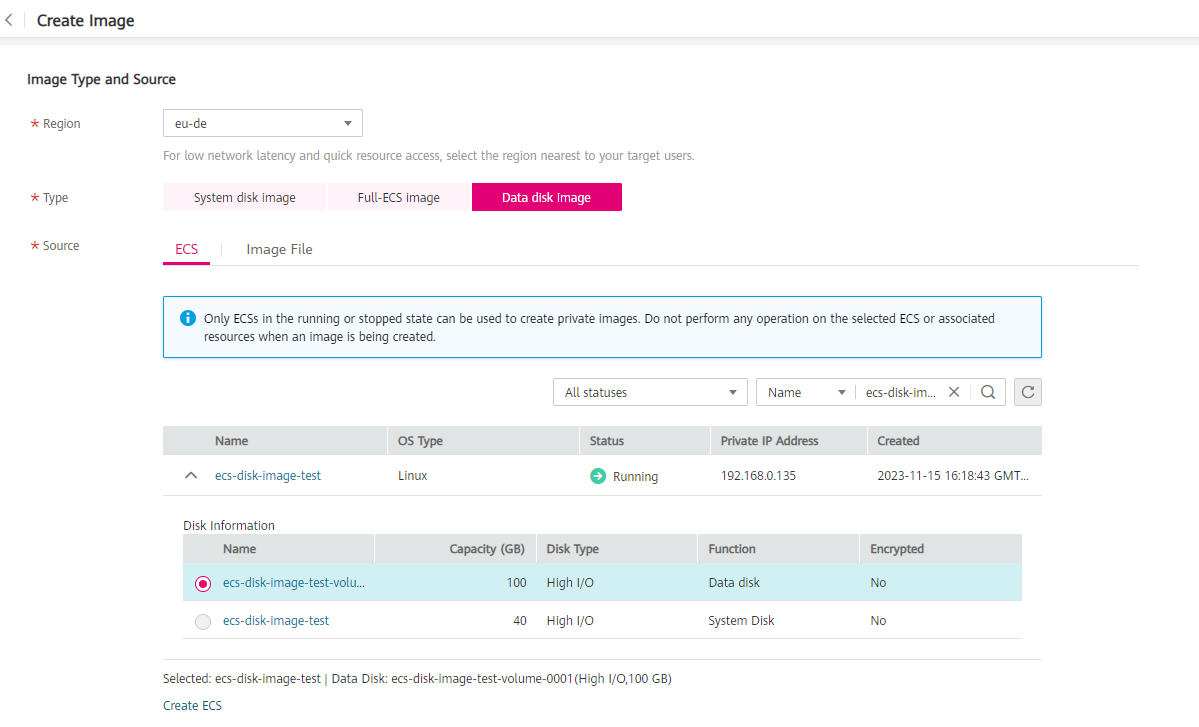
- Type: Select Data disk image.
- Source: Select ECS and then select the
data disk ecs-disk-image-test-volumedata disk. - Name: Enter a name for the data disk image, for example,
disk-image-test. - Enterprise Project: Select
default.
-
Click Next.
-
Confirm the settings, read and agree to the agreement, and click Submit.
-
The system redirects to the private image list. Wait for several minutes and check whether the data disk image is successfully created.

Sharing the Image with the Target Account
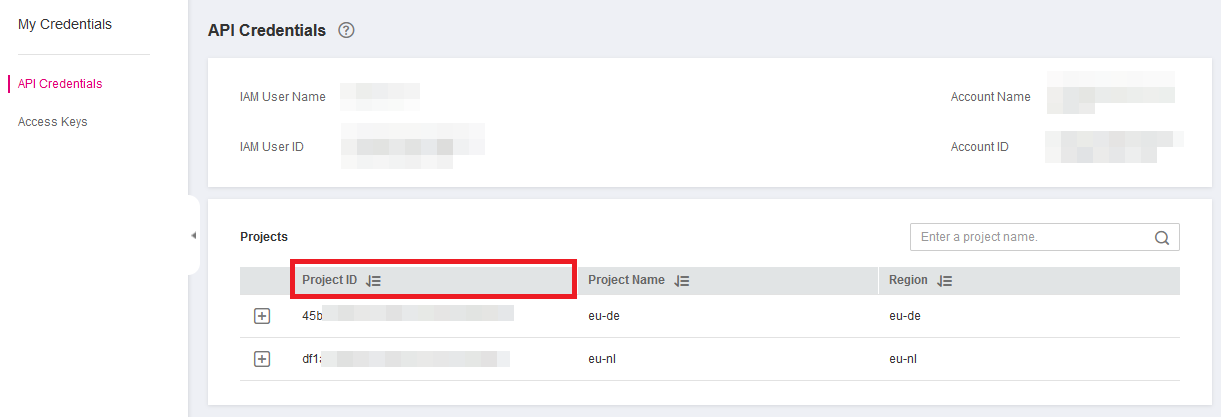
Share the data disk image created in Step 1 with the target account. Before the image sharing, obtain the project ID of the target account. (You can obtain the project ID from My Credentials:
-
Locate the row that contains the
disk-image-testprivate image. Choose More -> Share in the Operation column.The Share Image dialog box is displayed.
-
In the Share Image dialog box, enter the project ID of the target account.
-
Click OK.
Accepting the Shared Image
Accept the shared data disk image.
-
Log in to the management console using the account the image is shared with and switch to the related region.
-
Under Service List, choose Compute -> Image Management Service. Then, click the Images Shared with Me tab.
-
Select disk-image-test and click Accept.
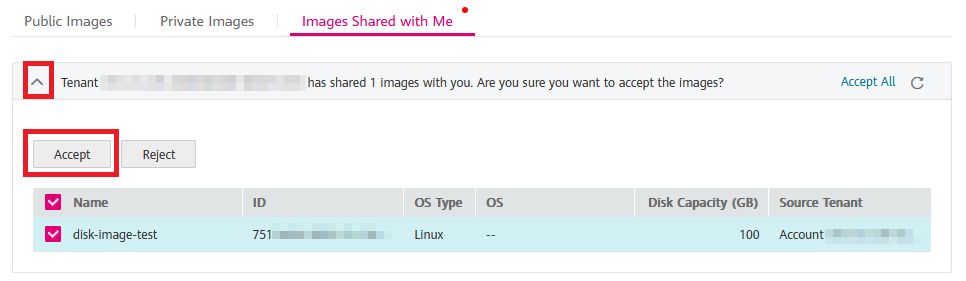
After the image is accepted, it is displayed in the shared image list.
Creating a Data Disk or an ECS
Use the shared image to create a new data disk and attach it to an existing ECS. Alternatively, create an ECS with a data disk created from the shared image. Then, check whether the service data is successfully migrated.
- Create a new data disk and attach it to an existing ECS.
-
Locate the row that contains the shared image
disk-image-test, and click Create Data Disk in the Operation column.
The page for purchasing EVS disks is displayed.
-
Configure the billing mode and disk specifications as needed. The AZ must be the same as that of the ECS to which the data disk will be attached. Click Next.
-
Return to the EVS disk list. Wait for several minutes until the EVS disk is created successfully.
-
Locate the row that contains the new EVS disk and click Attach in the Operation column to attach the data disk to the ECS.
-
Log in to the ECS and check whether the service data is successfully migrated.
Run the
fdisk -lcommand. The command output shows that the new data disk has been partitioned.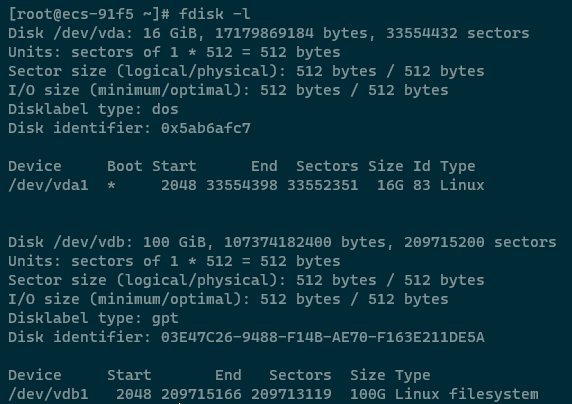
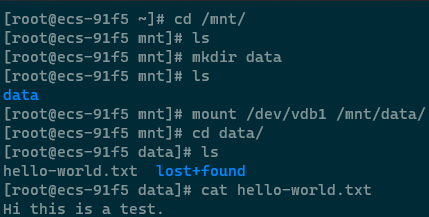
Mount the new partition to a directory of the ECS and check the hello-world.txt file. The file content is properly printed, which means that the service data migration is successful.
-
- Create an ECS with a data disk attached.
-
Under Service List, choose Compute -> Elastic Cloud Server.
-
In the upper right corner, click Create ECS.
The page for purchasing ECSs is displayed.
-
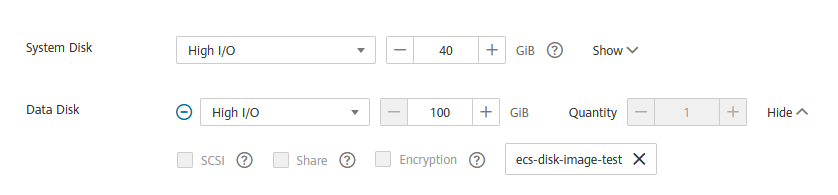
Configure the billing mode, AZ, and specifications as needed and add a data disk which will be created from the shared data disk image. Complete the ECS creation as instructed.
-
Wait for several minutes and check whether the new ECS is displayed in the ECS list.
-
Log in to the new ECS and check whether the service data is successfully migrated.
Run the
fdisk -lcommand. The command output shows that the new data disk has been partitioned. Mount the new partition to a directory of the ECS and check the hello-world.txt file. The file content is properly printed, which means that the service data migration is successful.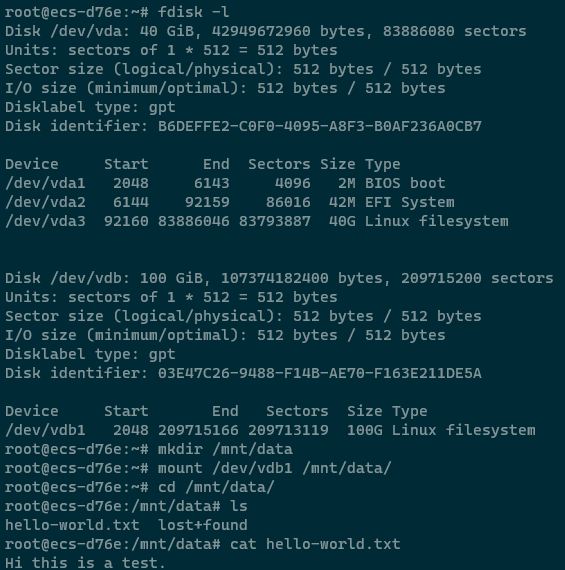
-