Deploy Umami on CCE
In this blueprint we are going to set up Umami on T Cloud Public's Cloud Container Engine (CCE), leveraging Kubernetes for scalability and flexibility. For the database backend, we will use the Zalando PostgreSQL Operator to provision and manage a PostgreSQL cluster within the CCE environment.
Prerequisites
We are going to need a CCE Cluster (its provisioning is out of the scope of this blueprint) and the zalando-postgres-operator. This operator automates the management of PostgreSQL clusters on Kubernetes, handling tasks like scaling, backups, and failover. It simplifies the deployment and maintenance of a highly available PostgreSQL database within the CCE cluster. Additionally we are going to need an Elastic Load Balancer in order to expose Umami.
Installing Zalando Postgres Operator
We are going to install the operator by using the provided Helm chart:
helm repo add postgres-operator-charts https://opensource.zalando.com/postgres-operator/charts/postgres-operator
helm repo update

helm install postgres-operator postgres-operator-charts/postgres-operator
Installing Umami
Provisioning a Database
As we priorly discussed, we are going to use zalando-postgres-operator in order to provision a PostgreSQL Cluster in CCE:
apiVersion: acid.zalan.do/v1
kind: postgresql
metadata:
  labels:
    application: umami
  name: umami-psql
spec:
  databases:
    umami: umami
  numberOfInstances: 1
  postgresql:
    version: "16"
    parameters:
      huge_pages: "false"
  preparedDatabases:
    umami:
      defaultUsers: true
      schemas:
        data: {}
        history:
          defaultRoles: true
          defaultUsers: false
  resources:
    limits:
      cpu: 500m
      memory: 500Mi
    requests:
      cpu: 10m
      memory: 100Mi
  teamId: default
  users:
    admin:
      - superuser
      - createdb
    umami: []
  volume:
    size: 1Gi
    storageClass: csi-disk
kubectl apply -f umami-postgresql.yaml
Deploying Umami
Create the follow manifest:
apiVersion: apps/v1
kind: Deployment
metadata:
  name: umami-web
spec:
  replicas: 2
  selector:
    matchLabels:
      app: umami-web
  template:
    metadata:
      labels:
        app: umami-web
    spec:
      containers:
        - name: web
          image: ghcr.io/umami-software/umami:postgresql-latest
          ports:
            - containerPort: 5000
              protocol: TCP
          env:
            - name: PORT
              value: '5000'
            - name: DB_DATABASE
              value: "umami"
            - name: DB_HOST
              value: umami-psql.docs-next.svc.cluster.local
            - name: DB_PORT
              value: '5432'
            - name: DB_USERNAME
              valueFrom:
                secretKeyRef:
                  name: umami.umami-psql.credentials.postgresql.acid.zalan.do
                  key: username
            - name: DB_PASSWORD
              valueFrom:
                secretKeyRef:
                  name: umami.umami-psql.credentials.postgresql.acid.zalan.do
                  key: password
            - name: DATABASE_URL
              value: "postgres://$(DB_USERNAME):$(DB_PASSWORD)@$(DB_HOST):$(DB_PORT)/$(DB_DATABASE)"
          imagePullPolicy: IfNotPresent
kubectl apply -f umami-web-deployment.yaml
A Kubernetes Secret with the name umami.umami-psql.credentials.postgresql.acid.zalan.do, containing the credentials of the umami database, will be automatically provisioned by the zalando-postgres-operator during the application of manifest umami-postgresql.yaml. The environmental variables DB_USERNAME & DB_PASSWORD are getting their values by referencing this Secret.
Creating an Elastic Load Balancer
Navigate to Network Console->Elastic Load Balancing and click Create Elastic Load Balancer. Choose to create Shared Load Balancer and choose New EIP so the new ELB is automatically bound to a new elastic IP:
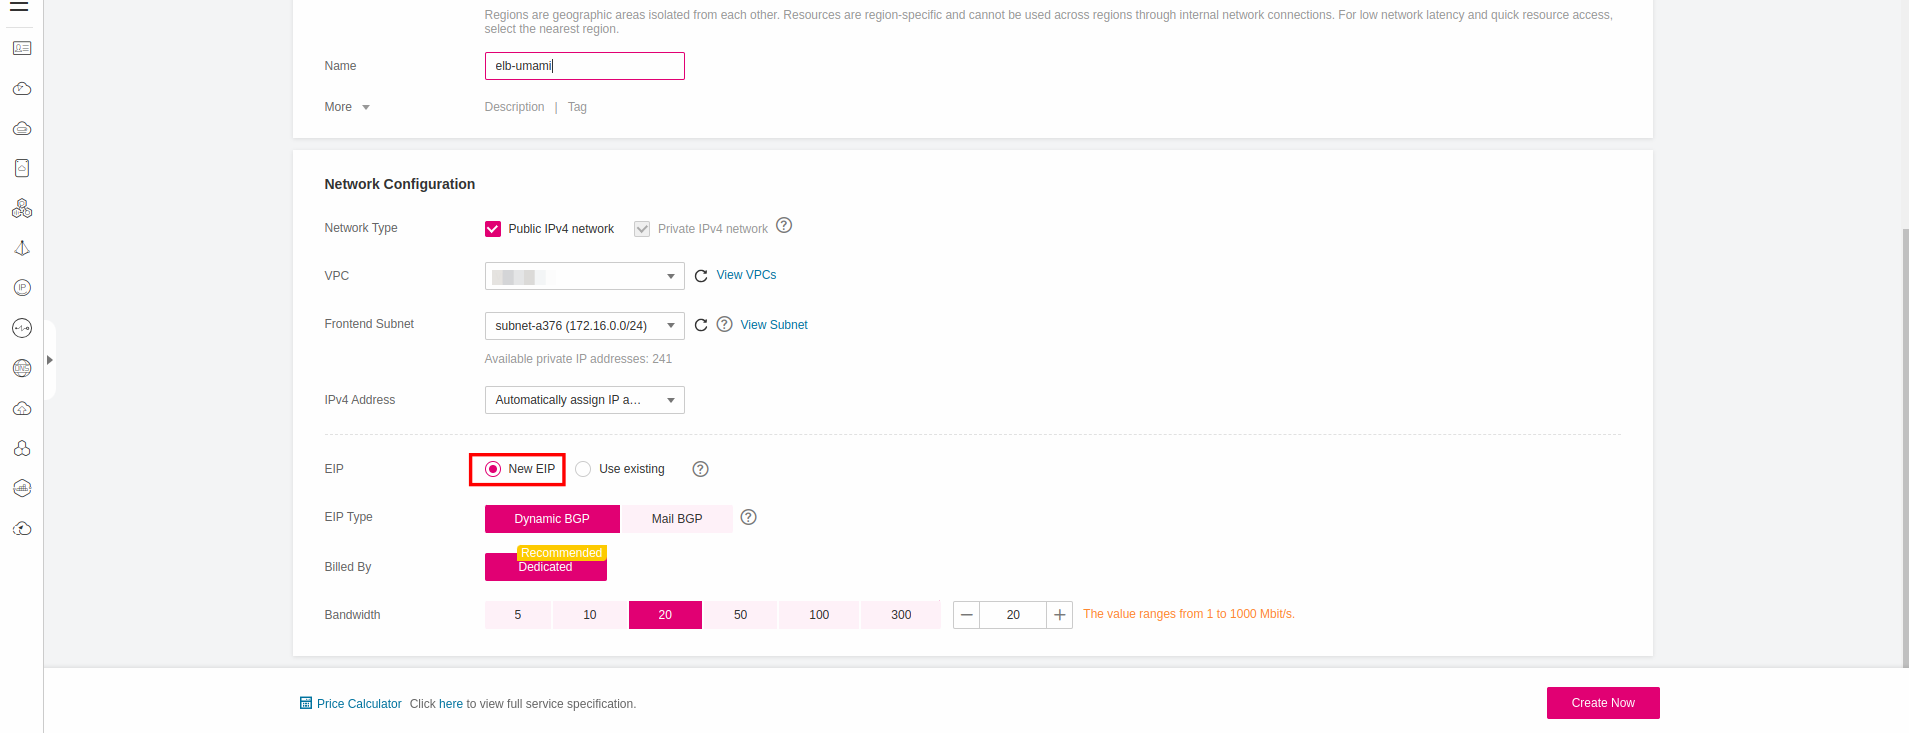
Write down the ID of the Elastic Load Balancer we are going to need it in the next steps.
Exposing Umami
Creating a Service
apiVersion: v1
kind: Service
metadata:
  name: umami-web
spec:
  type: NodePort
  ports:
    - protocol: TCP
      name: umami
      port: 5000
      targetPort: 5000
  selector:
    app: umami-web
kubectl apply -f umami-service.yaml
If you are not planning to expose the service via an Ingress object, change the type to ClusterIP.
Creating an Ingress (optional)
apiVersion: networking.k8s.io/v1
kind: Ingress
metadata:
  name: umami-ingress
  labels:
    app: umami-web
  annotations:
    kubernetes.io/elb.class: union
    kubernetes.io/elb.id: {value}
    kubernetes.io/elb.port: 80
spec:
  ingressClassName: cce
  rules:
  - host: umami.example.com
    http:
      paths:
      - backend:
          service:
            name: umami-web
            port:
              number: 5000
        path: /
        pathType: ImplementationSpecific
- Replace the placeholder
{value}of annotation kubernetes.io/elb.id with the ID of the Elastic Load Balancer we created before. - If the Elastic Load Balancer you created was a shared one then the annotation kubernetes.io/elb.class should have the value
union. - Replace
umami.example.comin host, with the FQDN of yours.
kubectl apply -f umami-ingress.yaml
Verification
Open in a browser the address: http://ELB_EIP and you should now land at the logon page of Umami:

Umami uses admin/umami as default credentials. Change them immediatelly after you log in!