Deploy Formbricks on CCE
This blueprint shows how to run Formbricks on T Cloud Public Cloud Container Engine, giving you a turnkey path to a self-hosted, scalable feedback platform. Formbricks is an open-source, AGPLv3-licensed suite (with a free and a commercial counterpart) that lets you build and deliver in-app, web-embedded, link-based or email surveys without sacrificing data privacy.
Formbricks includes a no-code survey editor, real-time response tracking and analysis, and the flexibility to target user groups based on their actions or attributes. Hosting on CCE combines those benefits with the operational simplicity and enterprise-grade SLAs of T Cloud Public, so you can focus on gathering insights rather worrying where your data is saved.
Prerequisites
- a Cloud Container Engine (CCE) cluster
- a Redis instance in Distributed Cache Service (DCS)
- a PostgreSQL instance in Relational Database Service (RDS)
- a bastion host in Elastic Cloud Service (ECS)
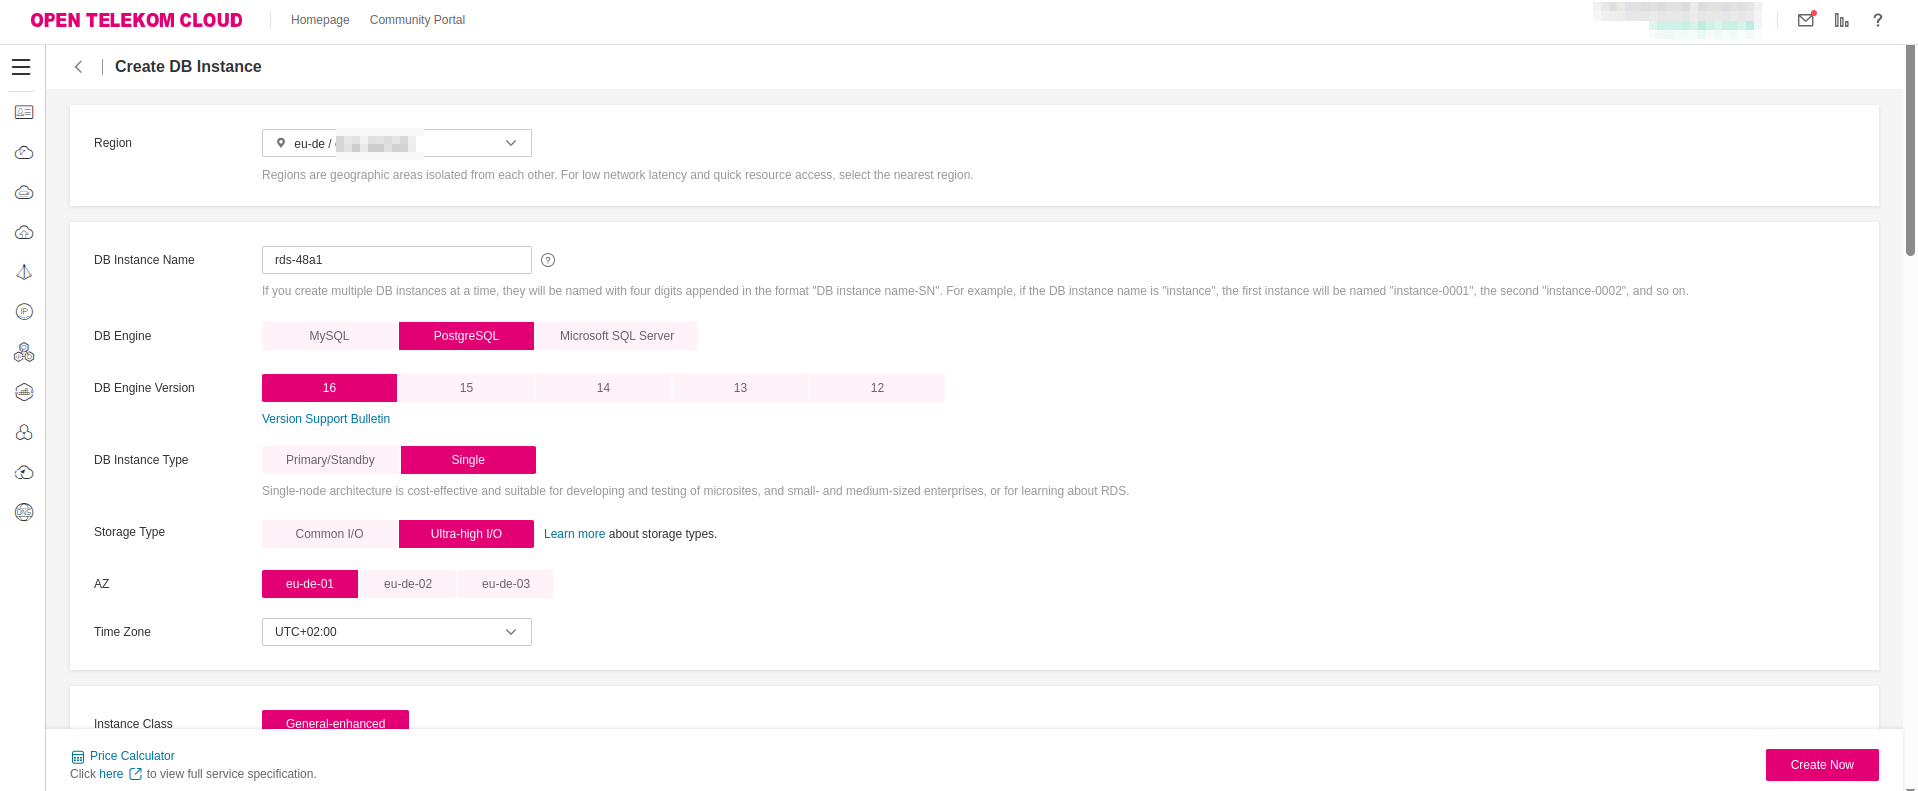
Creating a PostgreSQL Database
Formbricks requires persistent storage to retain data and configuration across pod restarts. While it's technically feasible to deploy a PostgreSQL instance directly within the CCE cluster, this approach introduces operational complexity and shifts responsibility for database management to the application team. A more efficient solution is to leverage T Cloud Public's Relational Database Service (RDS). It provides a scalable, fully managed PostgreSQL backend that integrates seamlessly with other managed services on the platform, significantly reducing administrative overhead and ensuring high availability and operational resilience.
This step involves provisioning a PostgreSQL database instance via T Cloud Public’s RDS service. Select an instance class and storage configuration that align with your anticipated workload—consider factors such as expected connection volume, data growth, and performance requirements. For production environments, it's recommended to opt for a compute-optimized or memory-optimized instance class, along with provisioned IOPS storage if consistent performance is critical. This ensures that Formbricks operates reliably under load and can scale as demand increases.
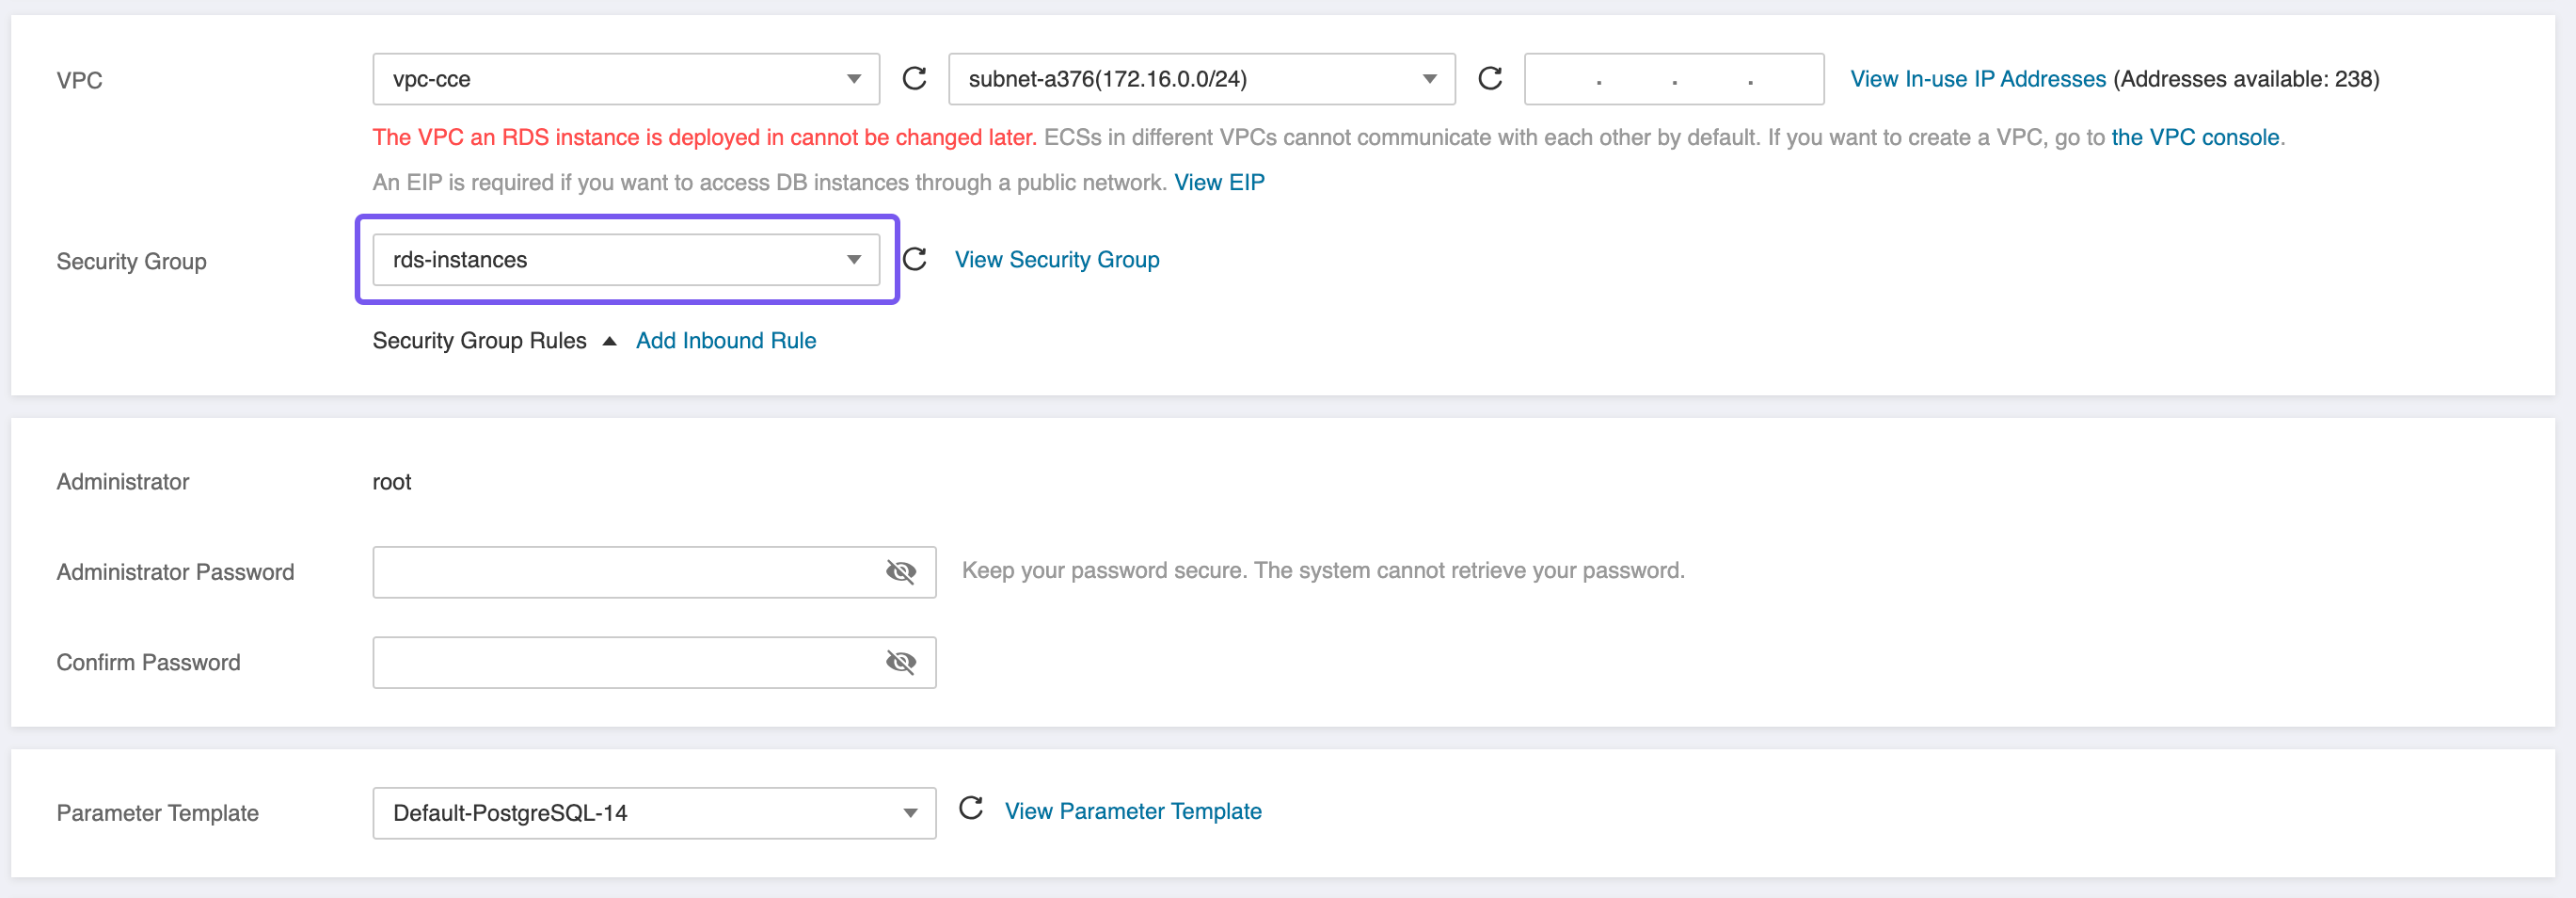
When provisioning the PostgreSQL instance, ensure the following network and security configurations are in place:
- Create two Security Groups,
rds-instancesandrds-clients, as described in best practice: Configure Security Groups for PostgreSQL RDS Instances and Clients. - Deploy the RDS instance within the same Virtual Private Cloud (VPC) as your CCE cluster to enable low-latency, private network communication between the application and the database.
- Attach the previously created
rds-instancesSecurity Group to the RDS instance. This group must allow inbound traffic on port5432from the Subnet or Security Group associated with the CCE nodes to enable secure database access.
Installing pgvector Plugin
Navigate to T Cloud Public Console -> Relational Database Service, choose your instance and then click Plugins. Search for the plugin vector and click Install.
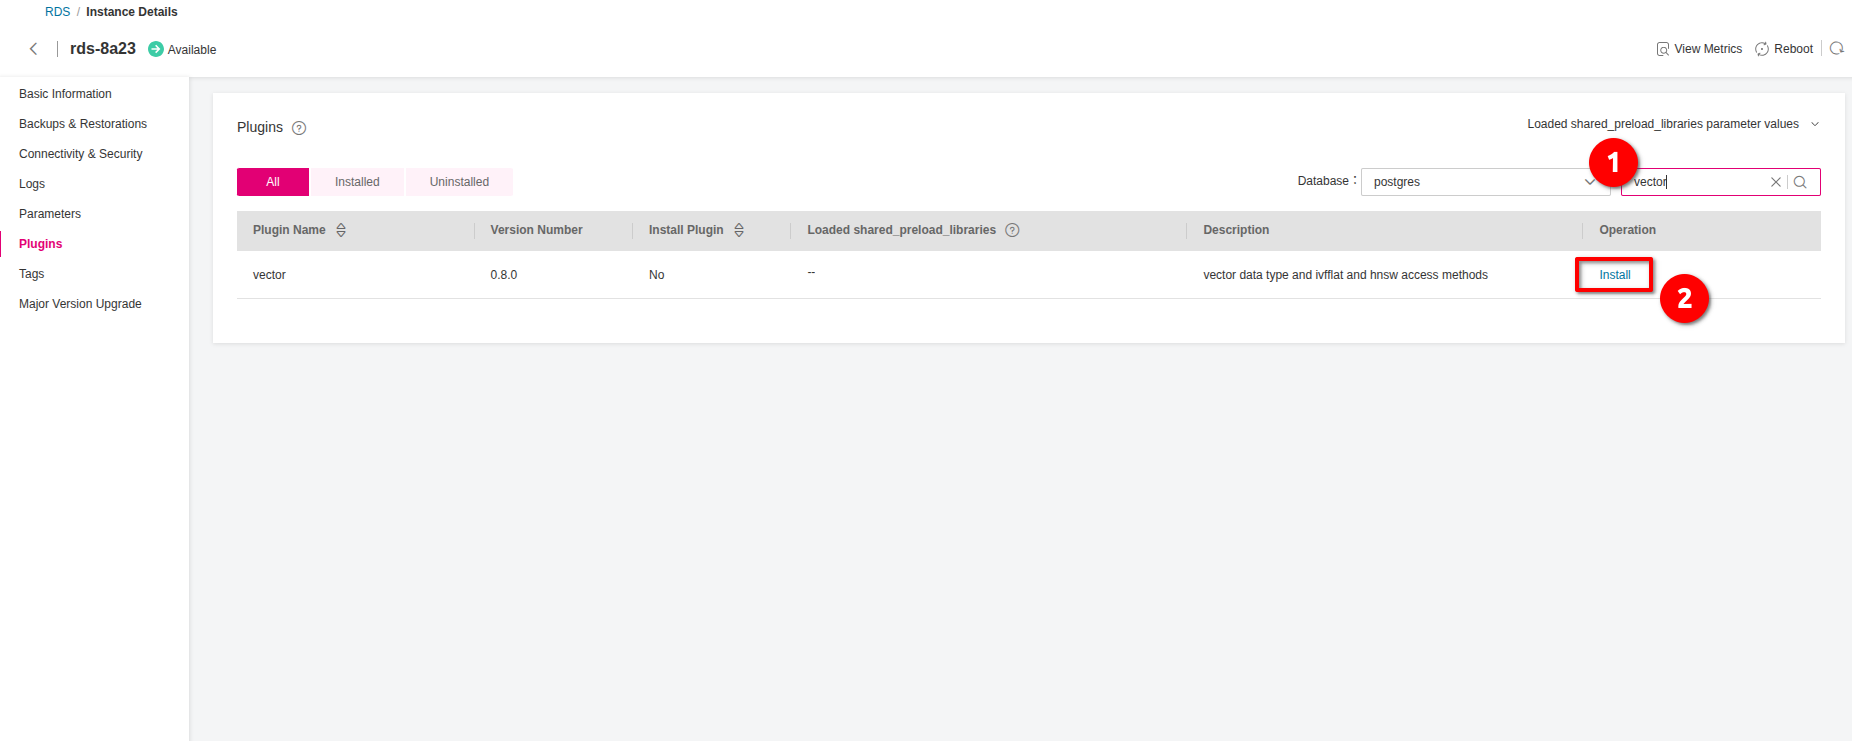
Installing the plugin is instantenous but we need afterwards to enable it. Connect, via SSH, to your bastion host and perform the following steps:
Installing PostgreSQL Client
sudo apt-get update
sudo apt-get install postgresql-client
Creating a new Database
psql -h <RDS_INSTANCE_FLOATING_IP> -U root -d postgres -c "CREATE DATABASE formbricks;"
Registering pgvector in the public Schema
psql -h <RDS_INSTANCE_FLOATING_IP> -U root -d formbricks -c "SELECT control_extension('create','vector','public');"
Creating a Redis Instance
- Navigate to T Cloud Public Console -> Distributed Cache Service (for Redis) -> Cache Manager and click Create DCS Instance. Choose the desirable Engine and Instance Specifications (a
redis.ha.xu1.large.r2.1flavor will suffice for this blueprint, but for production environments adjust to your needs estimations.)
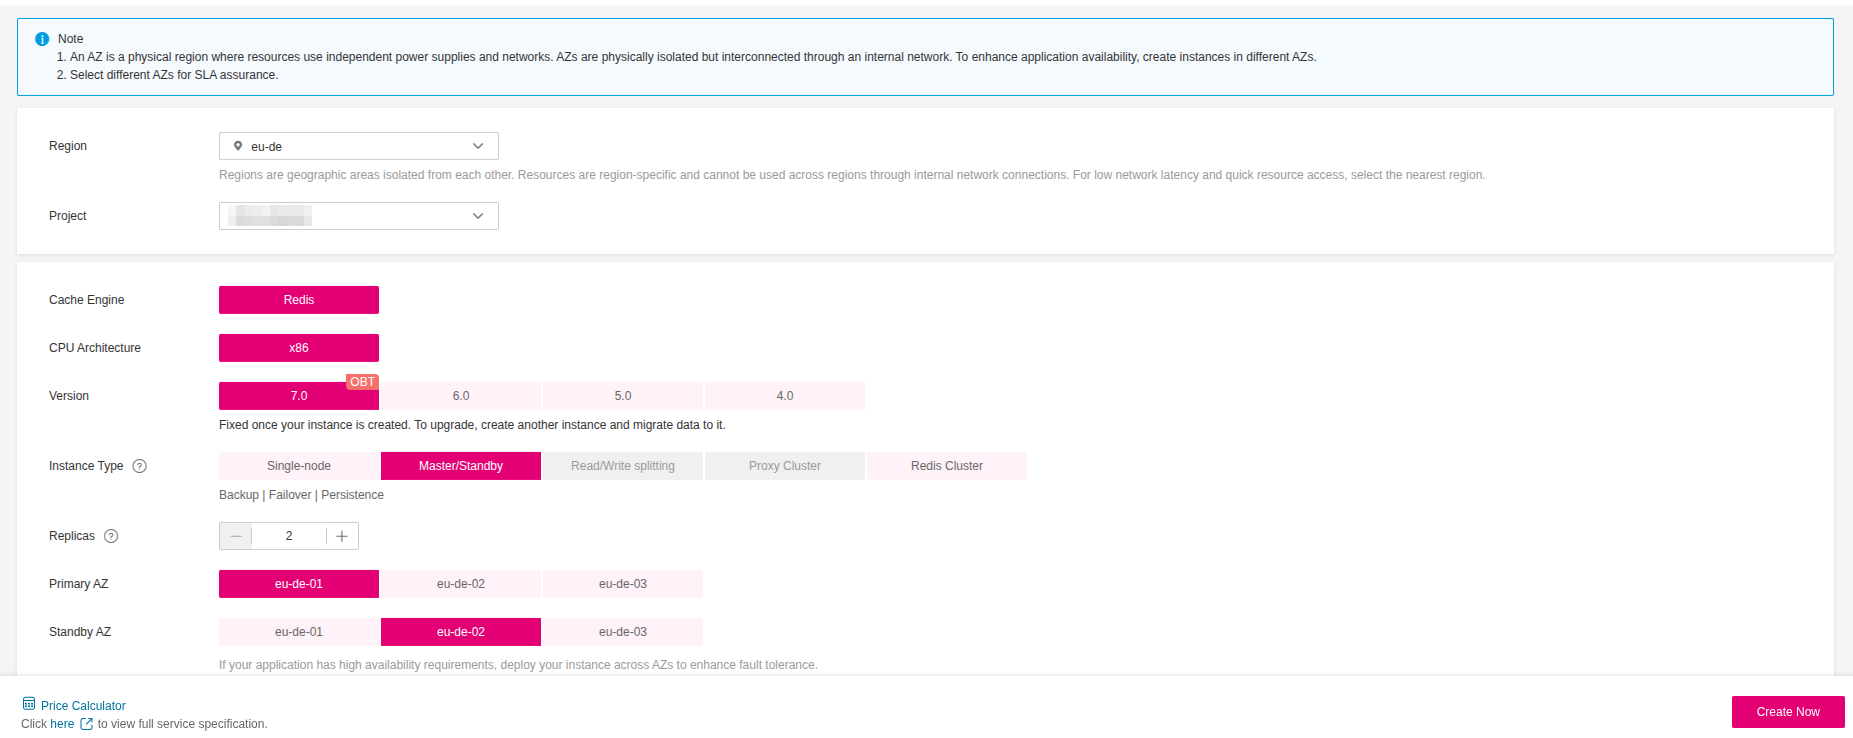
- Make sure you place the instance in the same VPC as your CCE cluster.
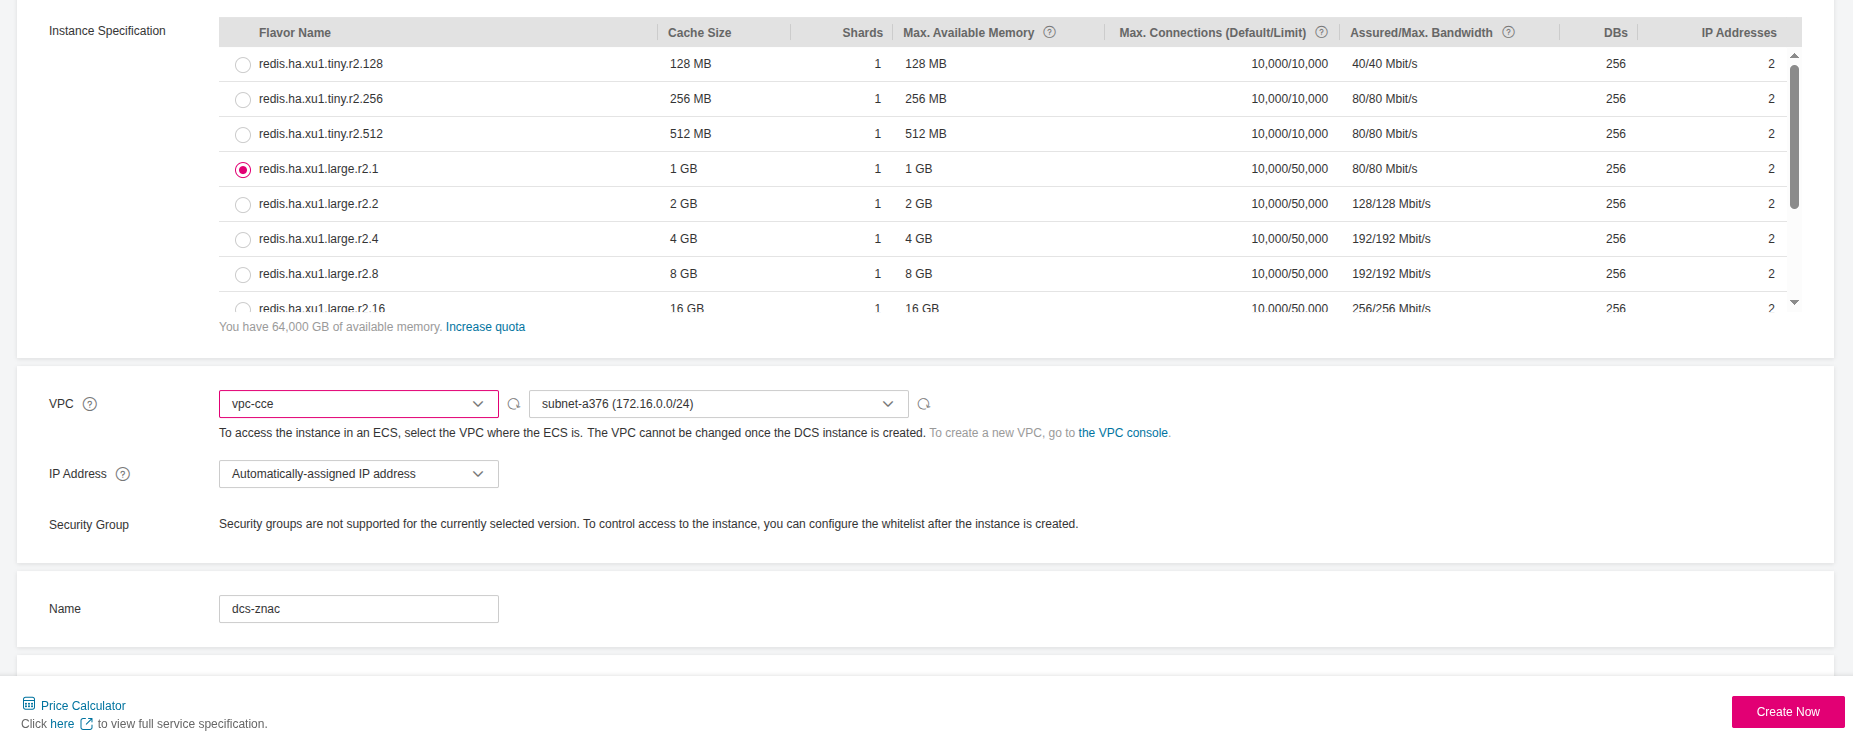
-
Choose Yes for Password Protected instance and provide the credentials.
-
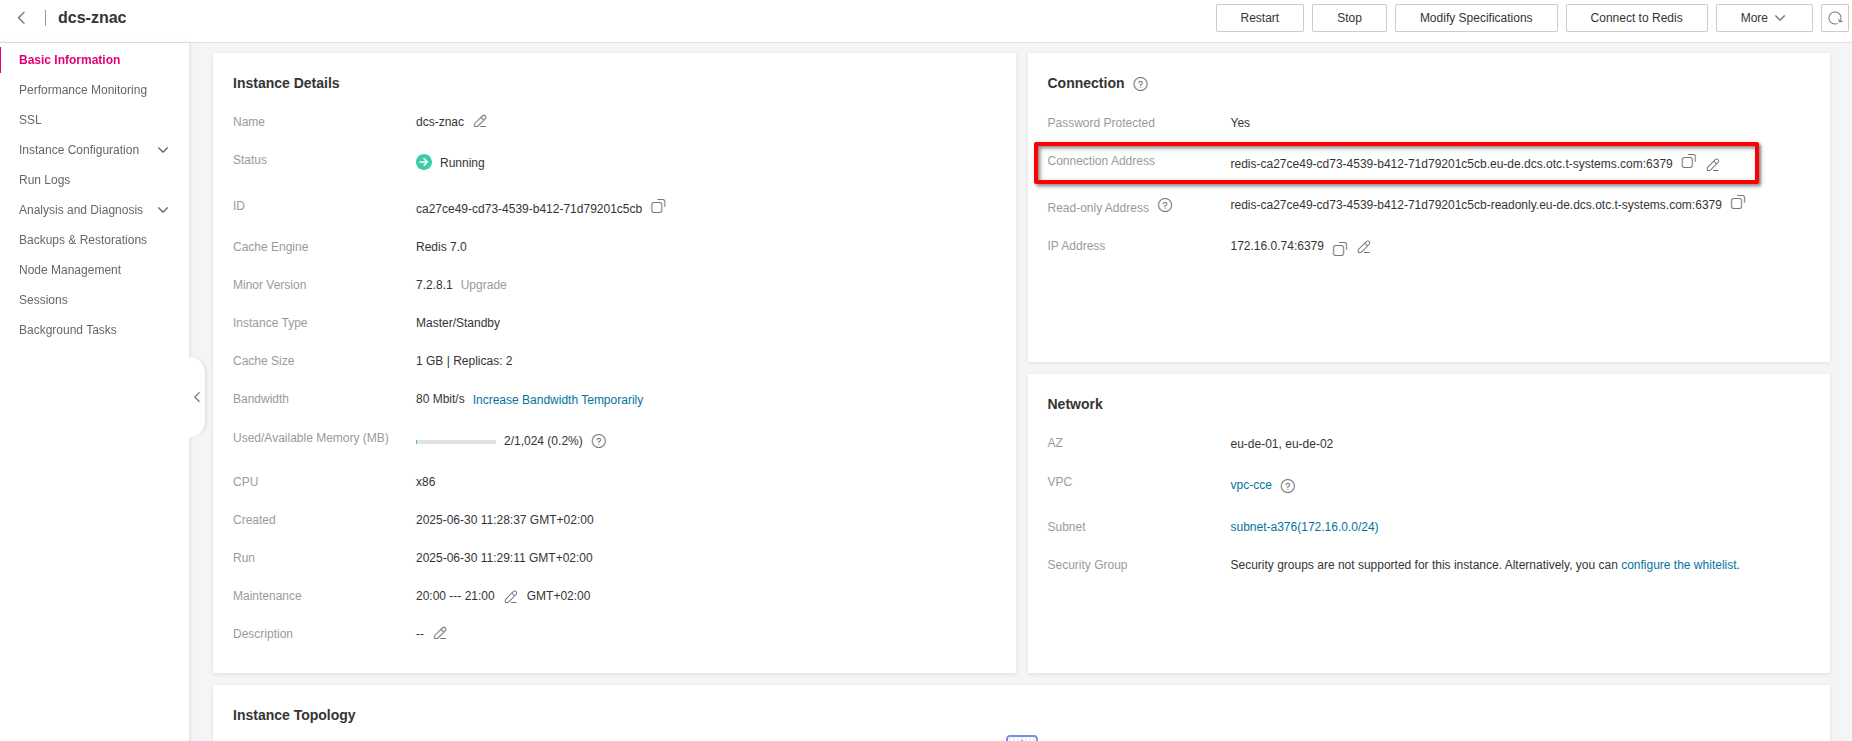
Finally, click Create Now and wait till the instance is been provisioned. Then enter the information dashboard of the instance and note down the Connection Address, as we are going to need it later to configure the Helm Chart values.
Creating a CCE Cluster
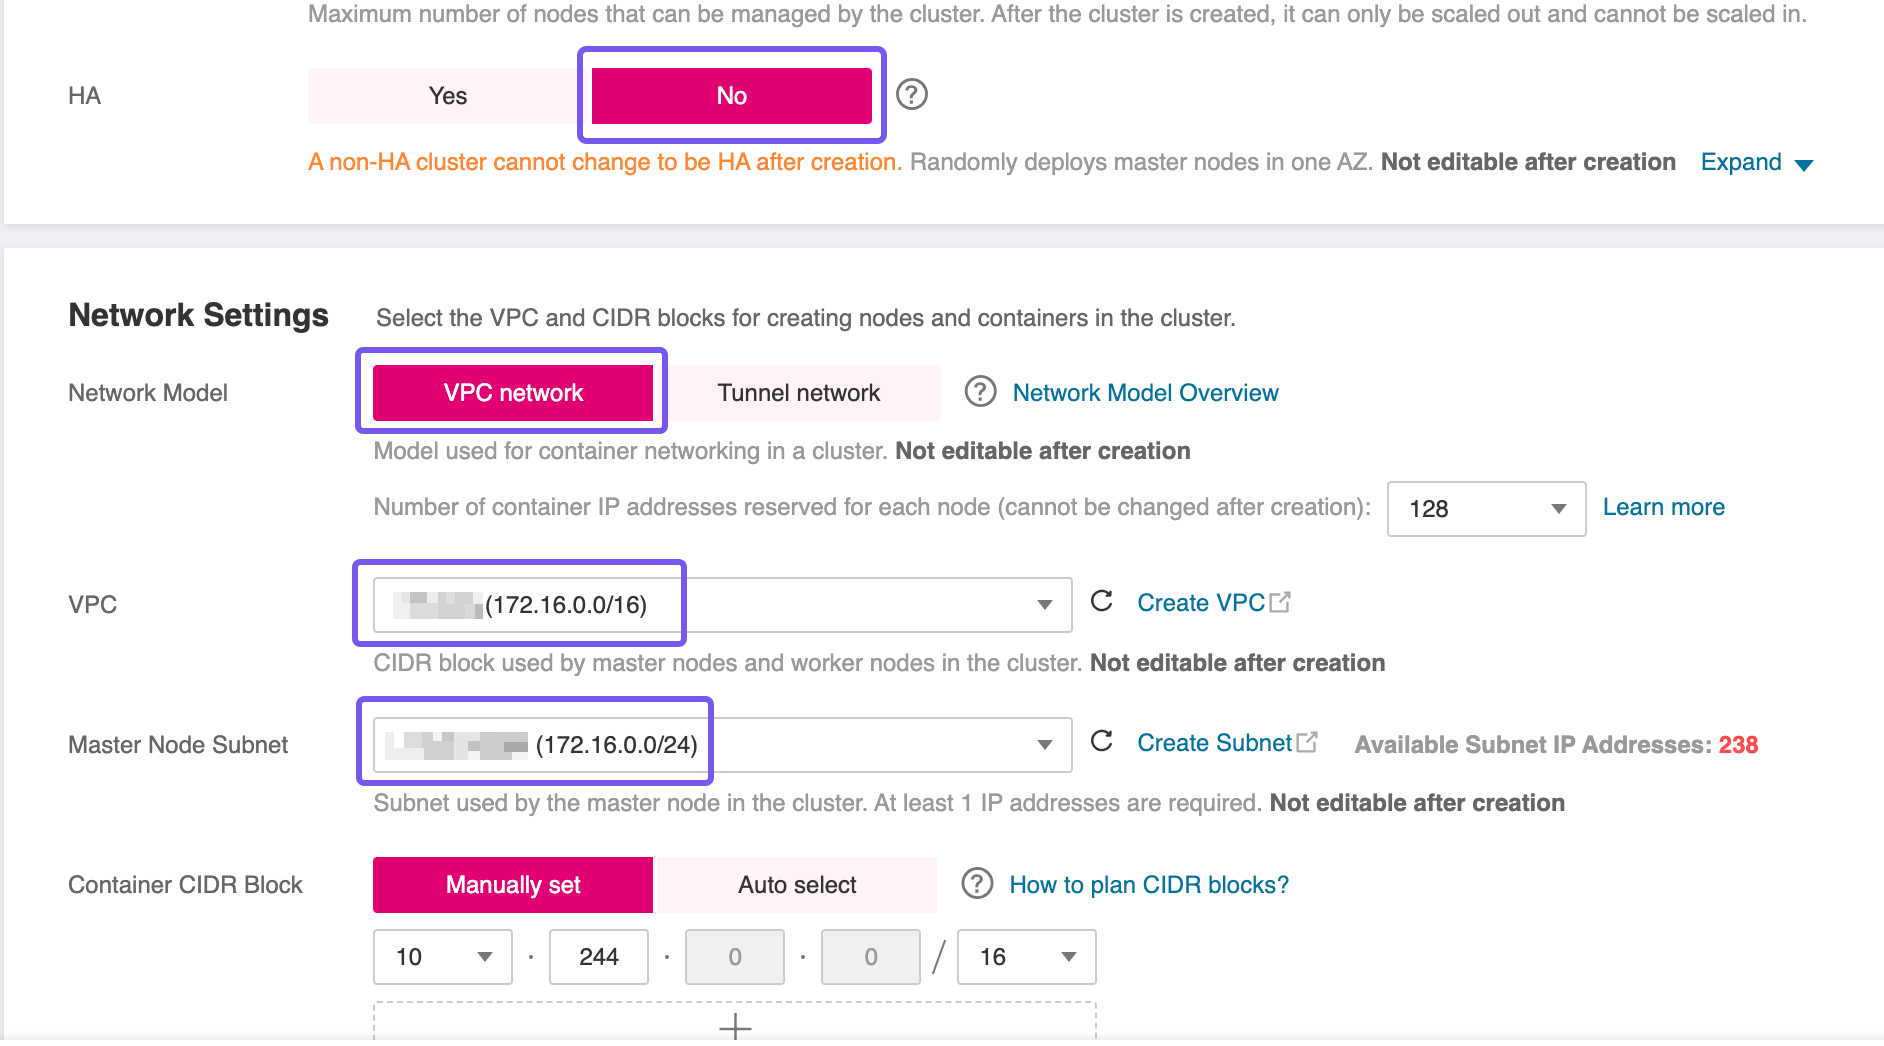
To proceed with the setup, you'll need to provision a Cloud Container Engine (CCE) cluster. Use the T Cloud Public wizard for cluster creation, and pay close attention to the following configuration specifics:
- High Availability (HA): For this blueprint, a non HA-cluster was used which is not advised for production workloads. However, if your workload demands fault tolerance and availability guarantees, consider enabling HA during creation—as this setting is immutable post-deployment.
- Network Placement: Ensure the CCE cluster is provisioned within the same VPC as the RDS instance to facilitate secure and low-latency communication.
- Subnet Configuration: If you're using a single Subnet for both services, place the CCE worker nodes in the same Subnet as the RDS instance to align with the predefined security group and routing rules.
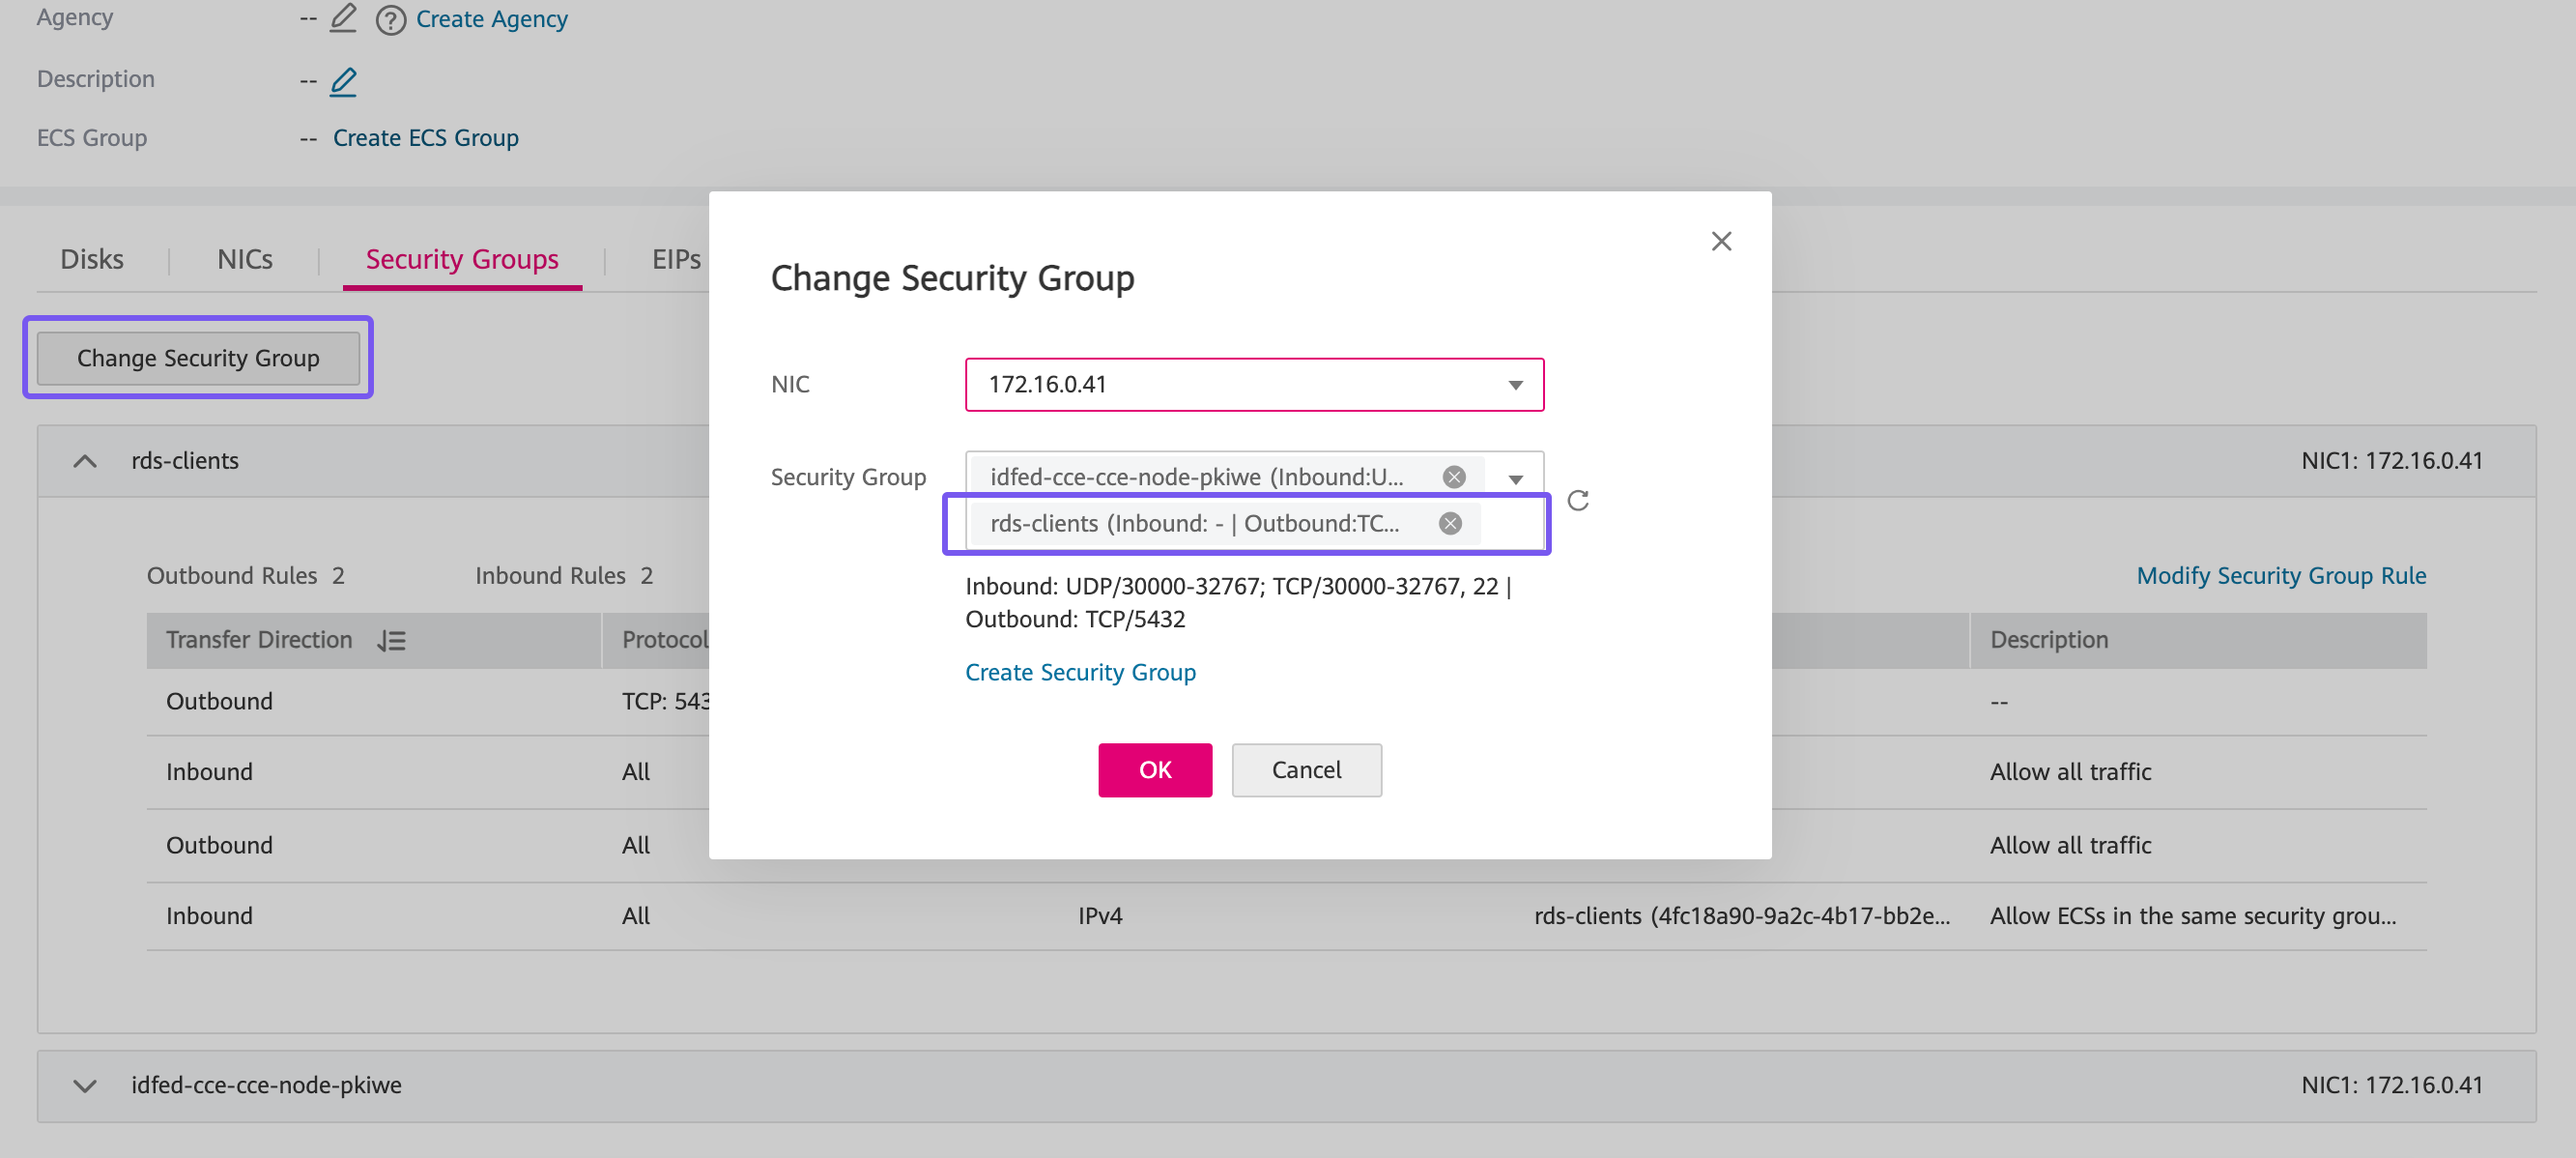
After the CCE cluster has been created, proceed to add worker nodes using the wizard. Once all nodes are in a Running or Ready state, you’ll need to update their network configuration to enable outbound connectivity to the database.
For each worker node, attach the previously created rds-client Security Group in addition to any existing group already associated with the node. This step ensures that outbound traffic on port 5432—required for connecting to the RDS instance—is permitted, establishing a secure and functional path between your application layer and the database backend.
Decide on the access method you'll use to interact with the CCE cluster post-deployment. There are two main options:
- Assigning an Elastic IP (EIP) and allowing direct access over the public Internet.
- Provisioning a bastion host in a public Subnet within the same VPC, and using it as a secure jump point to reach internal resources.
While the first option is quicker to set up, the recommended approach is to use a bastion host. This method significantly reduces the attack surface by isolating the cluster from direct Internet exposure. The bastion can be tightly locked down with security groups and monitored more easily, aligning with best practices for secure infrastructure access.
Preparing the CCE Cluster
Before deploying our workload, the CCE cluster must be equipped with a set of foundational components. In this section, we'll install and configure essential prerequisites such as the NGINX Ingress Controller for routing external traffic, cert-manager for managing TLS certificates, and other supporting workloads. These components establish the baseline infrastructure required to expose services securely and ensure smooth operation of the application stack within the Kubernetes environment.
Follow the guidelines in the best practice Enabling External Traffic with Ingress & TLS before proceeding to the next steps.
Installing Formbricks using Helm
Preparing Helm Chart Values
-
Download the default Helm Chart values from https://github.com/formbricks/formbricks/blob/main/helm-chart/values.yaml and save it in your working directory.
-
Under the
envstanza add the variableEMAIL_VERIFICATION_DISABLEDwith value1:env:
DOCKER_CRON_ENABLED:
value: "0"
EMAIL_VERIFICATION_DISABLED:
value: "1"importantDo not disable email verification in production! We are setting
EMAIL_VERIFICATION_DISABLEDhere totrueonly for demonstration purposes.More on the SMTP configuration of Formbricks can be found here.
-
Under the
ingressstanza set the variables values as following:ingress.enabledtotrueingressClassNametonginxtls.hostsandhosts.hostas the FQDN under which you wish to expose this workloadannotations.cert-manager.io/cluster-issueras theClusterIssueryou created in the previous steps (e.g.:opentelekomcloud-letsencrypt).
e.g.:
ingress:
    enabled: true
    ingressClassName: nginx
    hosts:
        - host: <YOUR.(SUB)DOMAIN.ADDRESS>
        paths:
            - path: /
            pathType: "Prefix"
            serviceName: "formbricks"
    annotations:
        cert-manager.io/cluster-issuer: "opentelekomcloud-letsencrypt"
        nginx.ingress.kubernetes.io/force-ssl-redirect: "true"
    tls:
        - hosts:
            - <YOUR.(SUB)DOMAIN.ADDRESS>
secretName: formbricks-tls -
Under the
redisstanza set the variables values as following:redis.enabledtofalseredis.architecturetoreplication(as long as you have created a Master/StandBy Redis instance, otherwise set tostandalone)redis.externalRedisUrlto the Connection Address we noted down in a previous step
e.g.:
redis:
    enabled: false
    externalRedisUrl: <CONNECTION_ADDRESS>
architecture: replication -
Under the
postgresqlstanza set the variables values as following:postgresql.enabledtofalsepostgresql.externalRedisUrltopostgresql://formbricks:<RDS_ROOT_PASSWORD>@<RDS_FLOATING_IP>:5432/formbricks
e.g.:
postgresql:
    enabled: false
    externalDatabaseUrl: "postgresql://formbricks:<RDS_ROOT_PASSWORD>@<RDS_FLOATING_IP>:5432/formbricks"
Setting redis.enabled and postgresql.enabled to false instructs the Helm Chart to connect to external services and to not deploy dedicated ones for the Formbricks workload in the cluster.
Installing Helm Chart
helm upgrade --install formbricks oci://ghcr.io/formbricks/helm-charts/formbricks \
-n formbricks \
--create-namespace \
-f values.yaml
Assuming you saved the default values in the previous step as values.yaml
Verification
- Open a browser and navigate to https://
hosts.hostwhere you will be prompted to create the root account of your installation:

-
Inspect the certificate, and proceed entering your desired credentials and click Continue with Email.
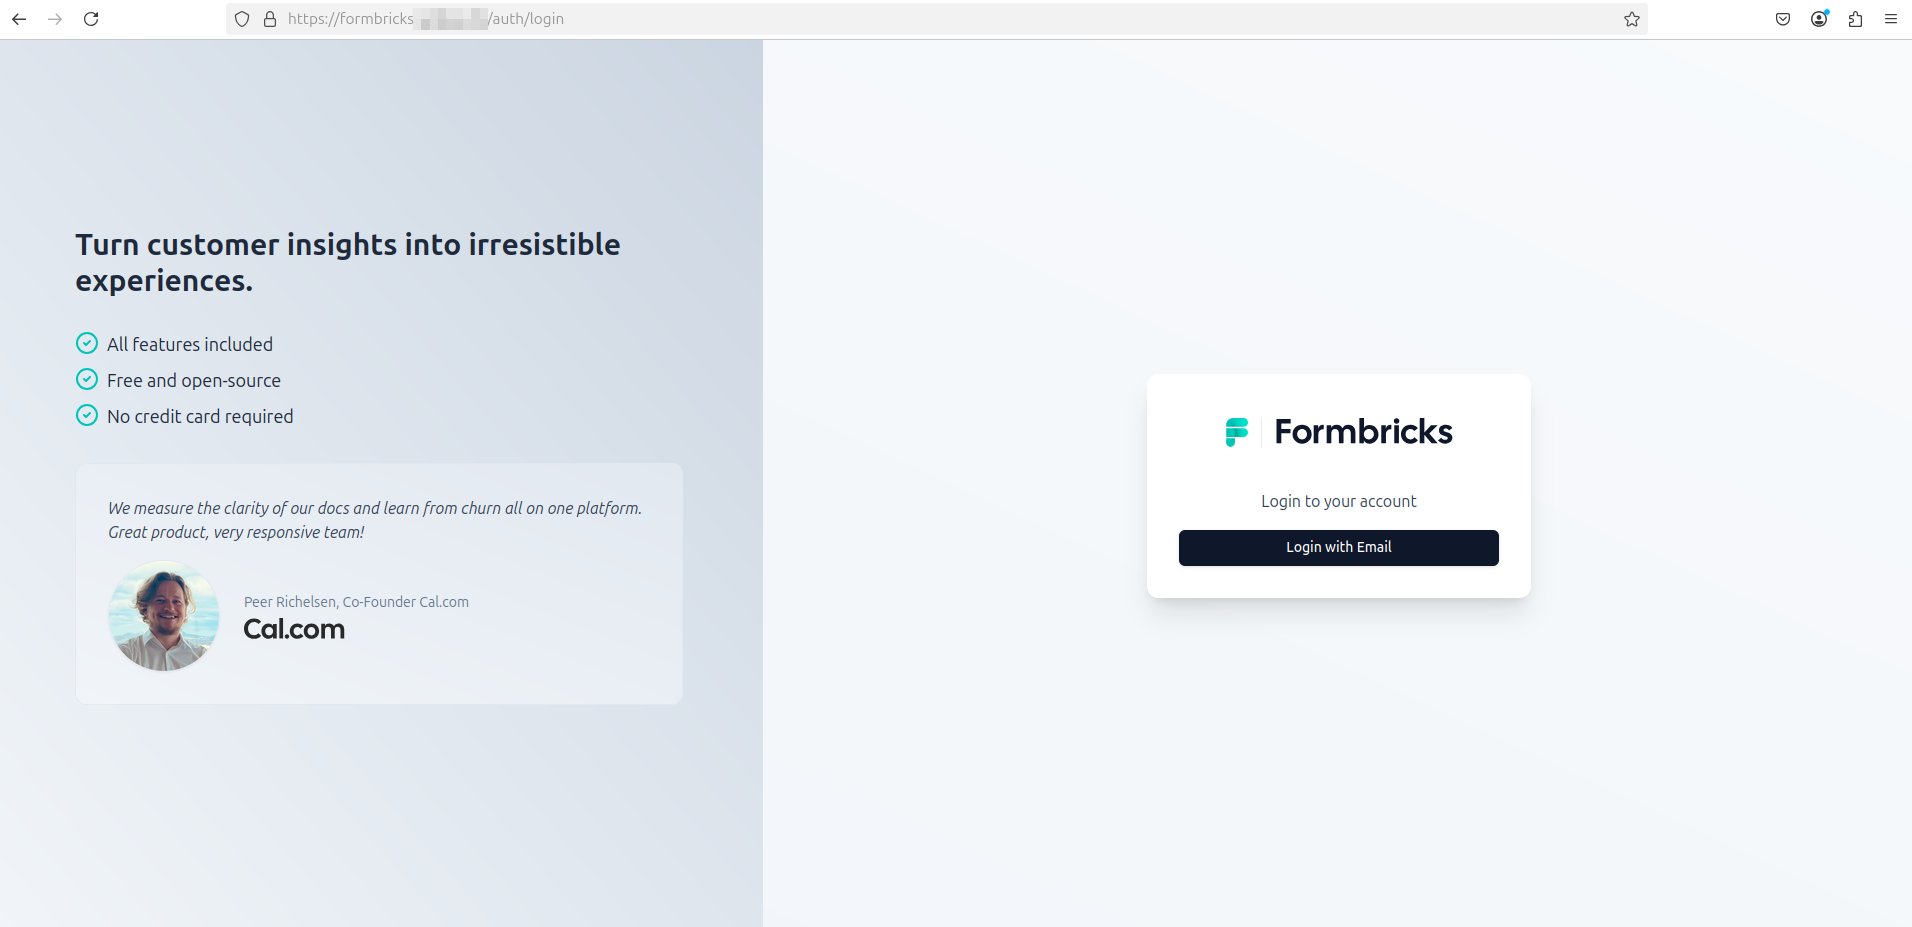
-
You will be redirected to the login page. Click Login with Email and enter the admin credentials you just provisioned:
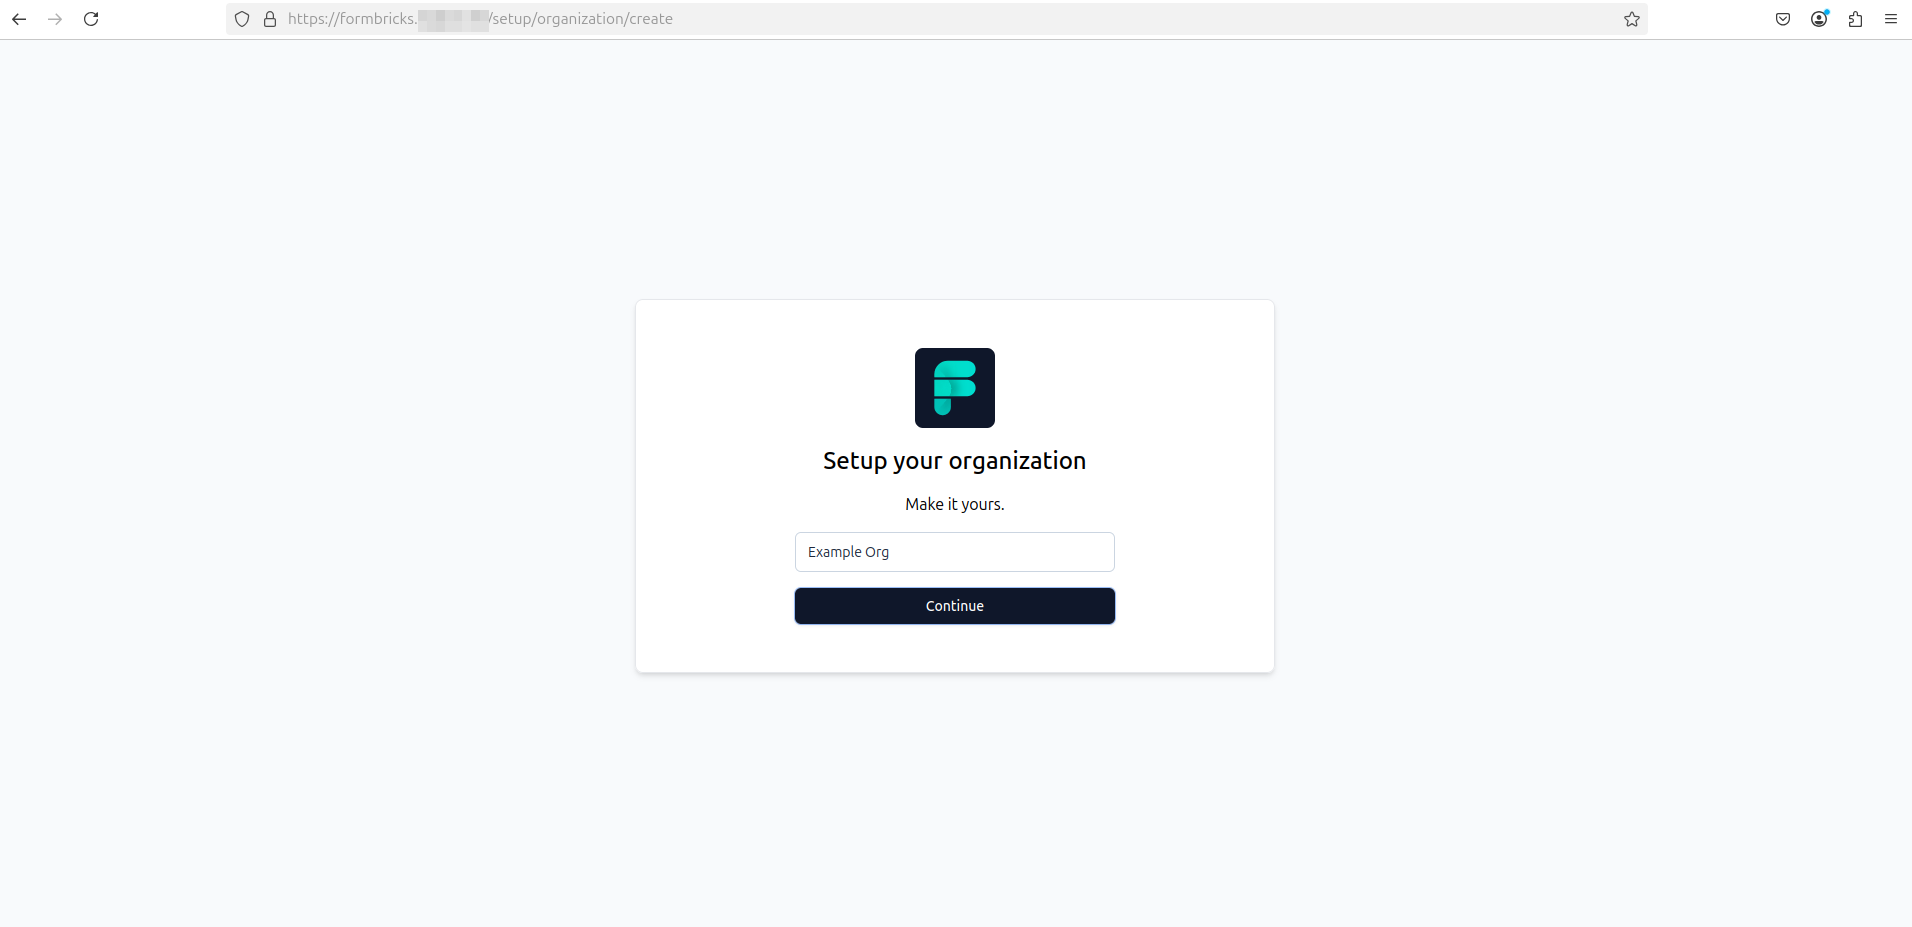
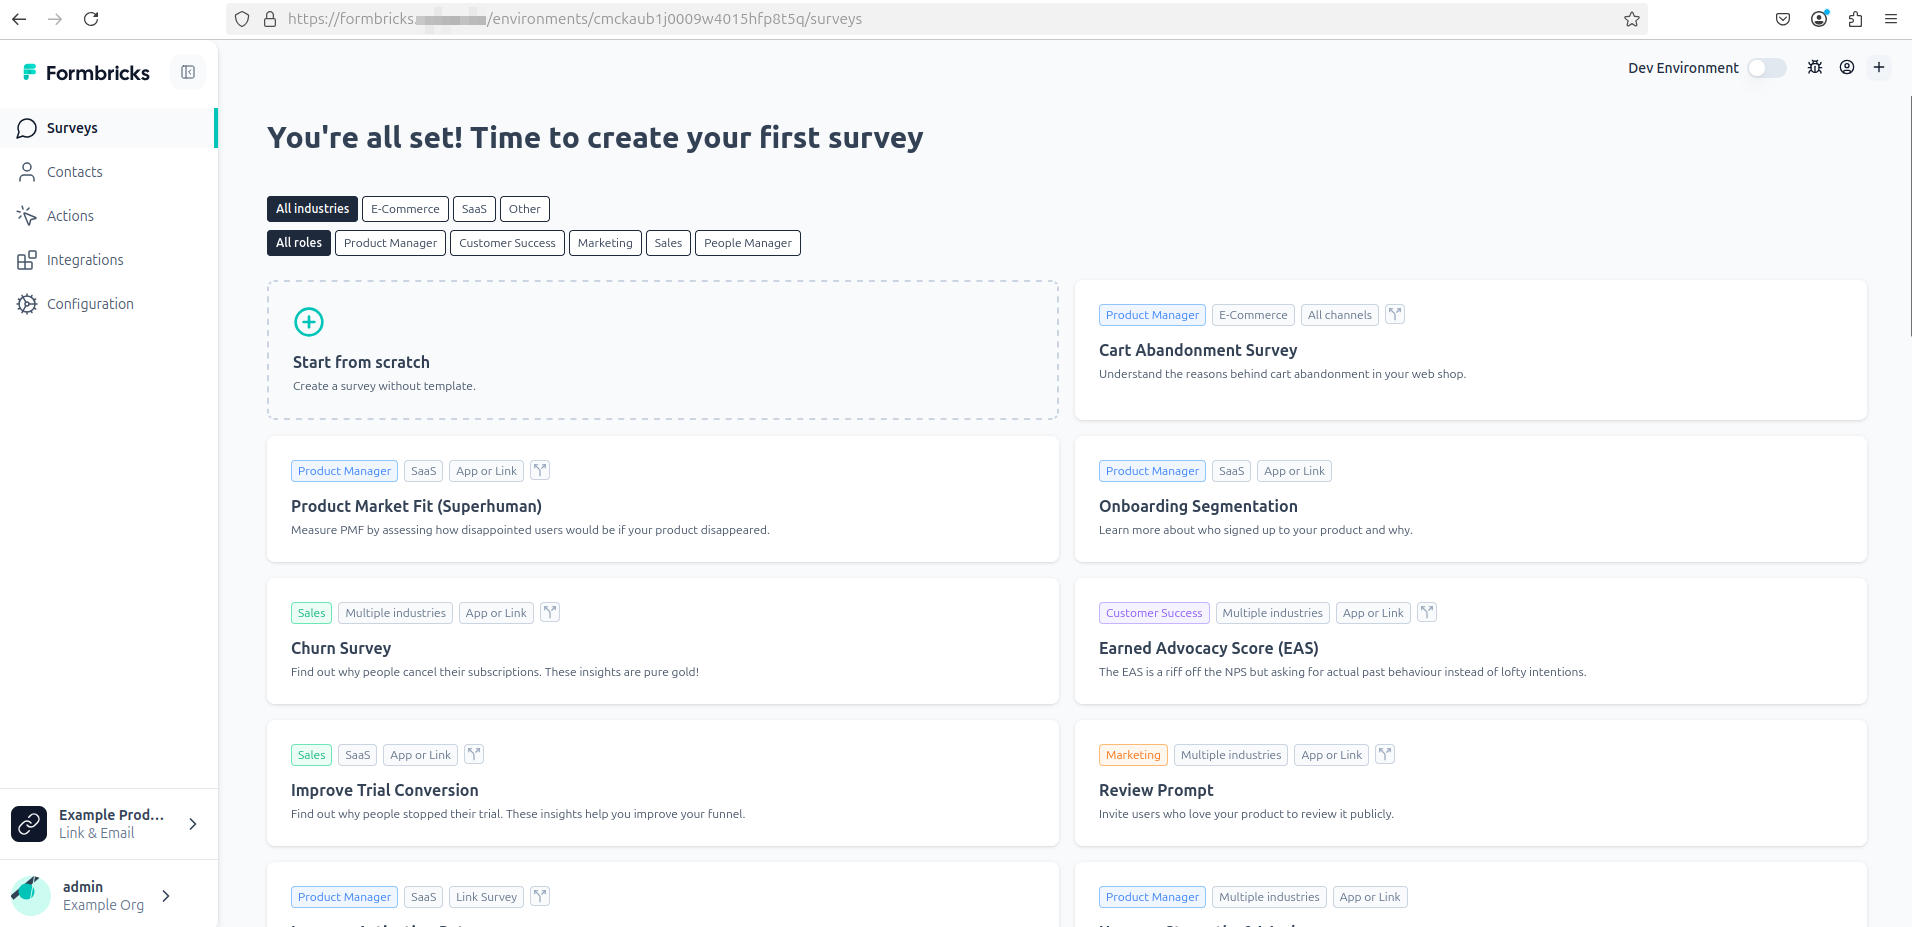
- Setup your first organization and project and click Continue through the wizard:
Troubleshooting
If formbricks Pod doesn't manage to enter in Running status, and the reason is a migration error, you need either to clean
the pending migrations table or drop the formbricks database in its entirety and start over. Regardsless which course of action you choose, you then need to terminate the Pod and let the Deployment recreate it.
If there are pending migrations, even if you correct the source of the problem, the installation process will refuse to continue. For that reason we need to perform one of these two clean up actions before trying again.
Clean Pending Migrations
In your bastion host execute the following commands:
psql -h <RDS_INSTANCE_FLOATING_IP> -U root -d formbricks
and then at the psql prompt run:
DELETE FROM public."_prisma_migrations"
 WHERE migration_name = '20241017124431_add_documents_and_insights';
Replace 20241017124431_add_documents_and_insights with the actual value you will encounter in the formbricks Pod logs.
Drop Database
In your bastion host execute the following commands:
psql -h <RDS_INSTANCE_FLOATING_IP> -U root -d postgres
and then at the psql prompt run:
-- terminate any open connections to formbricks
SELECT pg_terminate_backend(pid)
  FROM pg_stat_activity
 WHERE datname = 'formbricks';

-- drop the database
DROP DATABASE IF EXISTS formbricks;

-- drop the application role (optional)
DROP ROLE IF EXISTS formbricks;