Prepare CCE to Expose Workloads
Before deploying our workloads, the CCE cluster must be equipped with a set of foundational components. In this section, we'll install and configure essential prerequisites such as the NGINX Ingress Controller for routing external traffic, cert-manager for managing TLS certificates, and other supporting workloads. These components establish the baseline infrastructure required to expose services securely and ensure smooth operation of the application stack within the Kubernetes environment.
Creating an Elastic Load Balancer
This step has to take place once for every cluster as long as you are planning to use a single load balancer for all of your workloads.
The first step in preparing the environment is to provision an Elastic Load Balancer (ELB), which will serve as the external entry point for traffic into the CCE cluster. Setting up an ELB setup is critical for handling external traffic and forwarding requests to services within the cluster, such as the Ingress Controller.
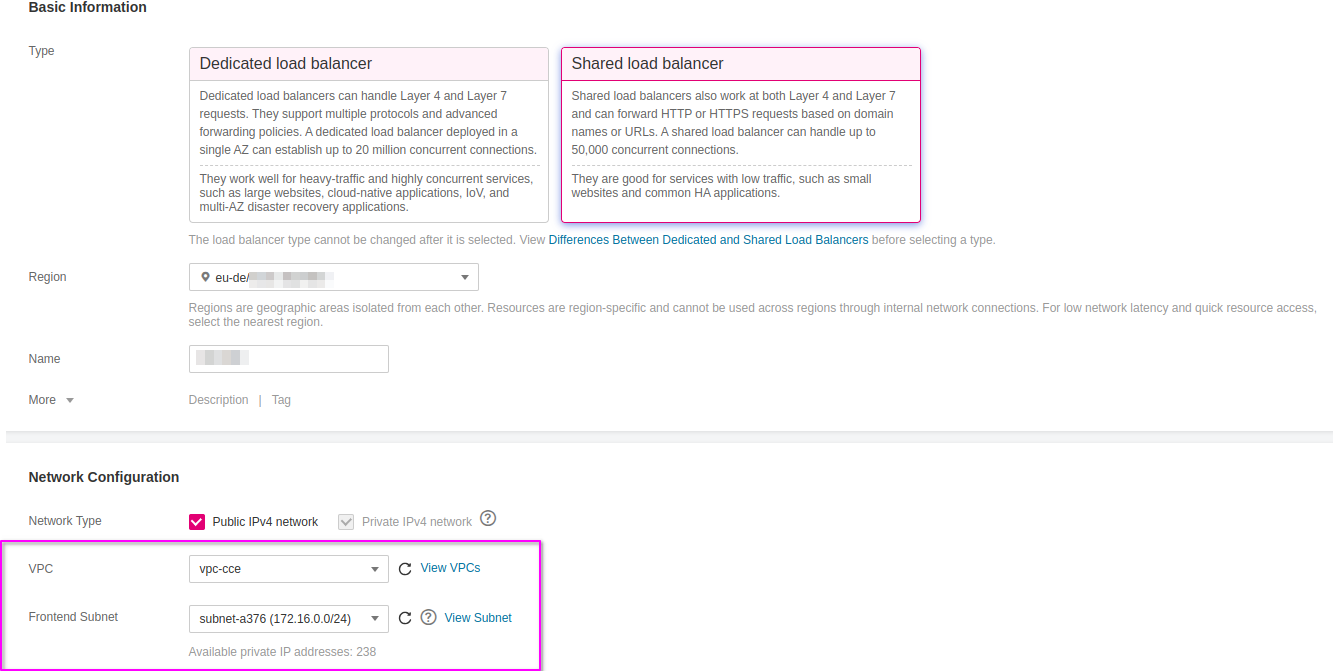
Go to Open Telekom Cloud Console -> Network -> Elastic Load Balancing and click Create Elastic Load Balancer. Ensure that the Elastic Load Balancer is provisioned within the same VPC and Subnet as your CCE cluster. This network alignment is essential to allow the load balancer to reach the CCE worker nodes directly using their private IP addresses. Misplacing the ELB in a different network segment would result in unreachable backends and broken ingress routing.
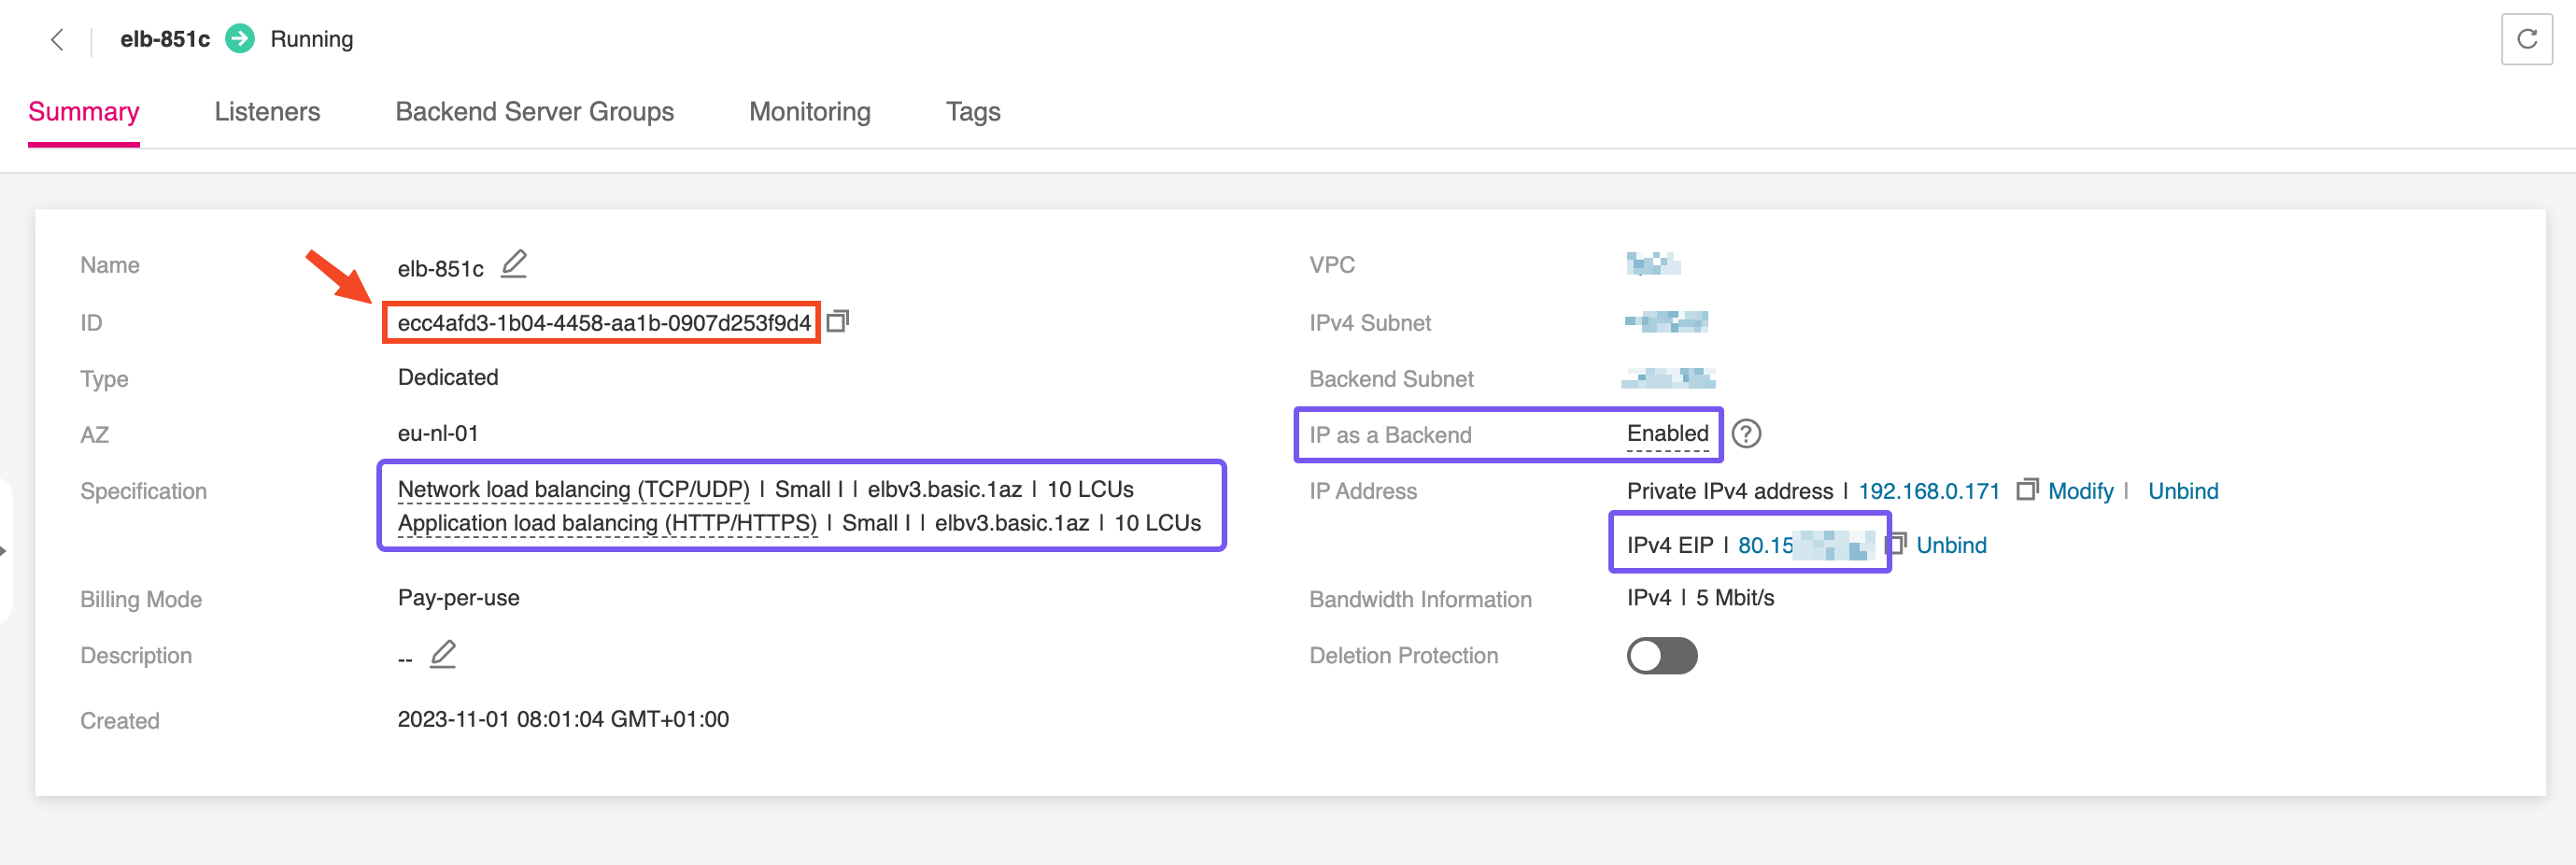
Once the Elastic Load Balancer is provisioned, make sure to note down the ELB ID. This identifier will be required during the configuration of the NGINX Ingress Controller, allowing it to bind correctly to the external load balancer and handle incoming traffic. The ELB ID serves as a reference for associating Kubernetes resources with the underlying network infrastructure, ensuring seamless integration between your Ingress layer and the public-facing endpoint.
Creating a Public DNS Endpoint
This step has to take place for every single workload.
Login to your domain registrar’s control panel and ensure the following:
-
Disable any dynamic DNS features associated with the domain or subdomains that will be used by your application.
-
Update the NS records of your domain to point exclusively to the following OTC name servers:
ns1.open-telekom-cloud.com
ns2.open-telekom-cloud.com
Once the nameserver change propagates and OTC has authoritative control over your domain, you’re ready to define DNS zones and records. You have two paths forward, depending on your operational model:
-
Manual Configuration via the OTC Console
Create a Public DNS Zone in the Open Telekom Cloud DNS service, then define an A record that maps your domain (e.g.,application.example.com) to the EIP of the external load balancer. -
Automated Configuration with ExternalDNS
Integrate the ExternalDNS controller into your Kubernetes cluster. It monitors Ingress resources and automatically creates and updates DNS records in your OTC DNS zone based on annotations. This option is ideal for dynamic environments or production setups that benefit from infrastructure-as-code and reduced manual intervention.
Choose the approach that best fits your deployment strategy and automation preferences.
Installing NGINX Ingress Controller
This step has to take place once for every cluster as long as you are planning to use a single load balancer for all of your workloads.
In this step, we’ll deploy the Ingress NGINX Controller for Kubernetes, which will act as the interface between the Elastic Load Balancer and the service running inside the CCE cluster. The controller handles HTTP(S) routing and termination, forwarding external traffic to the appropriate internal services based on host and path rules.
- Make sure that custom domain name—
application.example.com—should point to the public EIP associated with your ELB. This setup enables secure, domain-based access to your application and forms the foundation for managing ingress traffic across the cluster. - Don't forget that the Fully Qualified Domain Name (FQDN) you use to expose the corresponding service—such as
application.example.com—must correspond to a real, resolvable domain or subdomain that you own and control. You’ll need to create a DNS record (typically an A or CNAME record) that points this FQDN to the public Elastic IP assigned to your load balancer. Without a valid DNS mapping, certificate issuance and external access to the service instance will fail, especially if you're using TLS termination via cert-manager.
We’ll use Helm to deploy the NGINX Ingress Controller into the CCE cluster. Helm is the de facto package manager for Kubernetes, streamlining the deployment of complex applications using templated charts. If Helm is not yet installed on your local machine or the bastion host you're using to manage the cluster, you can install it using the following commands:
curl -fsSL -o get_helm.sh https://raw.githubusercontent.com/helm/helm/main/scripts/get-helm-3
chmod 700 get_helm.sh
./get_helm.sh
To deploy the Ingress NGINX Controller for Kubernetes properly, we need to supply Helm with a custom values file—commonly named overrides.yaml—which defines specific configuration parameters for the deployment. One of the most critical values in this file is the internal ID of the Elastic Load Balancer (ELB). This ID ensures that the Ingress Controller binds to the correct load balancer, enabling it to route external traffic to internal Kubernetes services.
The kubernetes.io/elb.id attribute will be used to annotate the Service resource created by the Ingress NGINX Controller for Kubernetes, so that all Ingress resources referencing this IngressClass will be automatically linked to the designated load balancer:
controller:
  replicaCount: 1
  service:
    externalTrafficPolicy: Cluster
    annotations:
      kubernetes.io/elb.id: "<ELB_ID>"
Make sure to replace <ELB_ID> with the actual ID of the Elastic Load Balancer we created earlier.
With the overrides.yaml file prepared, you can now proceed to install the NGINX Ingress Controller using Helm. This will deploy all required components into a dedicated namespace called nginx-system. Run the following commands:
helm repo add ingress-nginx https://kubernetes.github.io/ingress-nginx
helm repo update

helm install nginx-ingress ingress-nginx/ingress-nginx \
  --namespace nginx-system \
  --create-namespace \
  --values overrides.yaml
This will set up the Ingress NGINX Controller for Kubernetes with your custom configuration, including the ELB binding. Once deployed, Kubernetes Ingress resources referencing the nginx class will route traffic through this controller.
Installing OTC ACME DNS01 Solver
This step has to take place once for every cluster.
Cert-manager DNS providers are integrations with various DNS (Domain Name System) service providers that allow cert-manager, a Kubernetes add-on, to automate the management of SSL/TLS certificates. DNS providers enable cert-manager to automatically perform challenges to prove domain ownership and obtain certificates from certificate authorities like Let's Encrypt.
By configuring cert-manager with the compatible Open Telekom Cloud DNS provider, we can set up automatic certificate issuance and renewal for our Open Telekom Cloud CCE workloads without manual intervention. This automation is crucial for securing web applications and services deployed on CCE clusters.
To enable automated TLS provisioning for workloads in your CCE cluster, follow the recommended approach for as in the Best Practice: Issue an ACME Certificate with DNS01 Solver in CCE.