Identity Federation with GitHub
Identity Federation in Keycloak refers to the ability to use external identity providers to authenticate users in your application. In this context, GitHub can be used as an identity provider, allowing users to log in to your T Cloud Public tenant using their GitHub credentials. Users can choose to log in with their GitHub accounts and Keycloak takes care of the authentication process, providing a seamless experience for users while ensuring security and centralized identity management for external accounts that are not actively managed in your tenant's IAM.
Prerequisites
For this lab, you are going to need a:
- Keycloak server: You should have a Keycloak server instance set up and running
- GitHub account: You need a GitHub account to register your application and obtain client ID and secret
Deploying Keycloak
You can use the Deploy Keycloak on CCE blueprint to set up a working Keycloak instance on CCE.
Configuring Keycloak & IAM
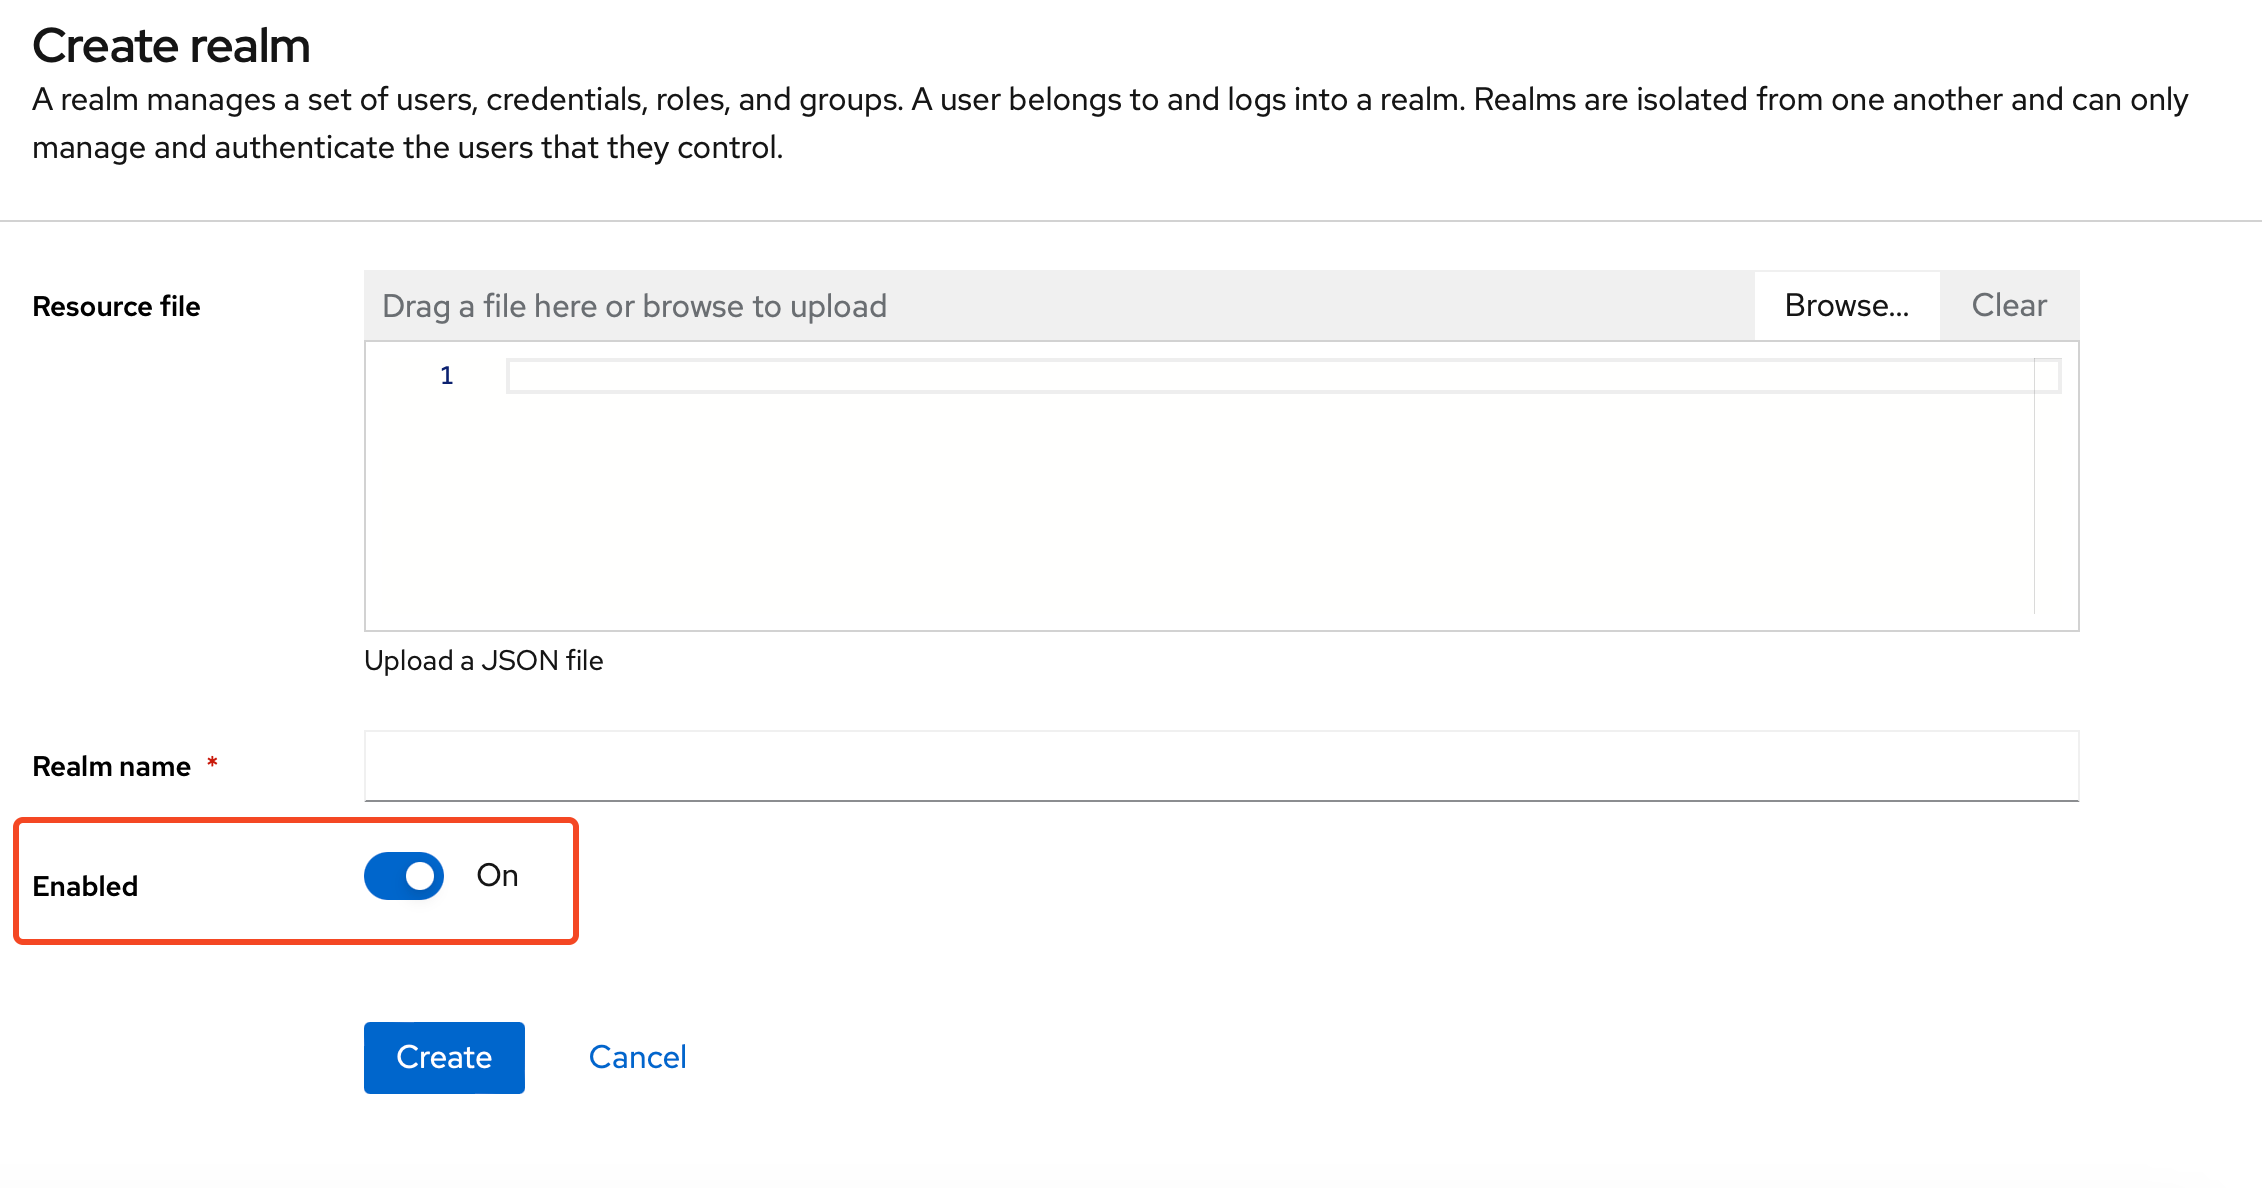
Creating a new Realm
A realm manages users, credentials, roles, and groups. A user belongs to and logs into the realm he is assigned to. Realms are isolated from one another and can manage and authenticate only those users that they belong to them.
Open and login to your Keycloak instance. Create a new realm (let's call it otcac_test_company_1 for the course of
this blueprint) and mark it as enabled:
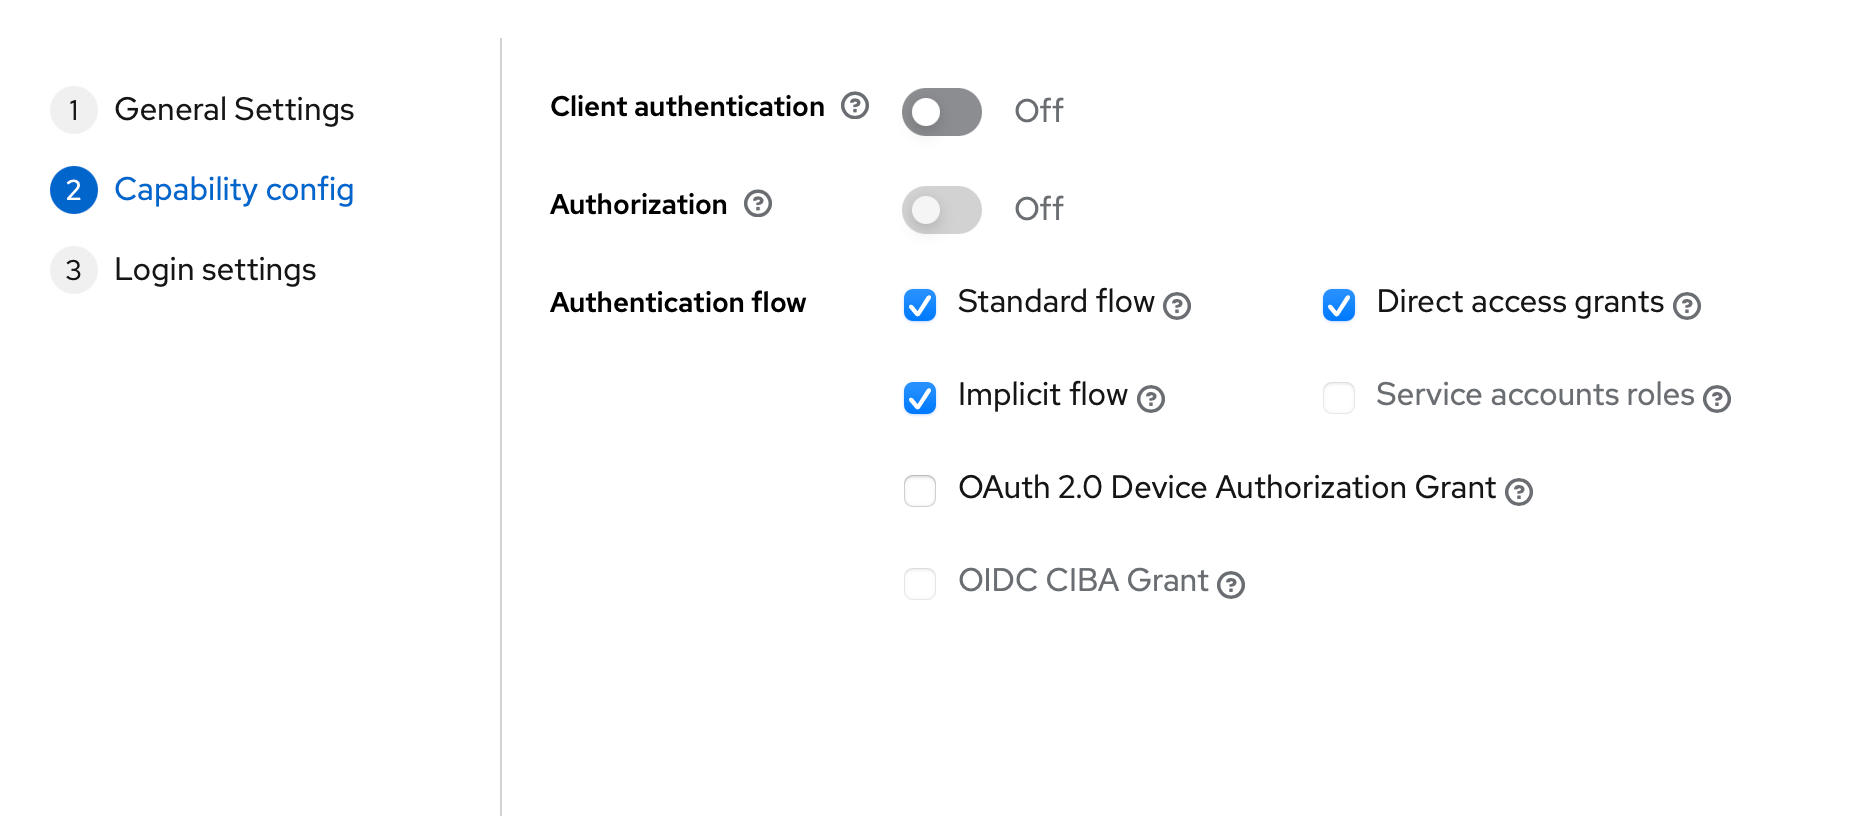
Creating a new Client
Clients are applications, or services, that can request the authentication of a user. Create a new client (let's call it
otcac_test_company_1_client with type OpenID Connect and in the Capability config step of the wizard, activate the following Authentication
flows:
- Standard flow
- Implicit flow
- Direct access grants
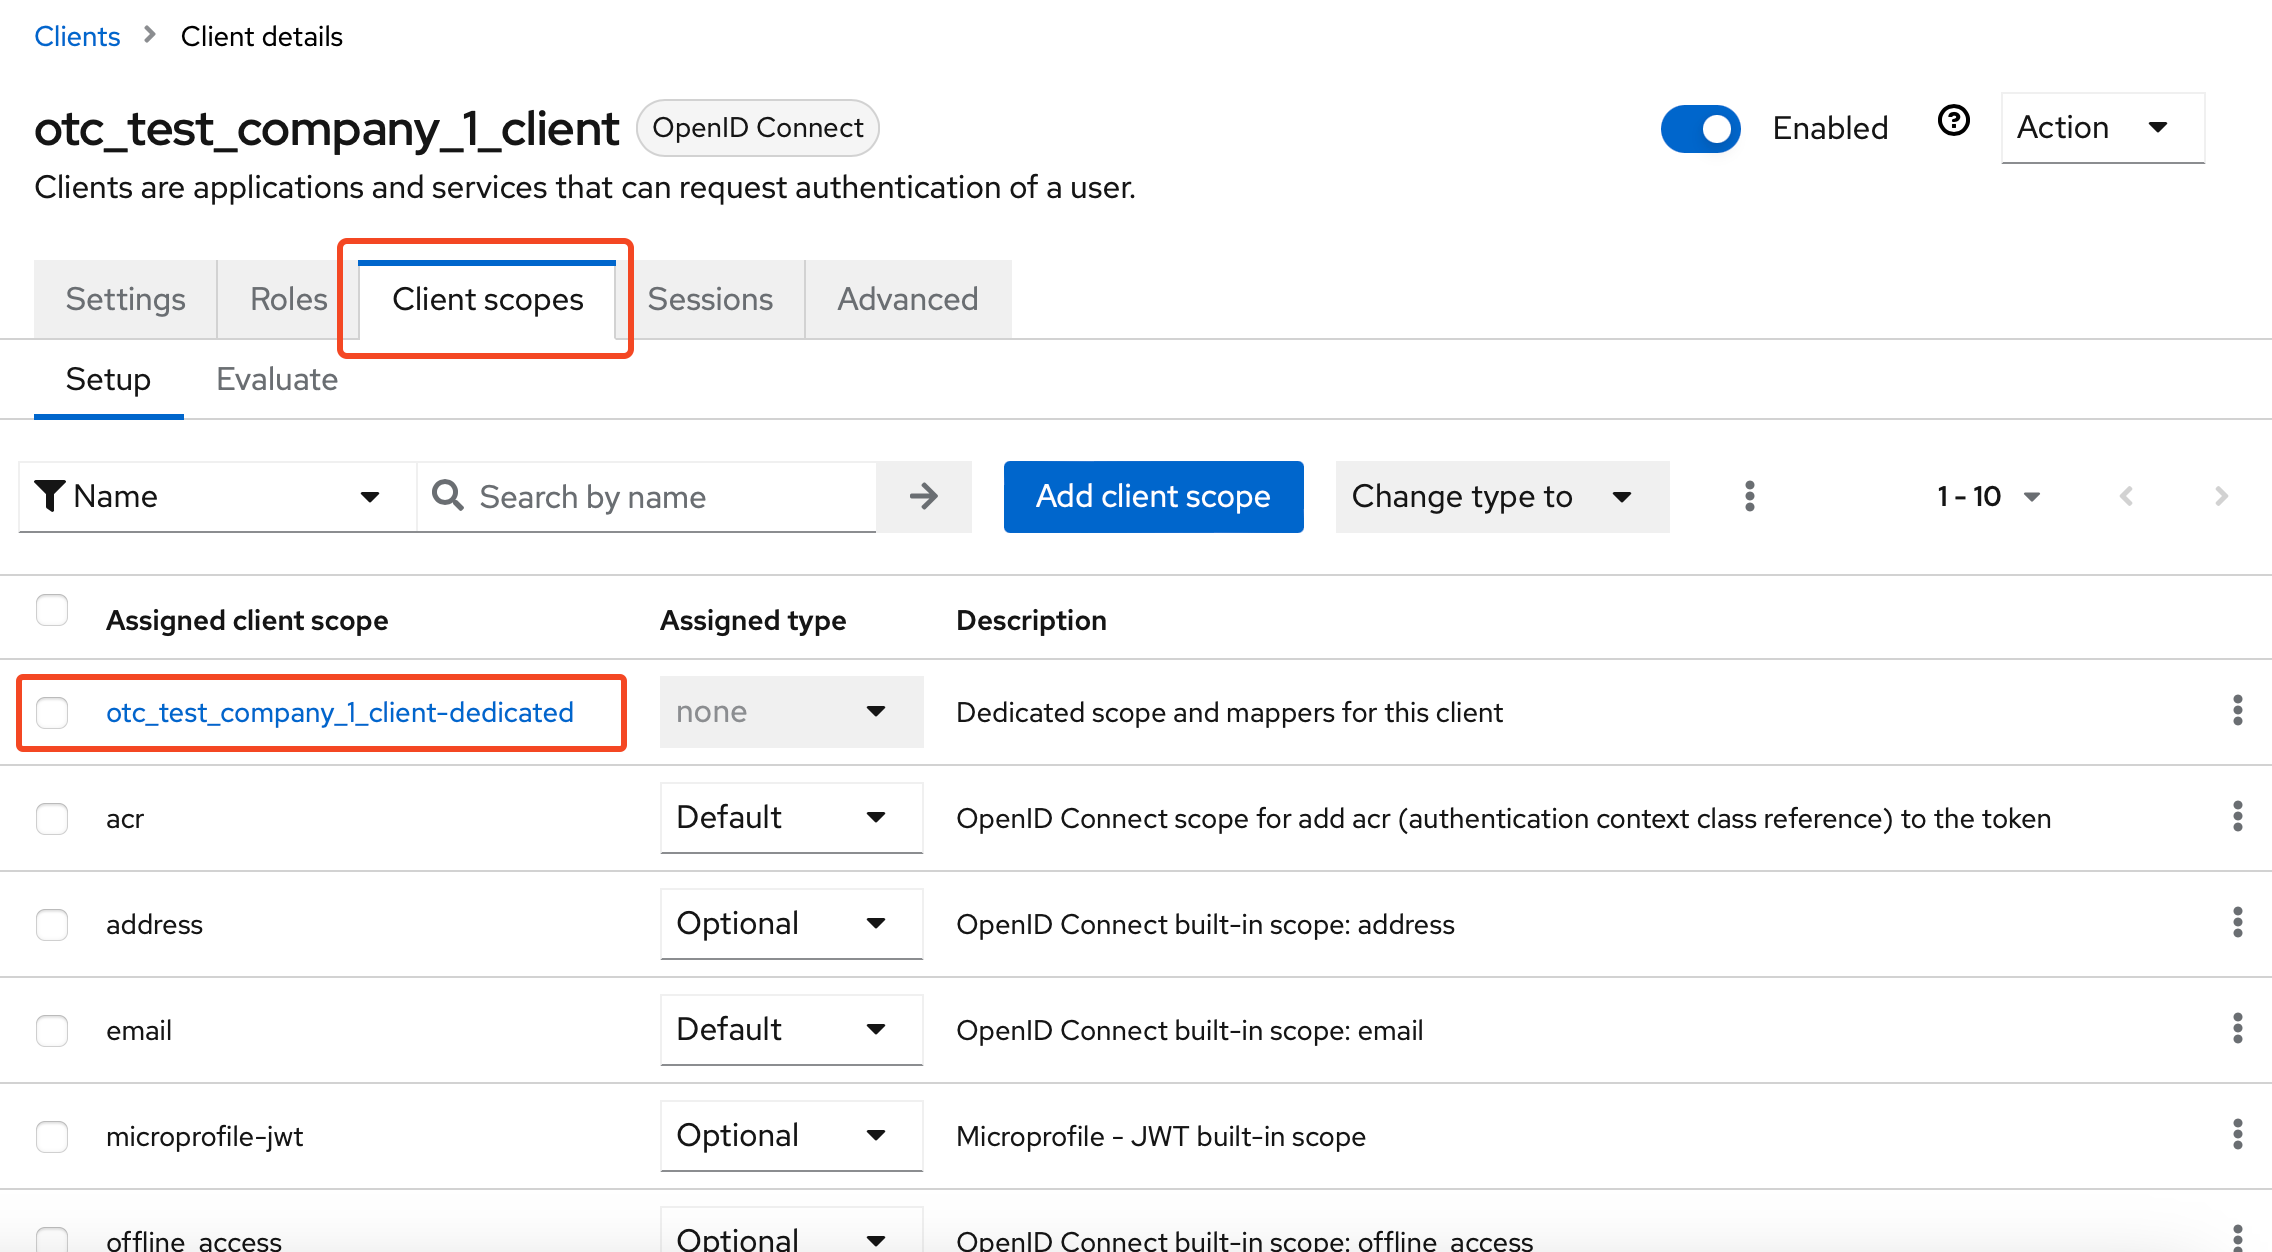
Configuring Mappers
Open the management console of the Client you just created, and navigate to the Client scopes tab. Click on the list
item with the name: otcac_test_company_1_client-dedicated:
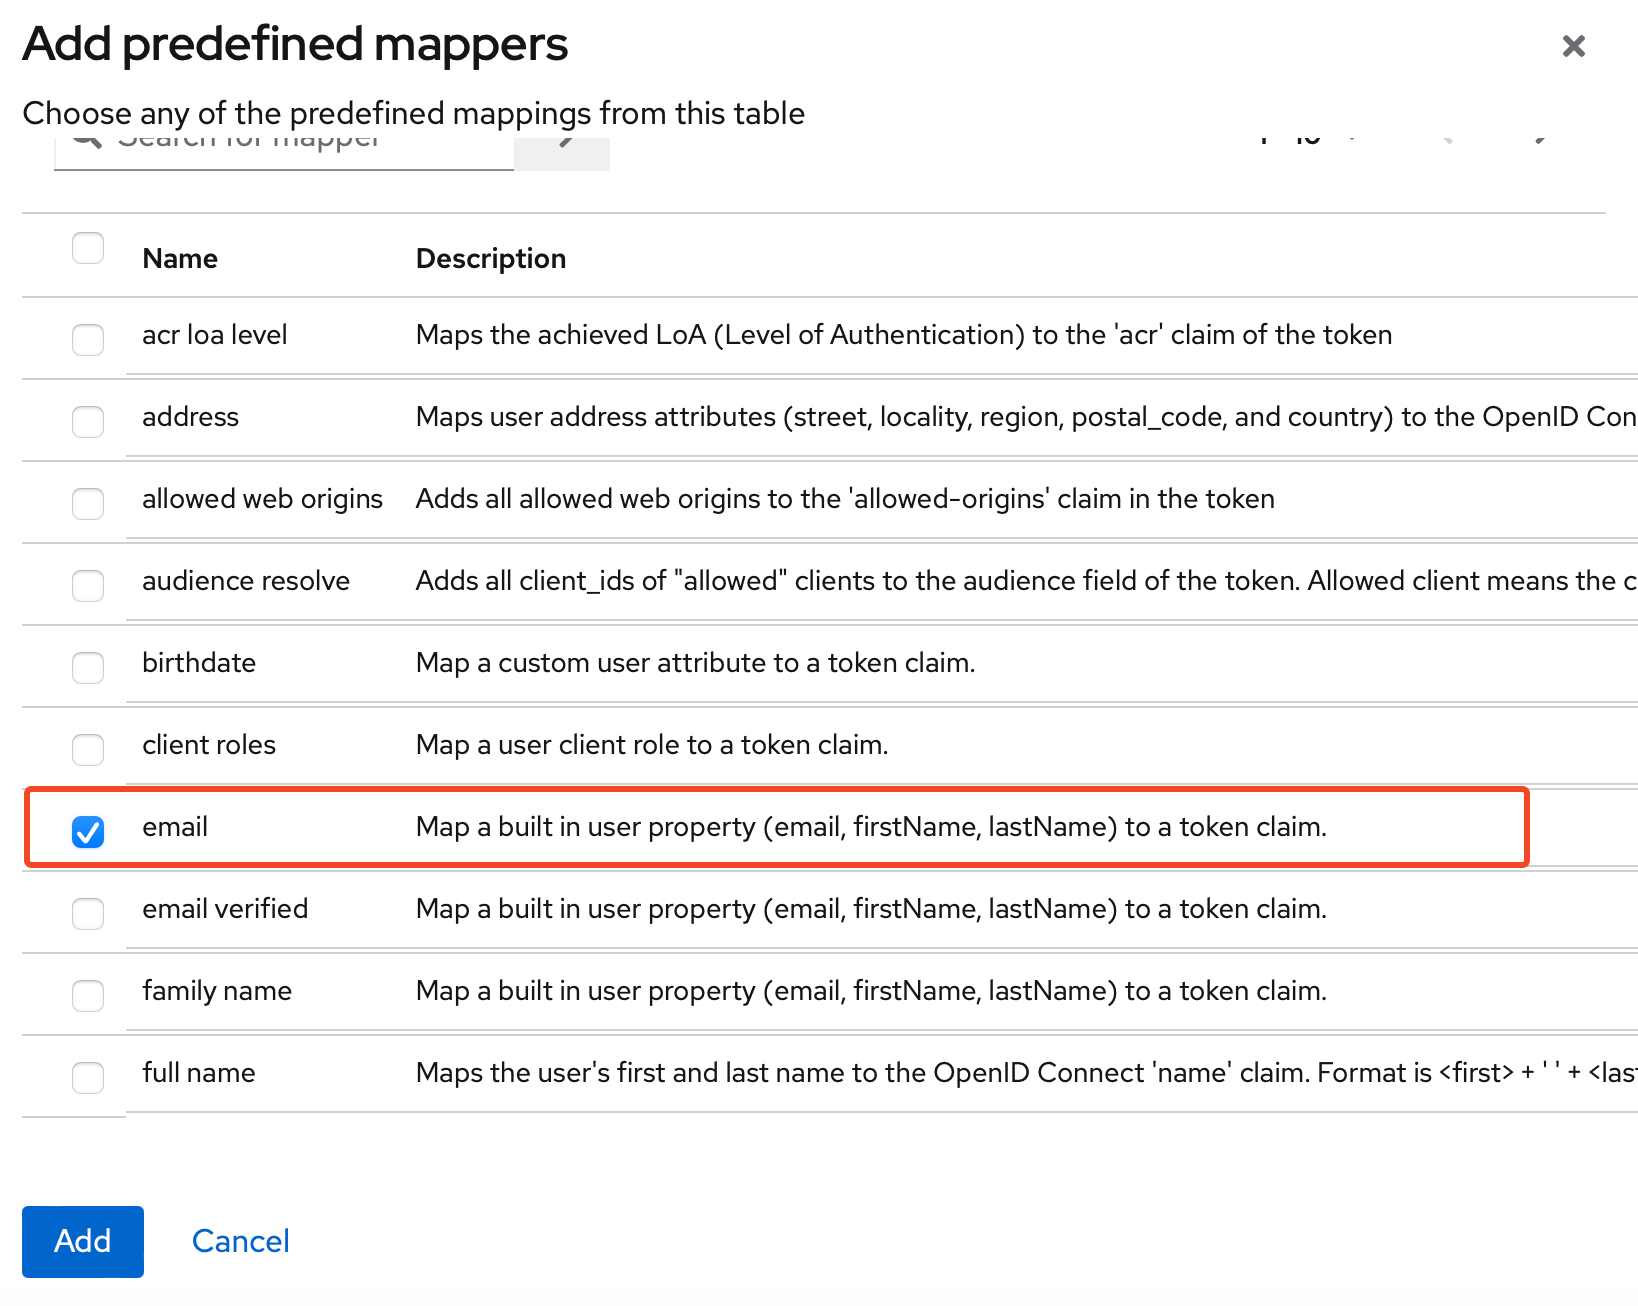
Now we need to add some mappers. We will first add one of the predefined ones:
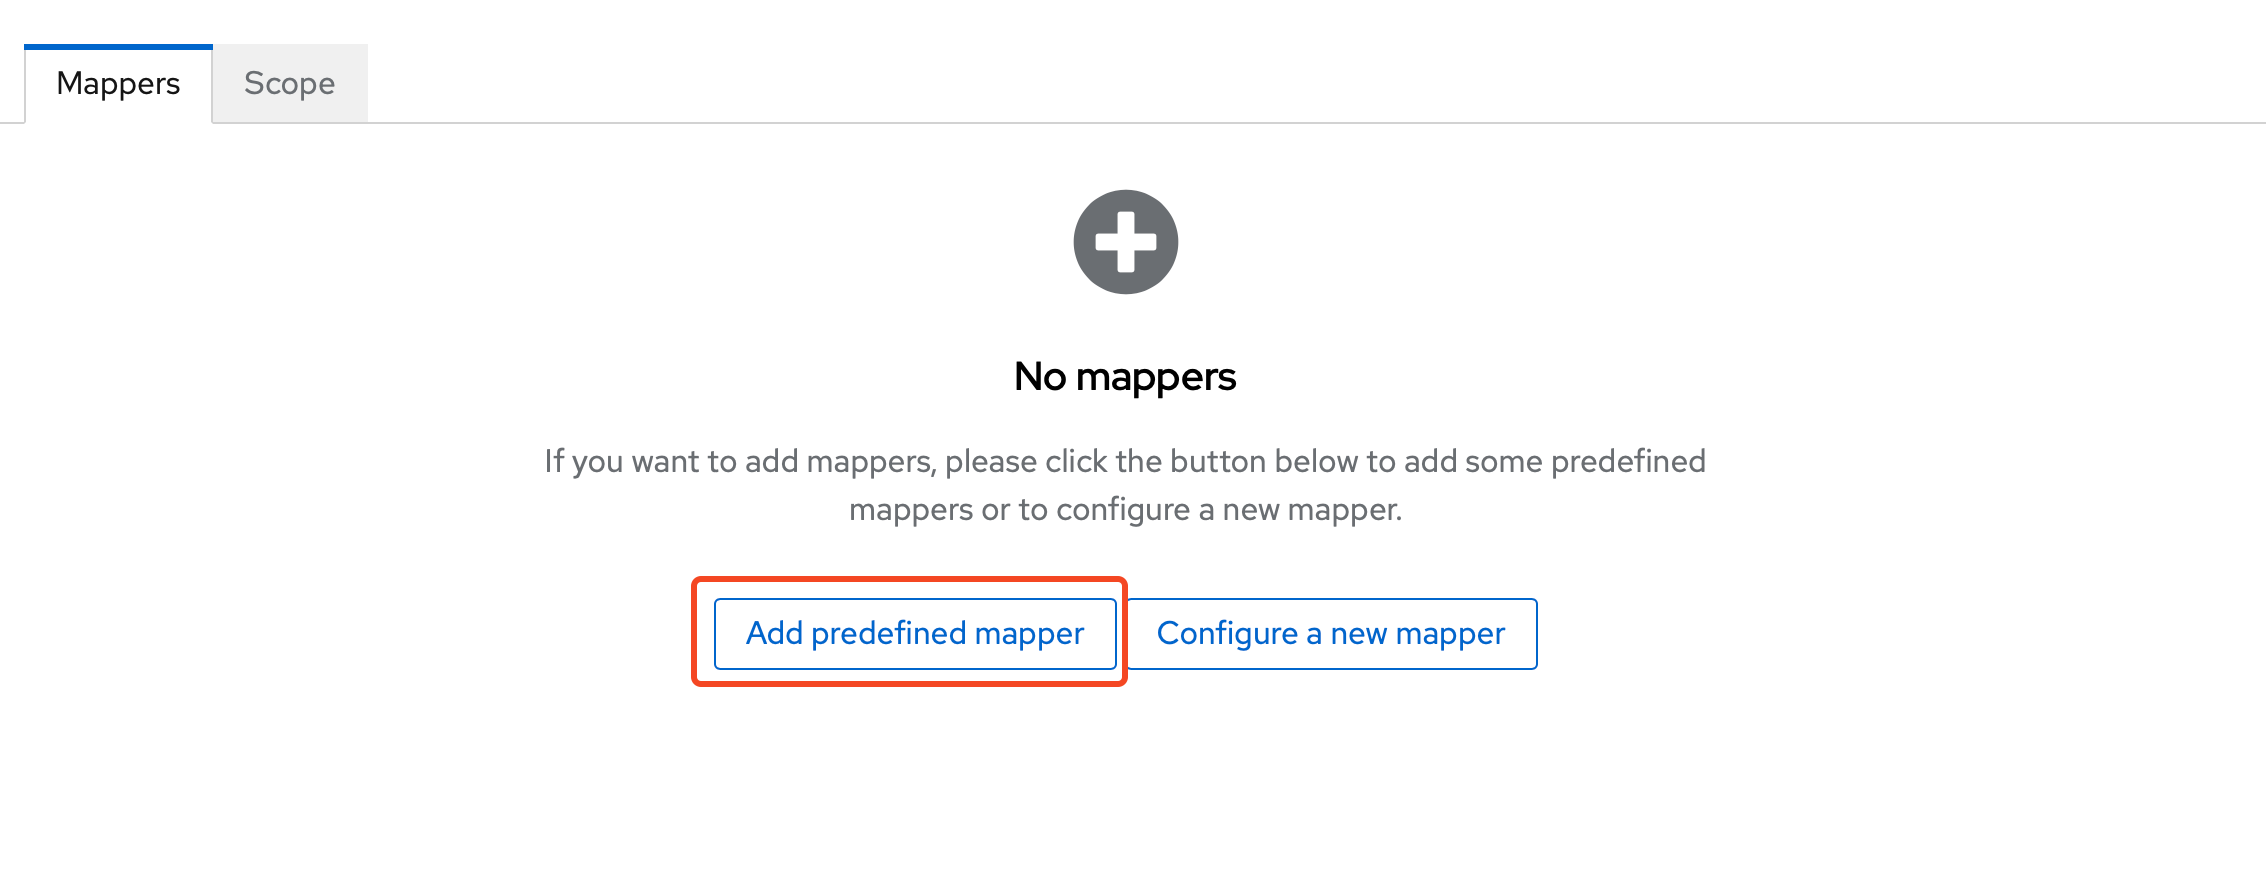
and from the list choose email:
Next we need to add a group membership mapper. Click Add mapper -> By Configuration:
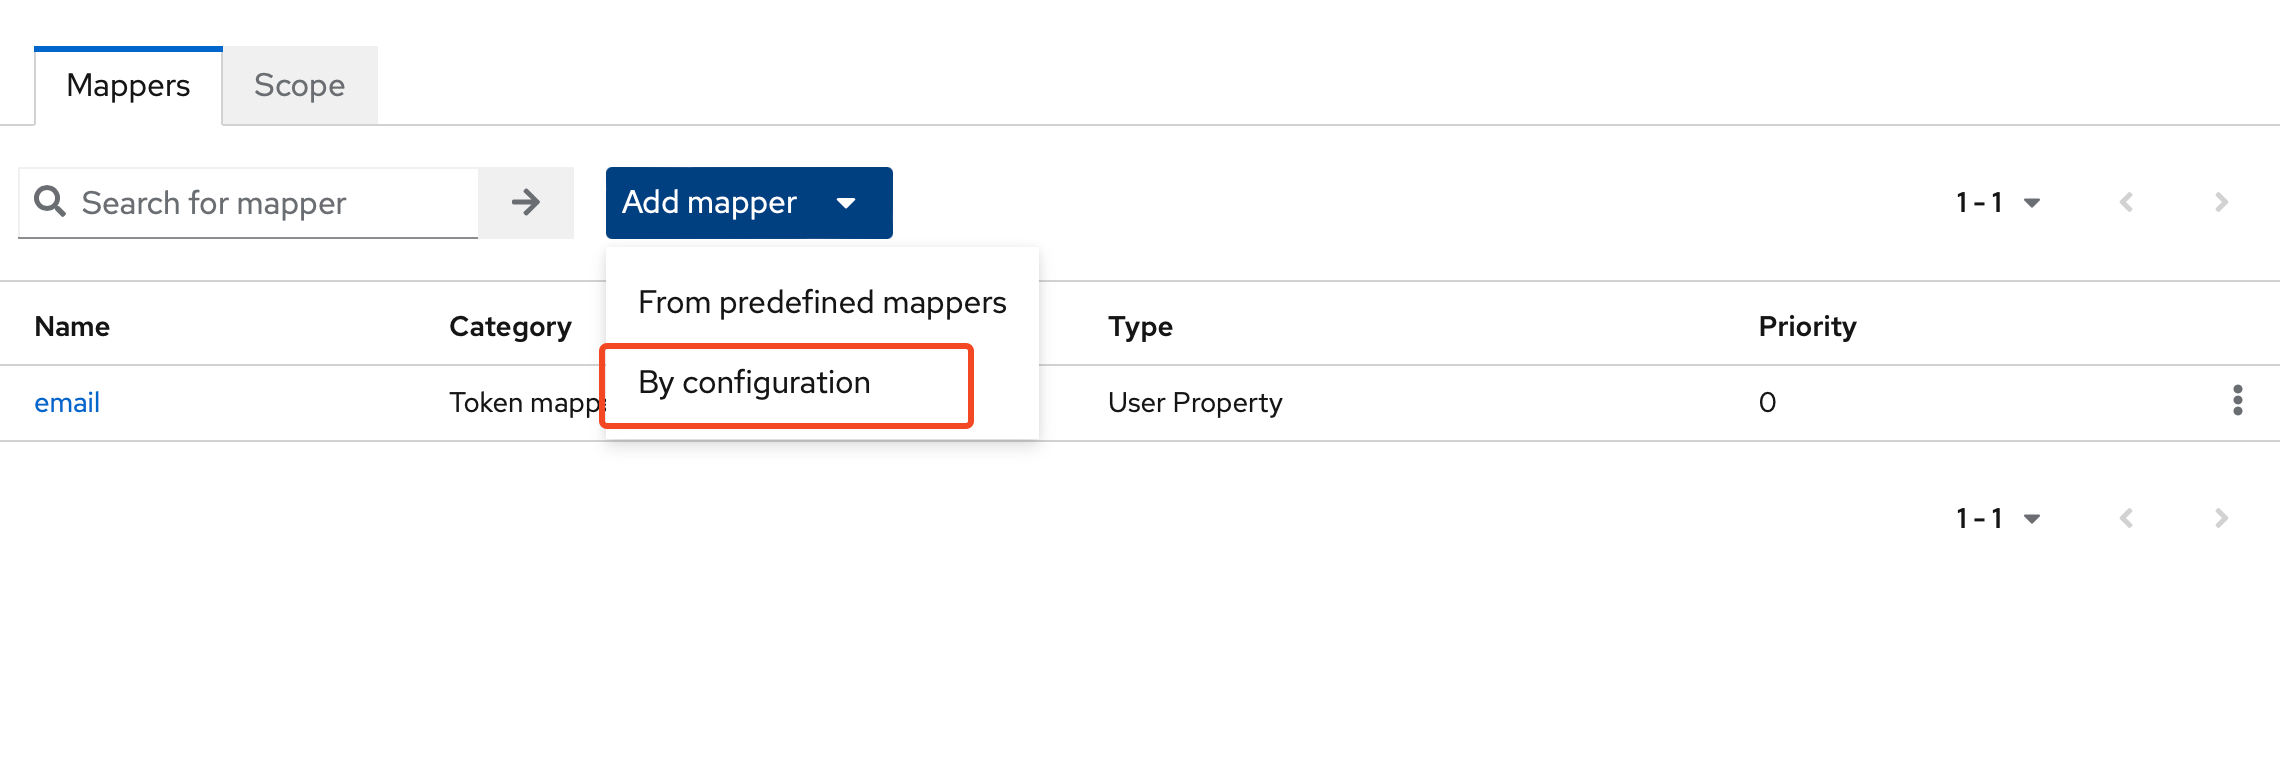
and from the list choose Group Membership:

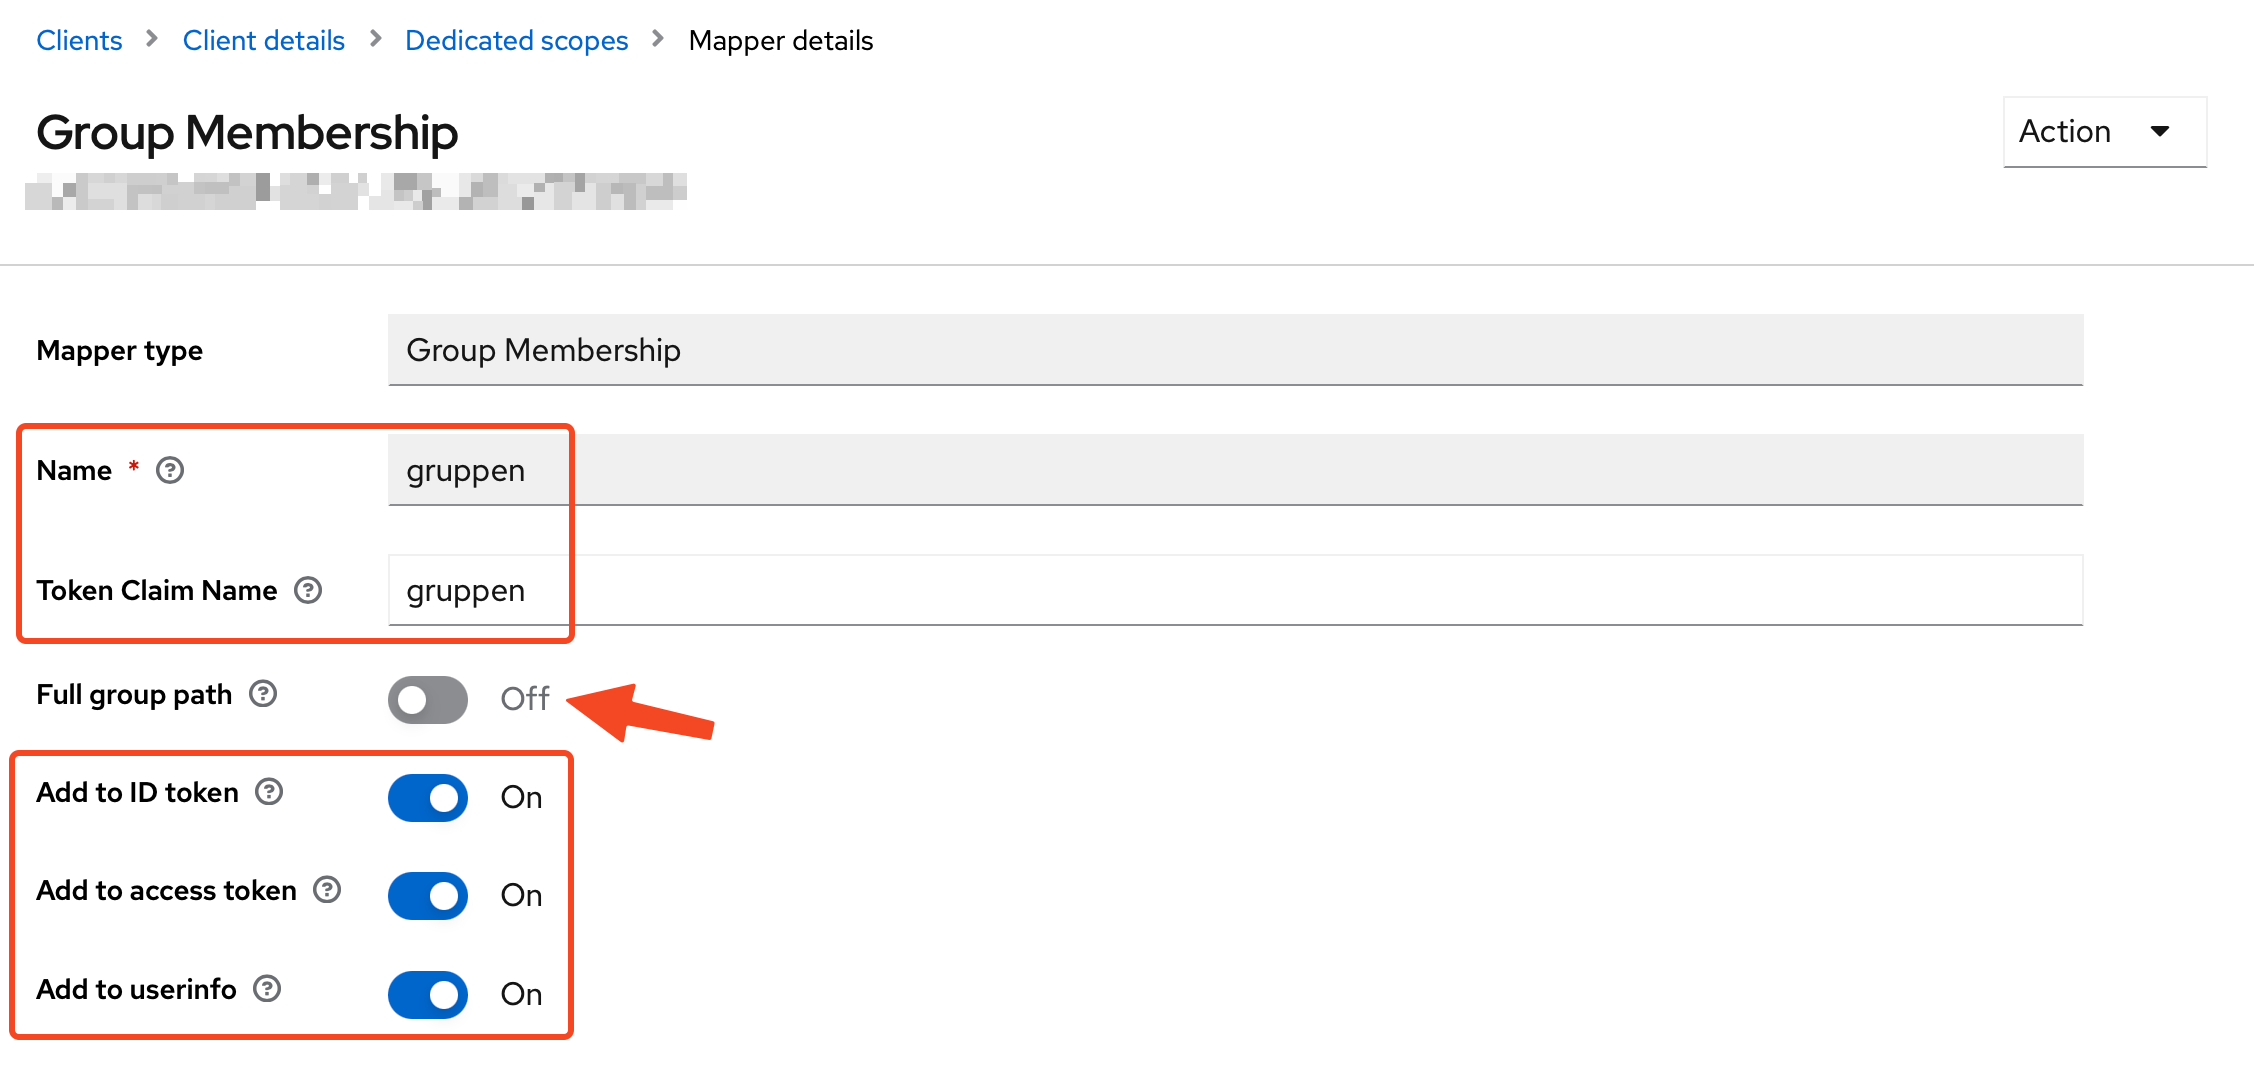
Open the configuration of the mapper. Insert a mapper and token name as gruppen. The token name will be used in the
OTC Conversion Rules. Disable the Full group path option:
Get OpenID Endpoint Configuration
Open Realm Settings and click on OpenID Endpoint Configuration:
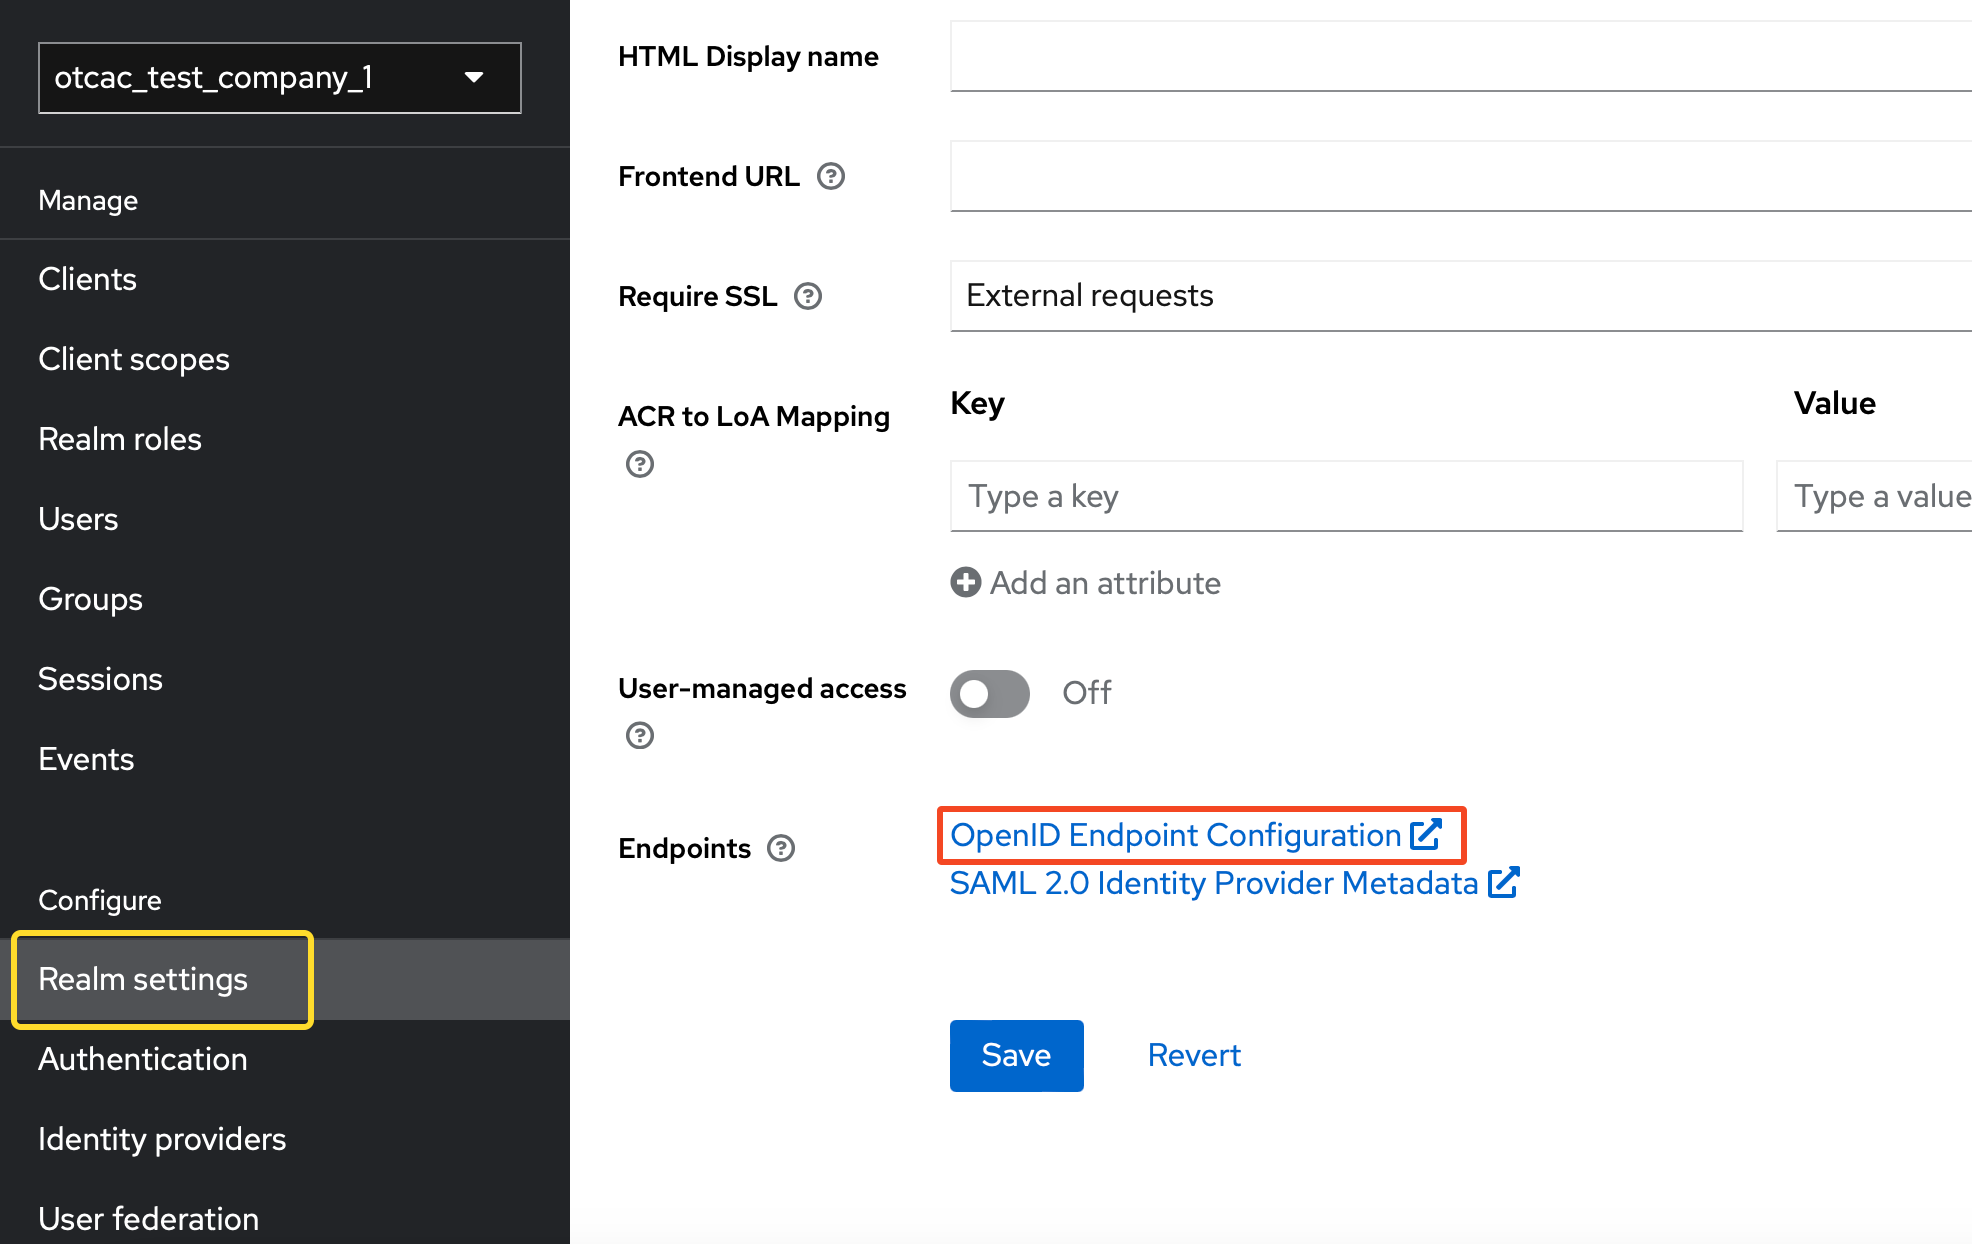
You will be redirected to web page rendering, as JSON, all the endpoints and the current configuration of your realm:

It is recommended to keep this web page open in a separate tab or screen, because we are going to need to grab some values from it, for our the next steps.
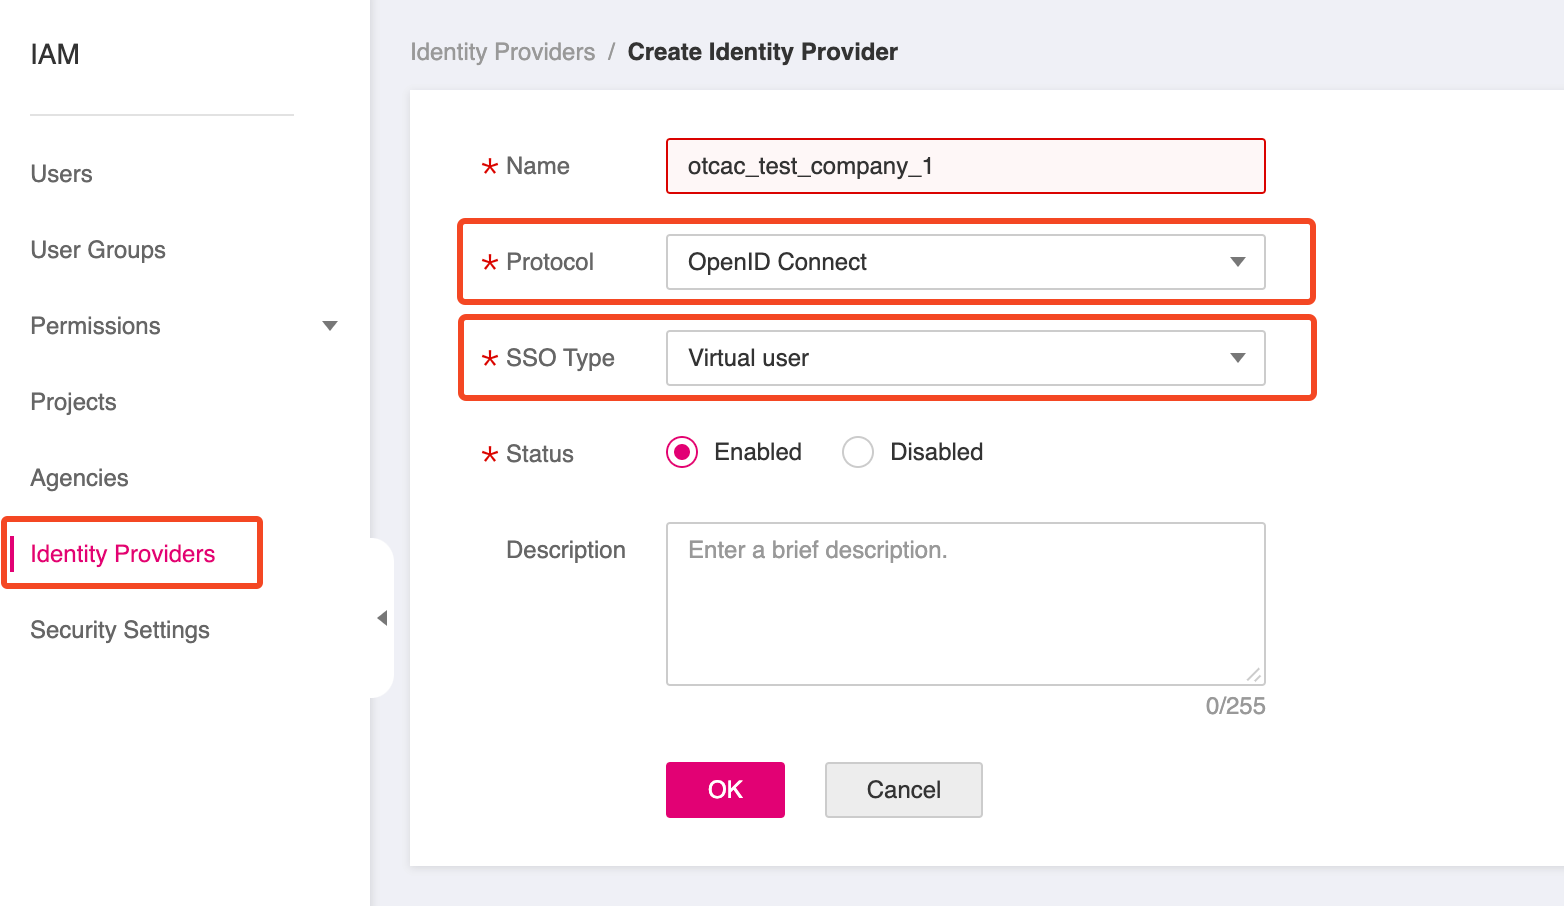
Creating a new IAM Identity Provider
For this step we will change to T Cloud Public Console and particularly to IAM and Identity Providers. Create a new
one, and set Protocol to OpenID Connect, SSO Type to Virtual User and Status to Enabled:
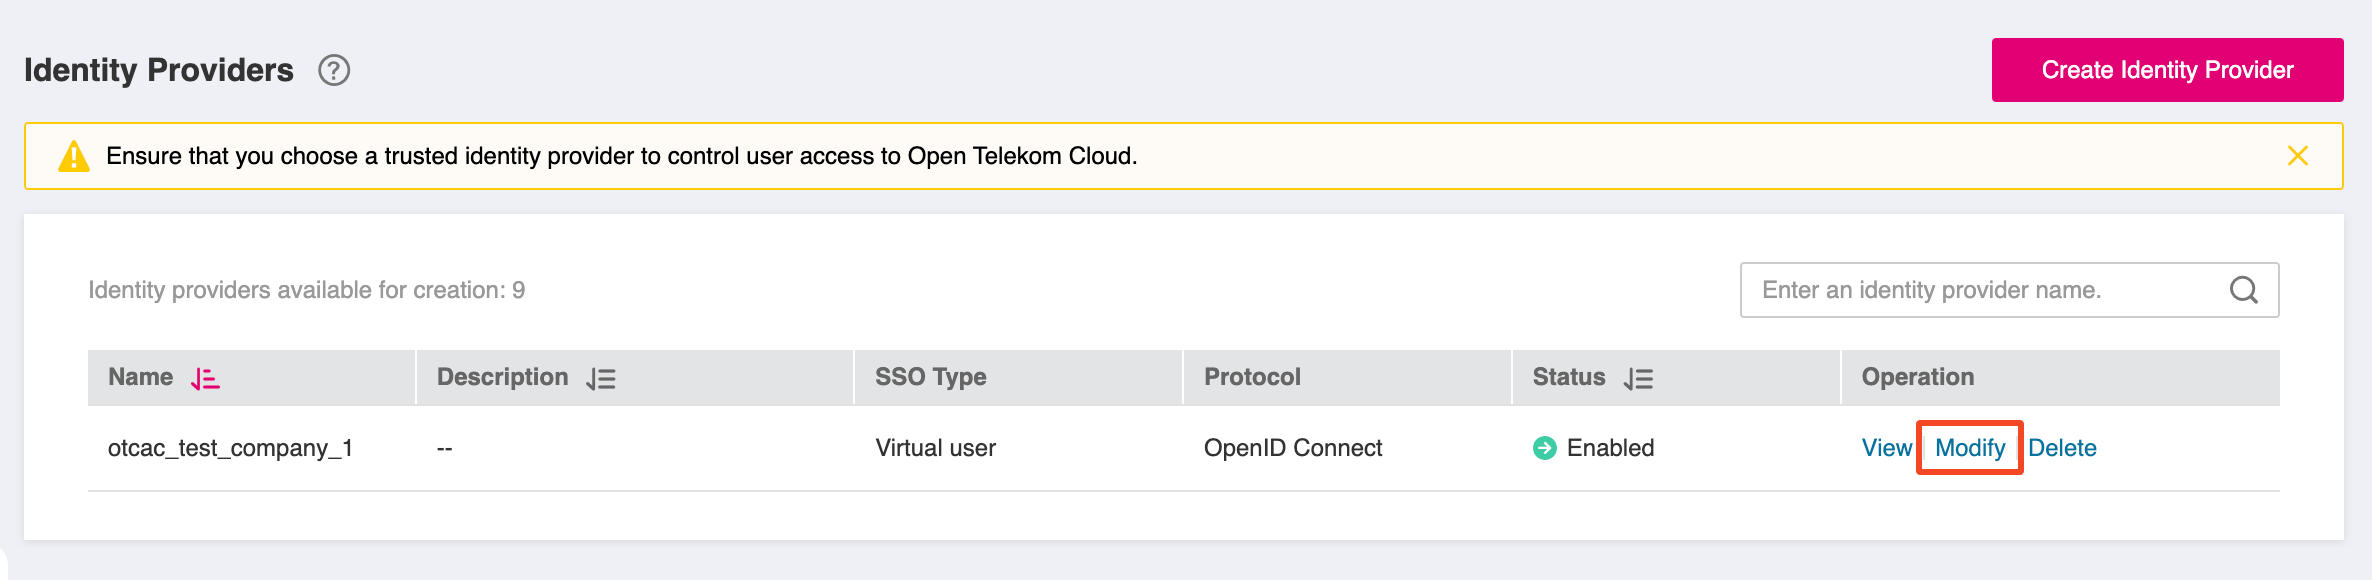
Configuring the IAM Identity Provider
Find your newly created provider in Identity Providers list and click Modify:
Set the following values:
- Access Type: Programmatic access and management console access
- Client ID: The id of your client as defined in Keycloak (in this example is
otcac_test_company_1_client) - Authorization Endpoint: copy the value from key authorization_endpoint of the OpenID Endpoint Configuration JSON output
- Response Mode:
form_post - Signing Key: open in a new tab the URL address that is value of the key
jwks_uriof the OpenID Endpoint Configuration JSON output. Copy the whole output of the new page and paste it as is in the respective textbox for Signing Key.
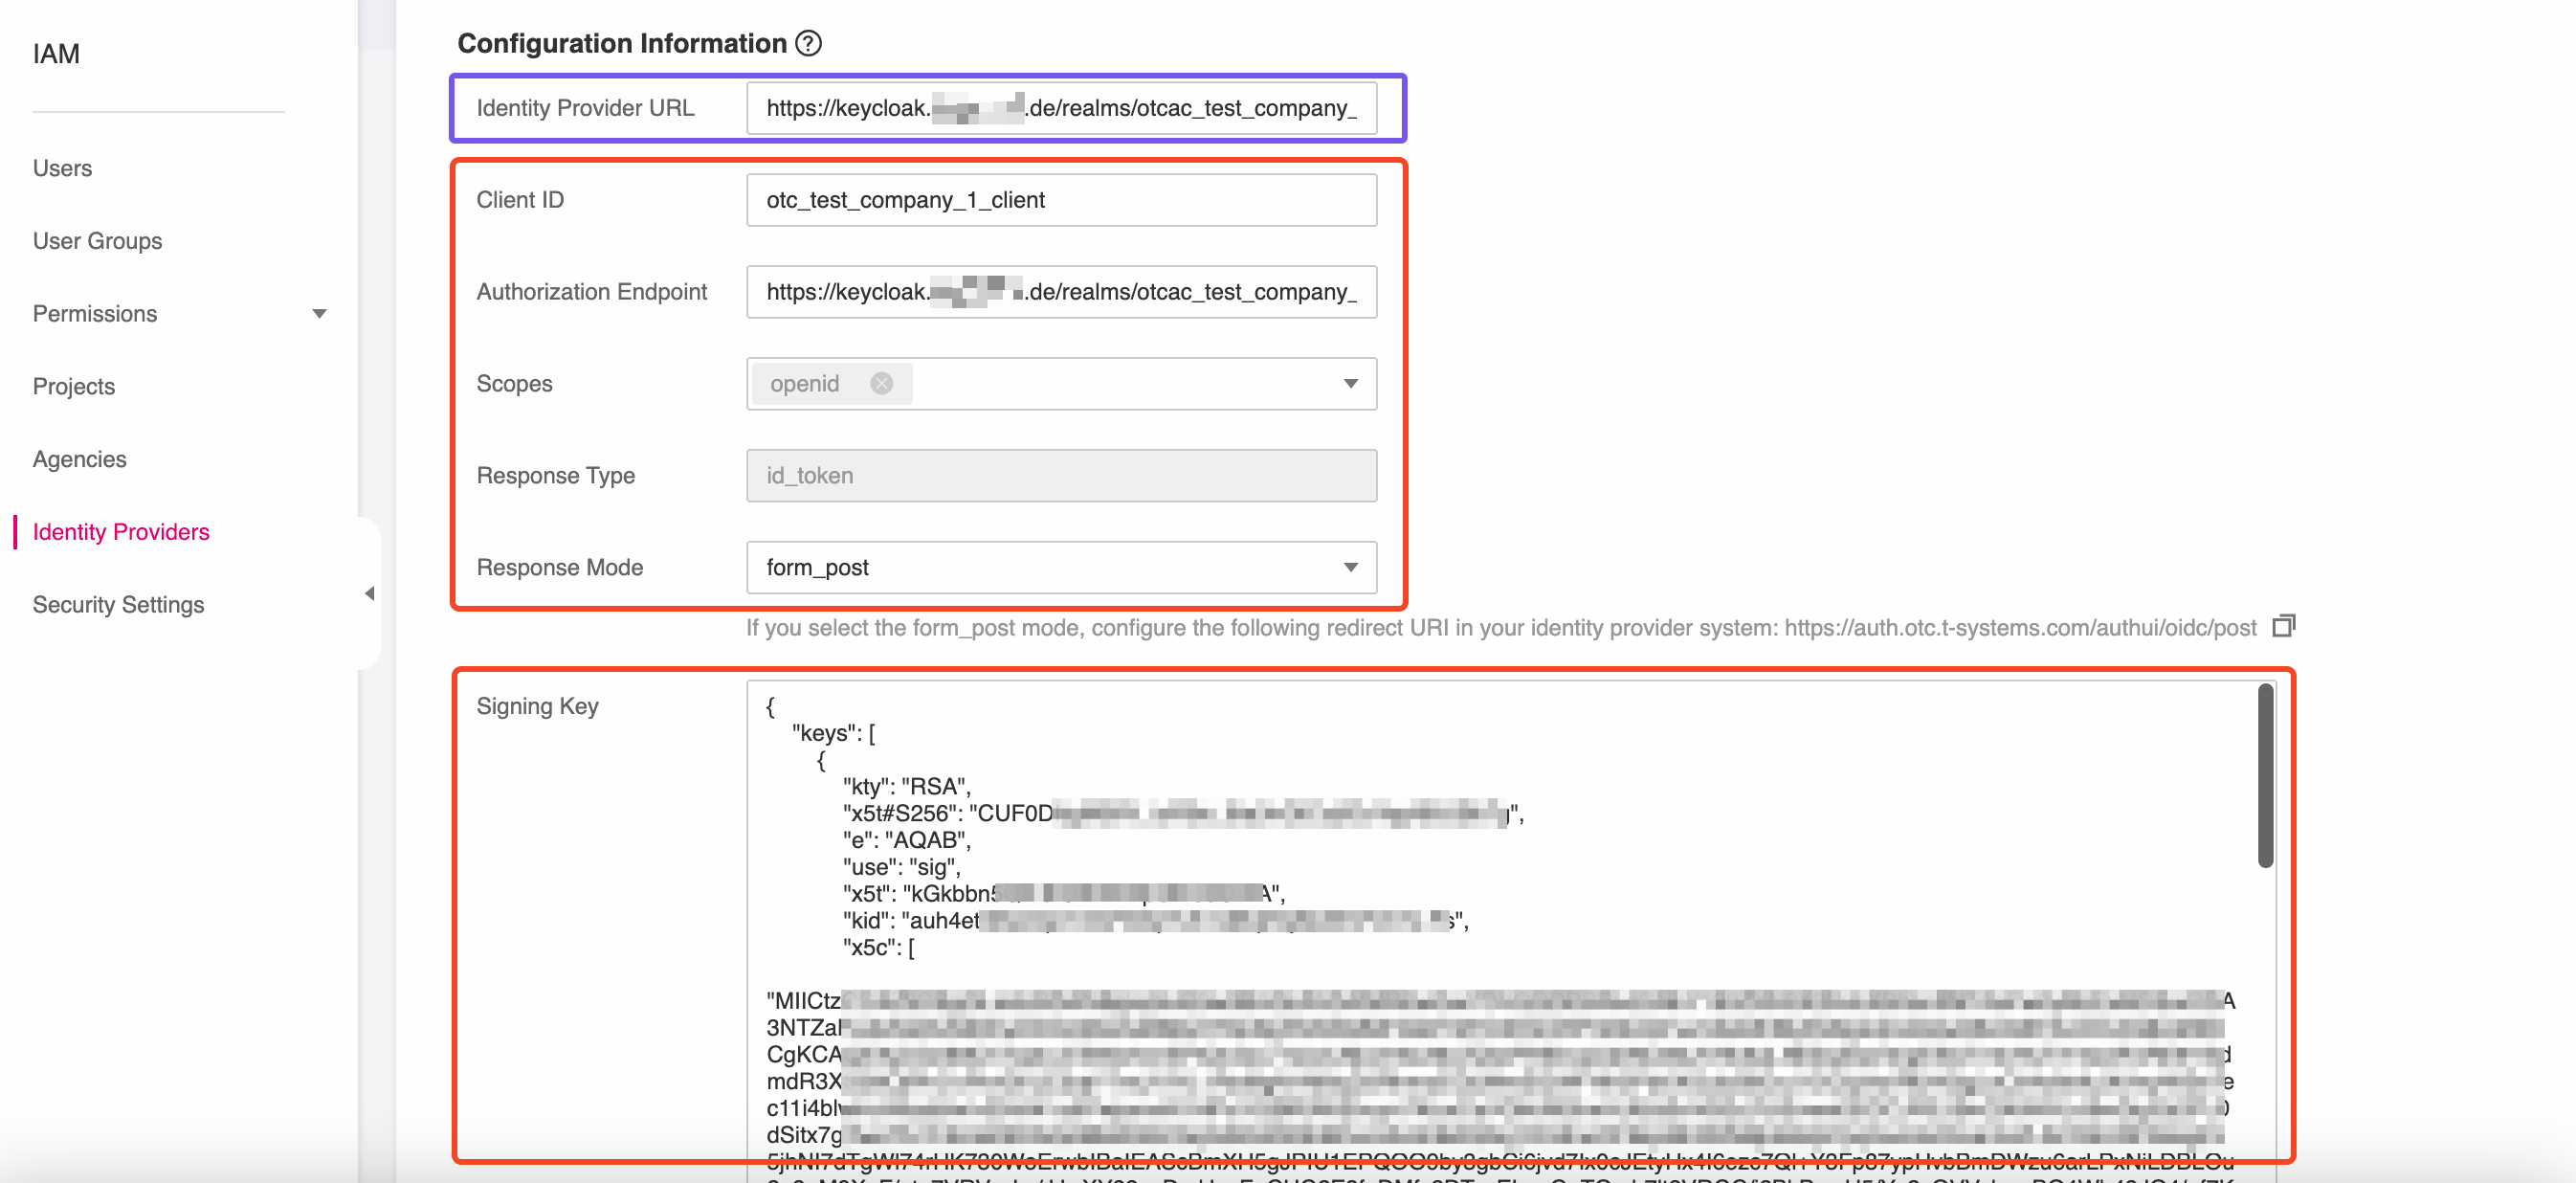
Save the changes, but before closing this panel copy the value of the Identity Provider URL because we are going to need this value in the next step of this blueprint.
Configuring Client's Access Settings
For this step we will switch back to Keycloak Administration Console, and navigate to Access Settings for our client:
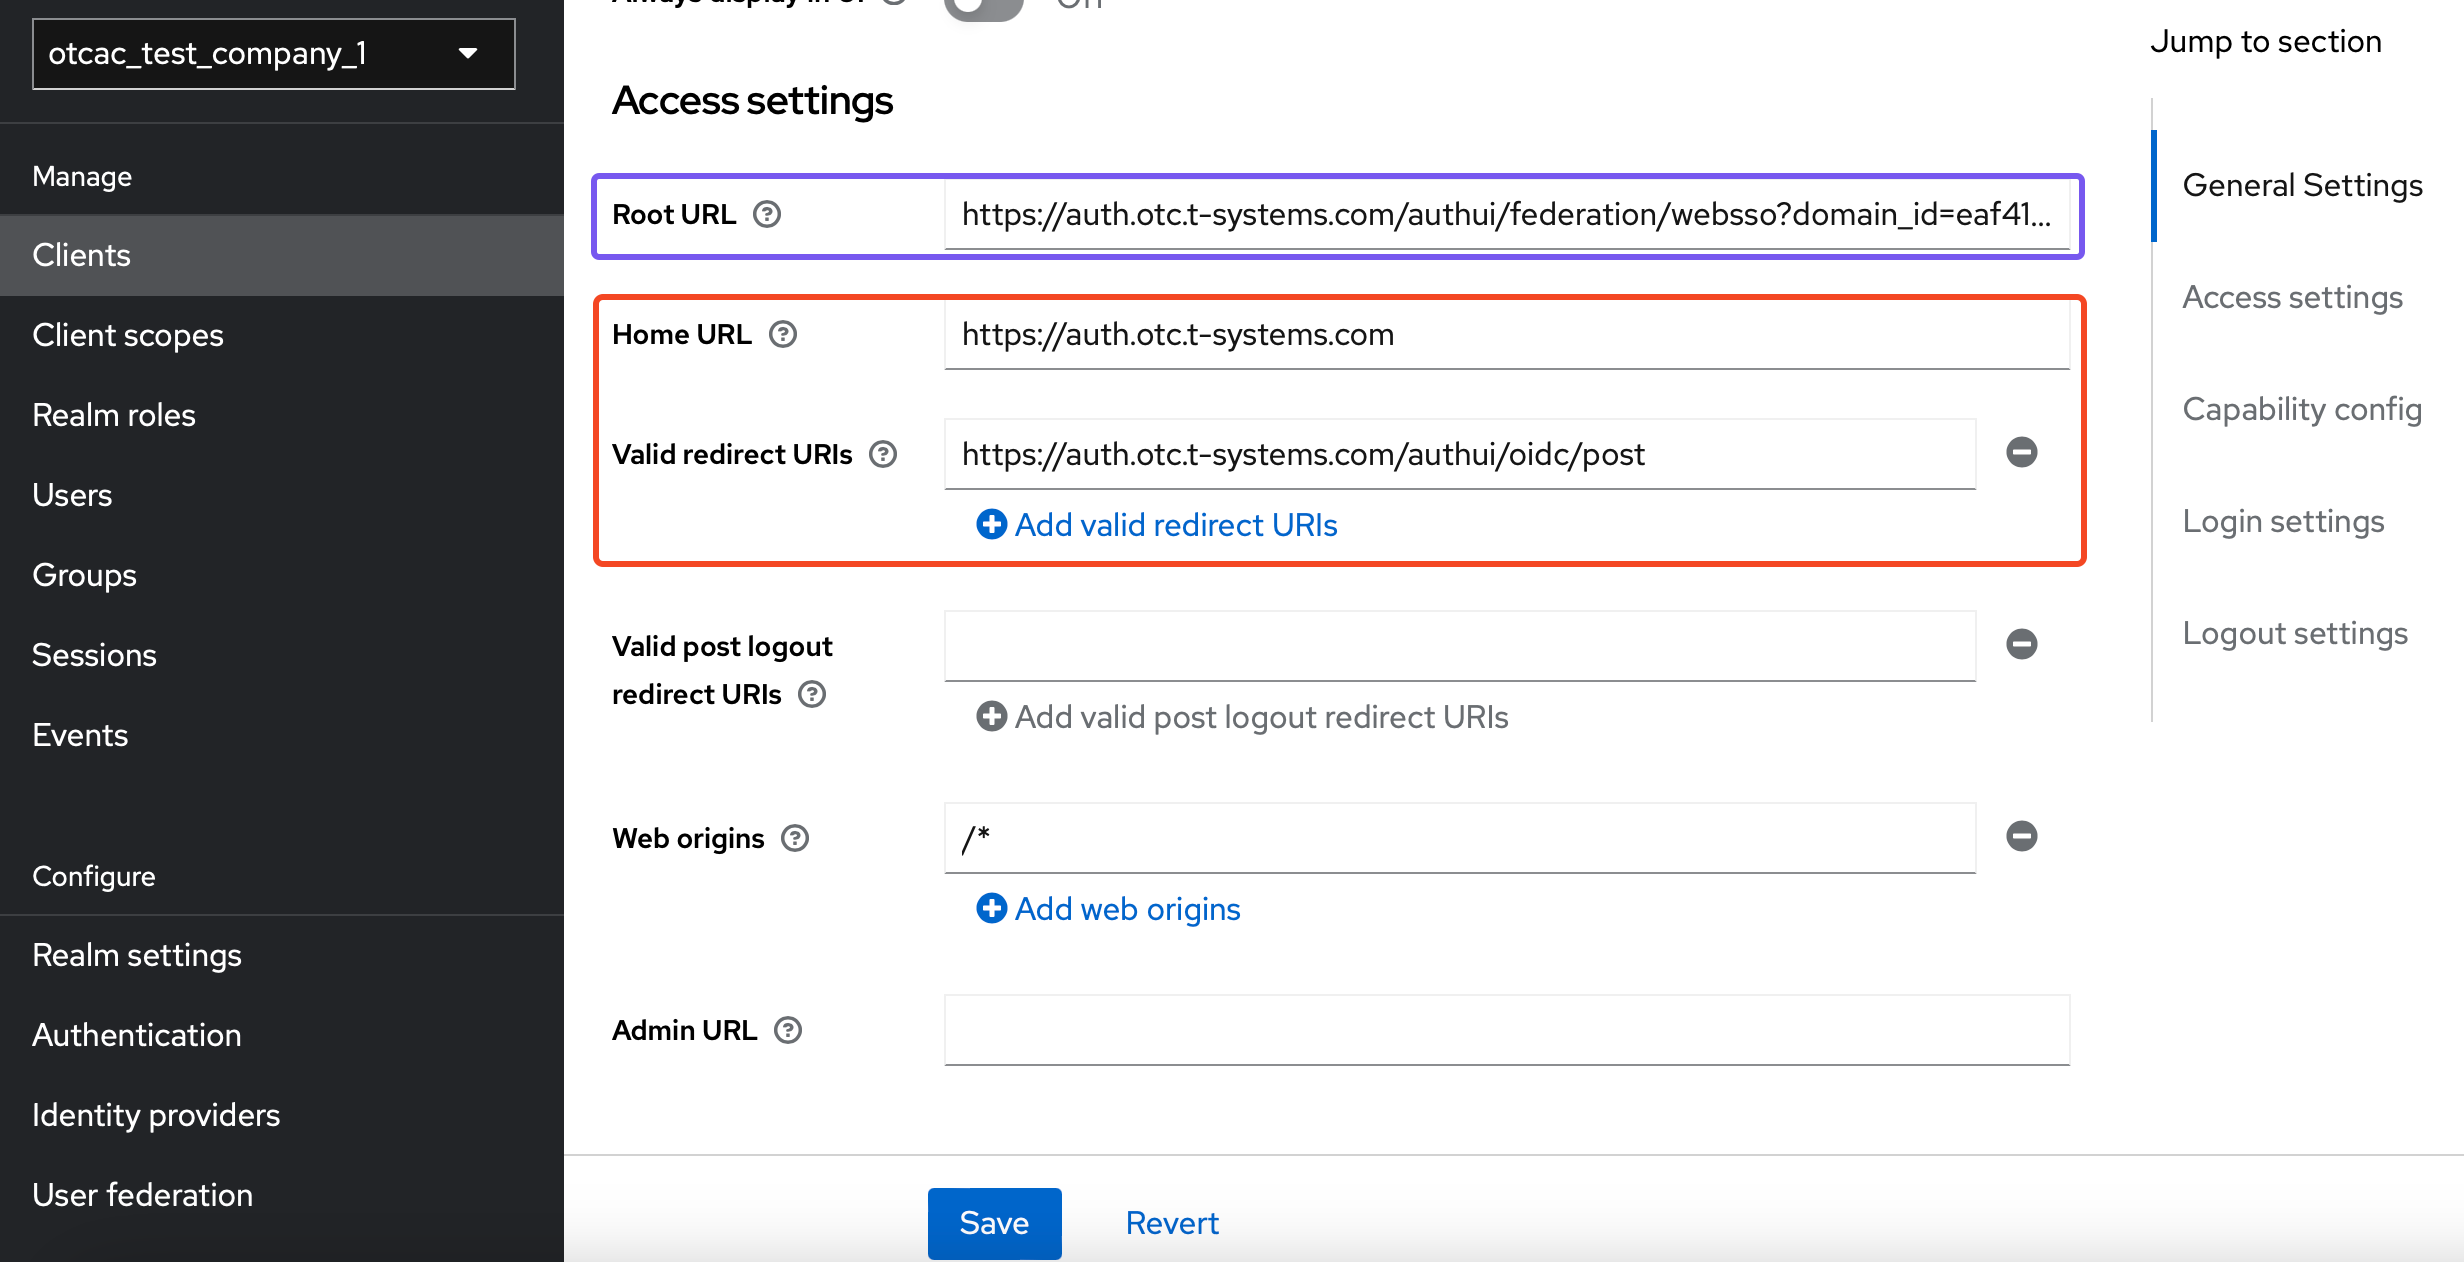
Set the following values:
- Root URL: The Identity Provider URL you copied in the previous step.
- Home URL:
https://auth.otc.t-systems.com - Valid redirect URIs:
https://auth.otc.t-systems.com/authui/oidc/post
GitHub Integration
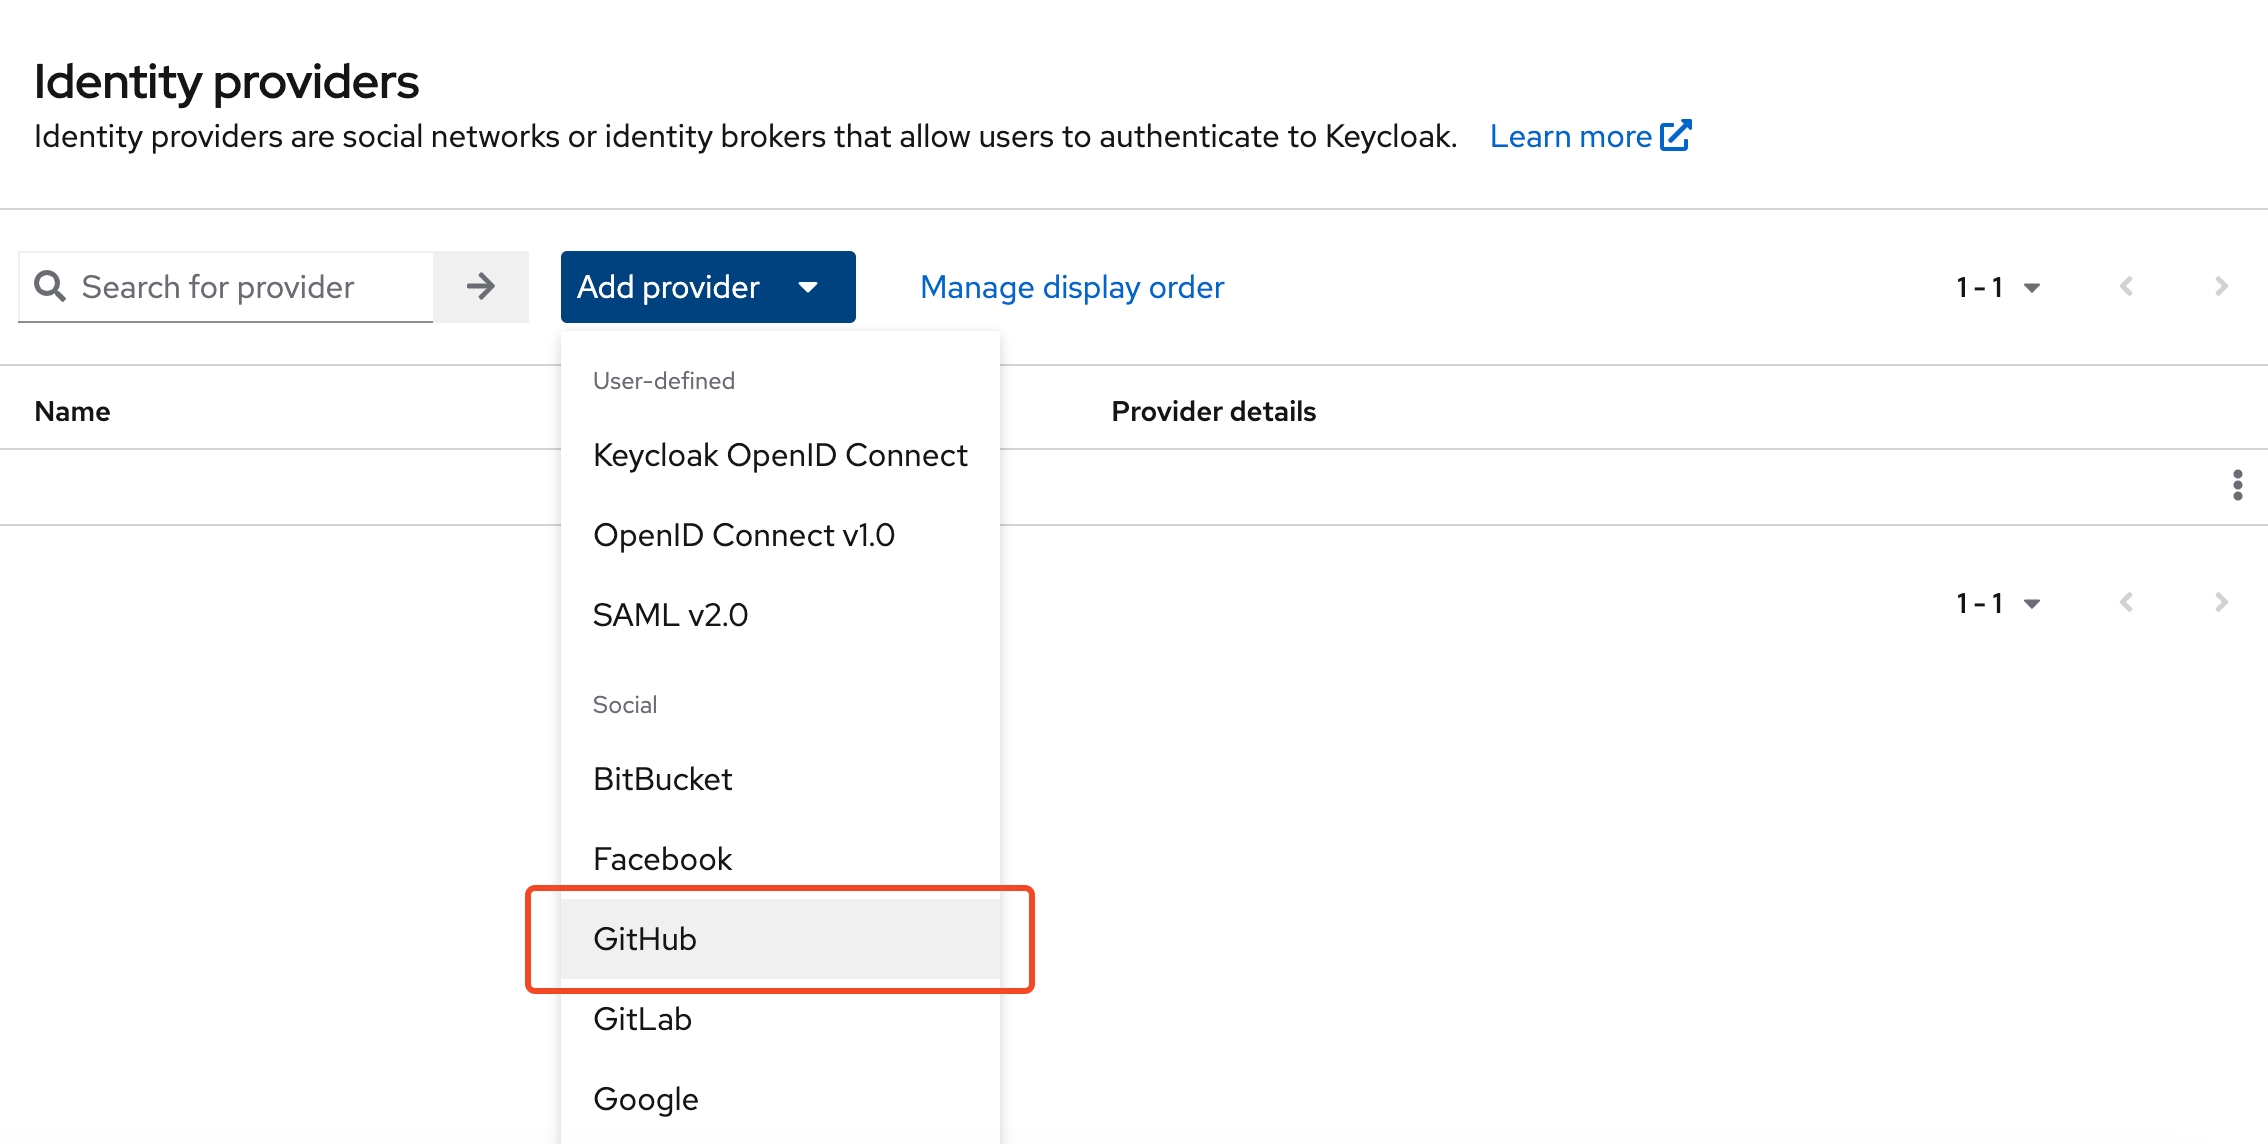
Adding GitHub as Identity Provider
Then we have to add a new Identity Provider that will allow users to authenticate using their GitHub accounts:
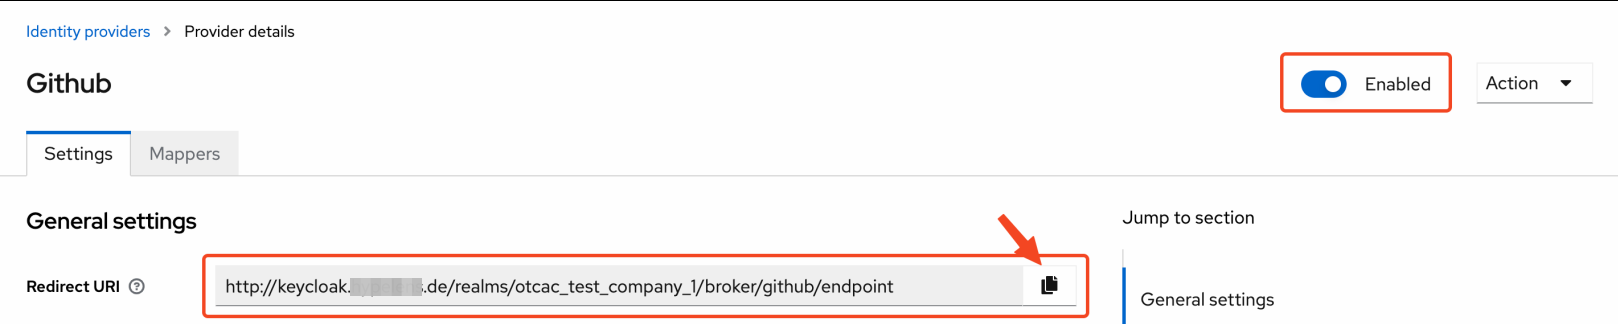
Enable the provider and copy the Redirect URI because we are going to need in the next step, that will interconnect this Keycloak realm with a GitHub OAuth application.
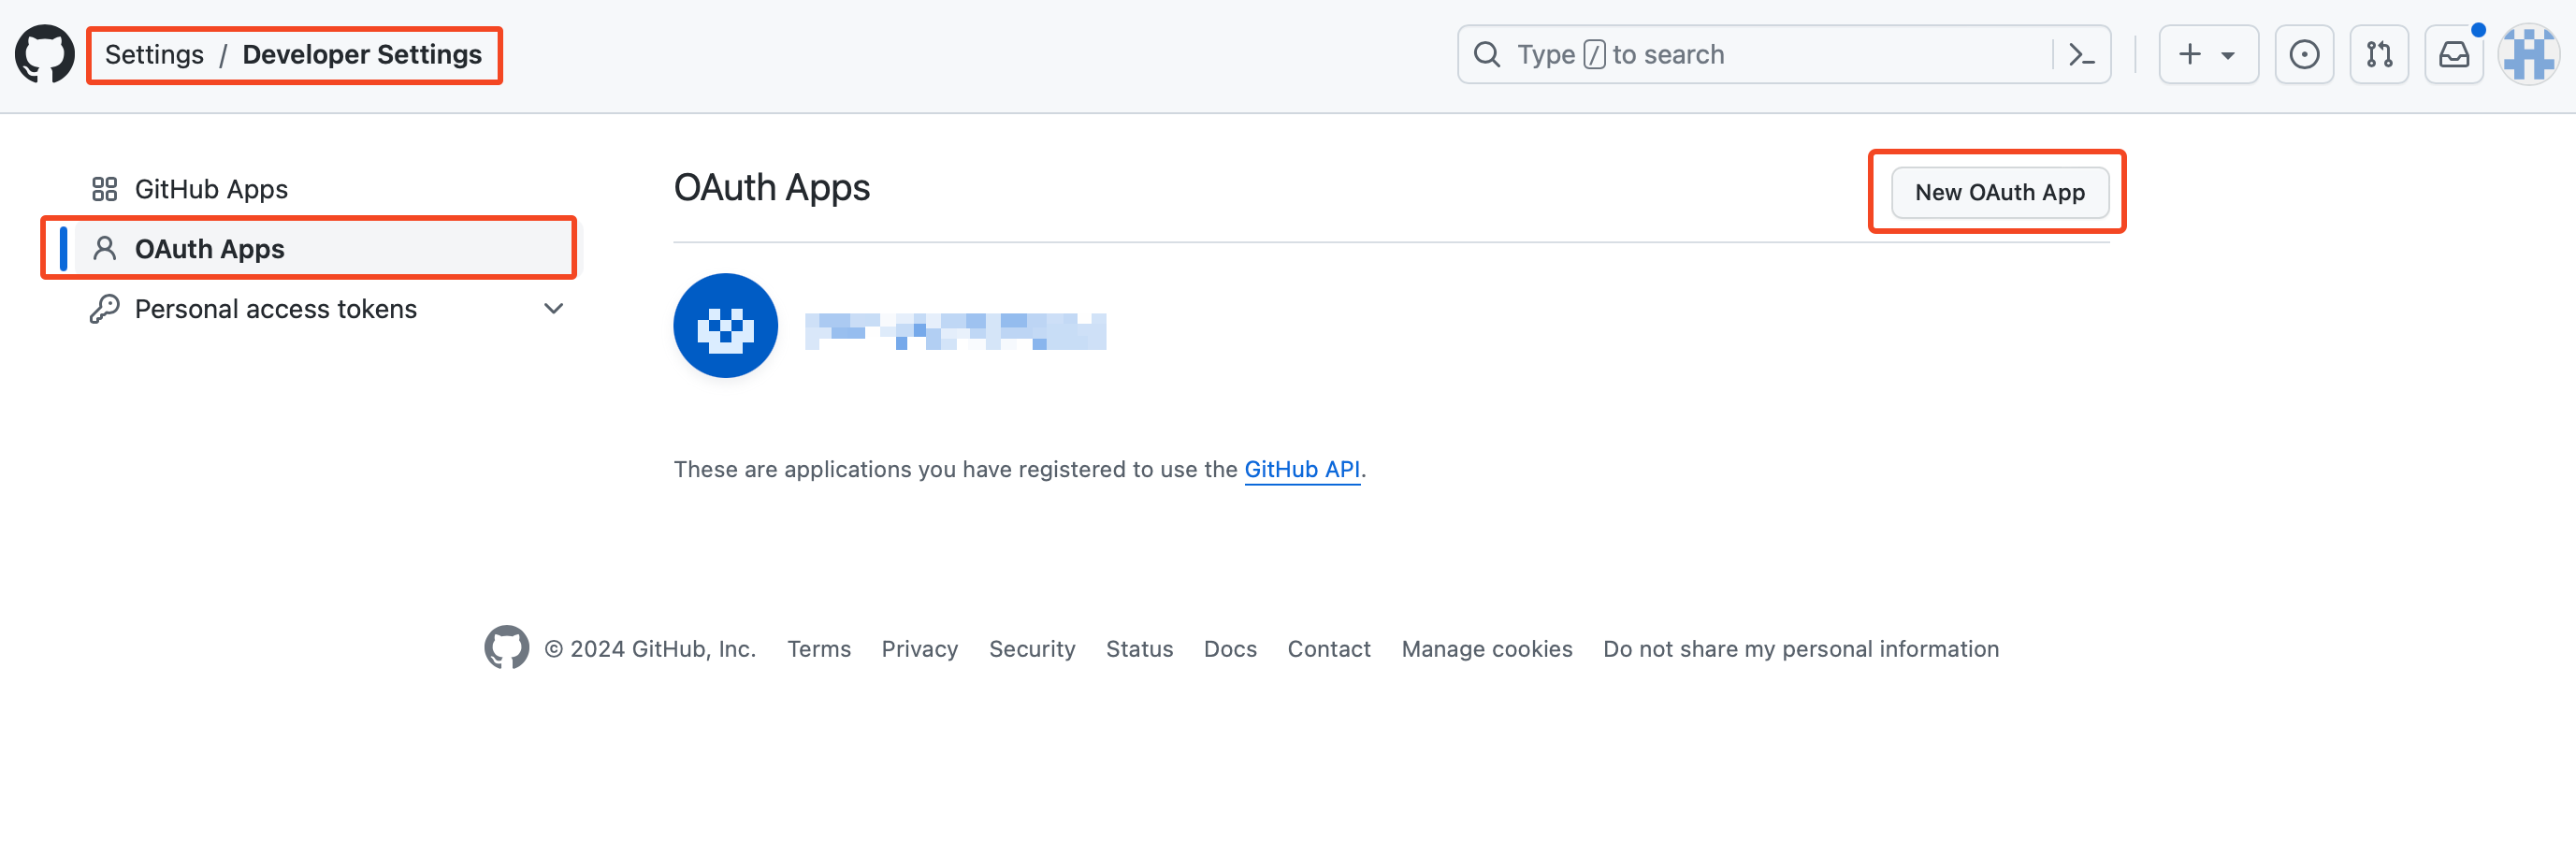
Creating new GitHub OAuth App
Open your GitHub account and find OAuth Apps under Settings -> Developer Settings and create a new app:
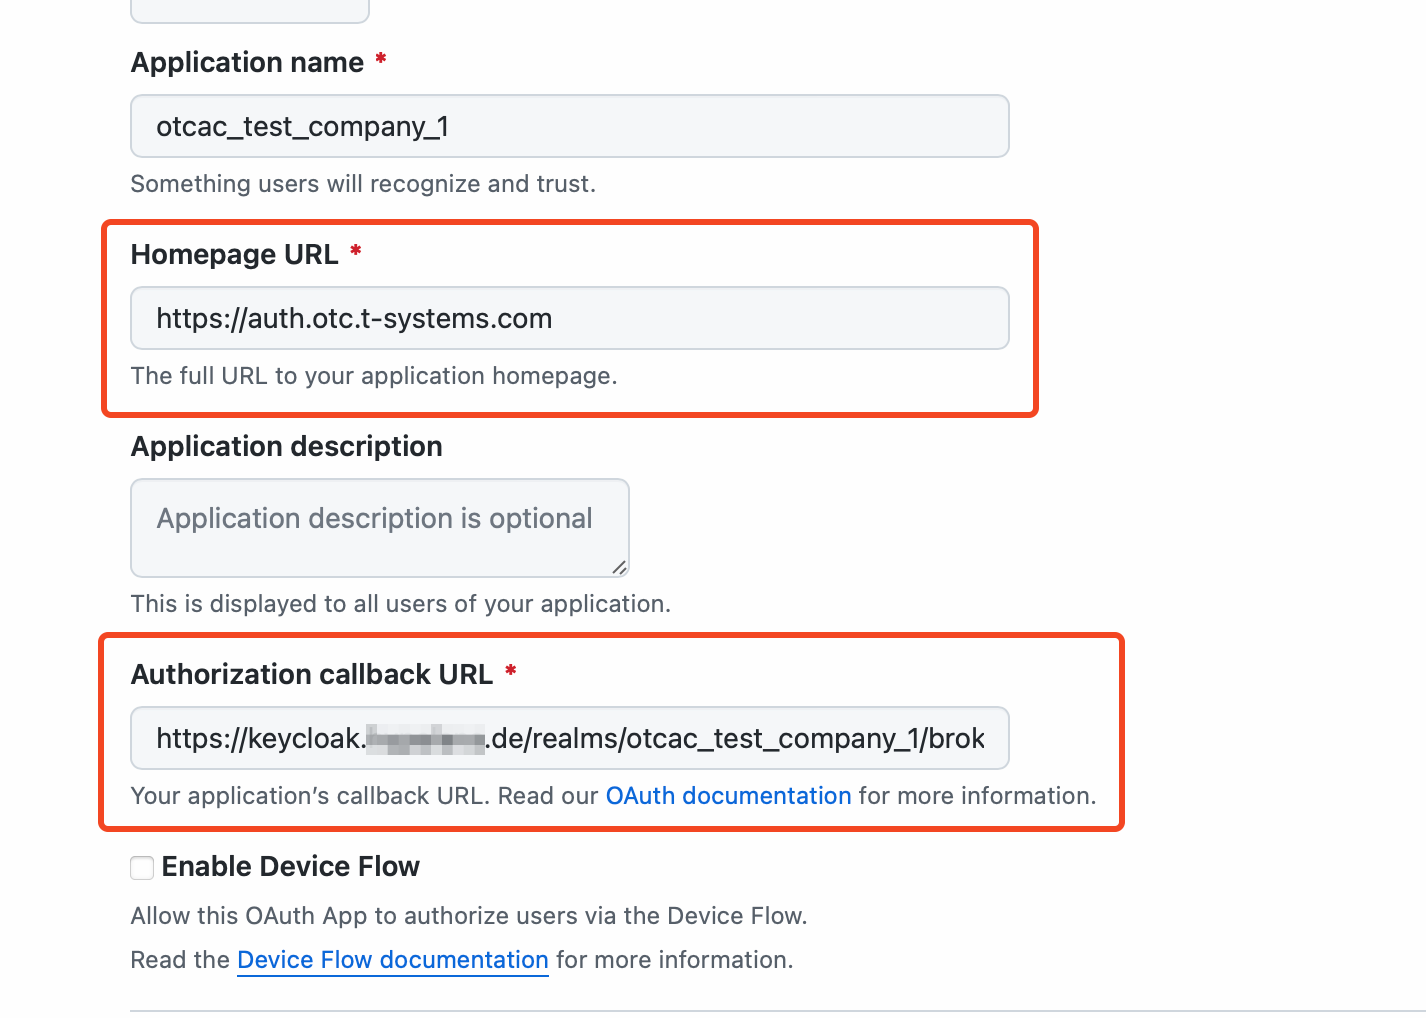
and set the following values:
- Homepage URL:
https://auth.otc.t-systems.com - Authorization call back URL: the Redirect URI we picked up from the previous step
Last piece of creating an OAuth App is to generate a client secret:
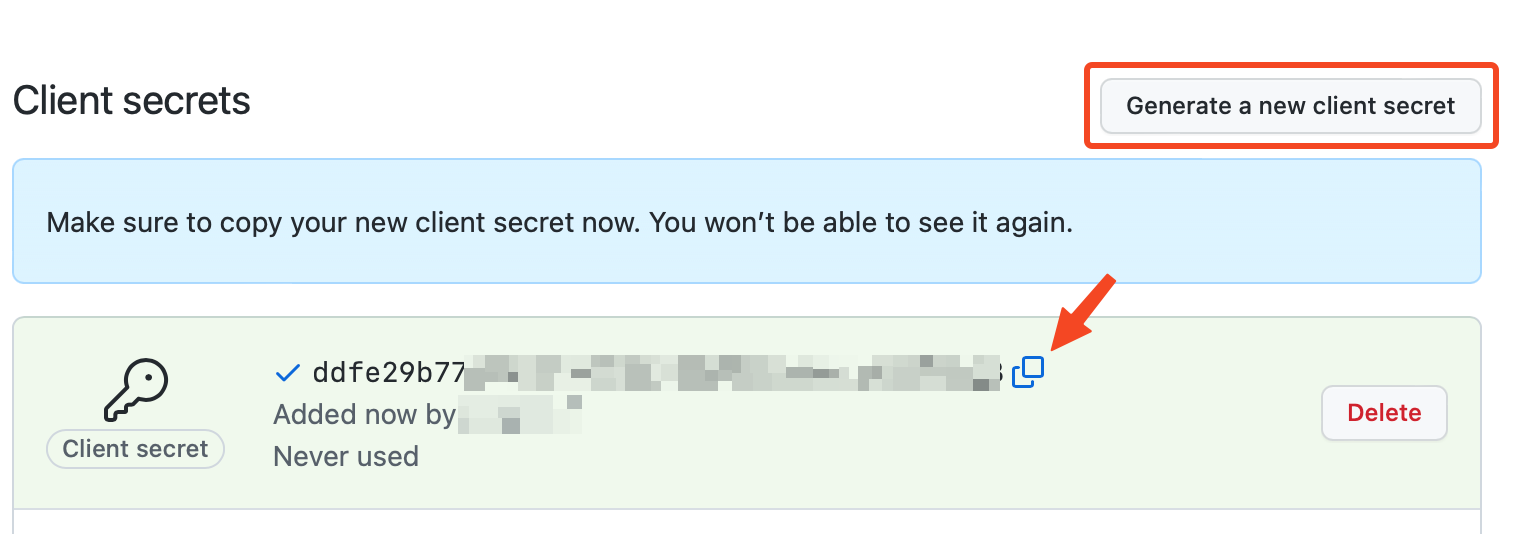
Make immediately a copy of the client secret value. We are going to need it (along with the Client ID of the app) during our next step and additionally that is the last time that it will be visible on the GitHub console.
Configuring GitHub Identity Provider
Next, let's return back to the configuration panel of our newly created GitHub Identity Provider in Keycloak, and set the following values:
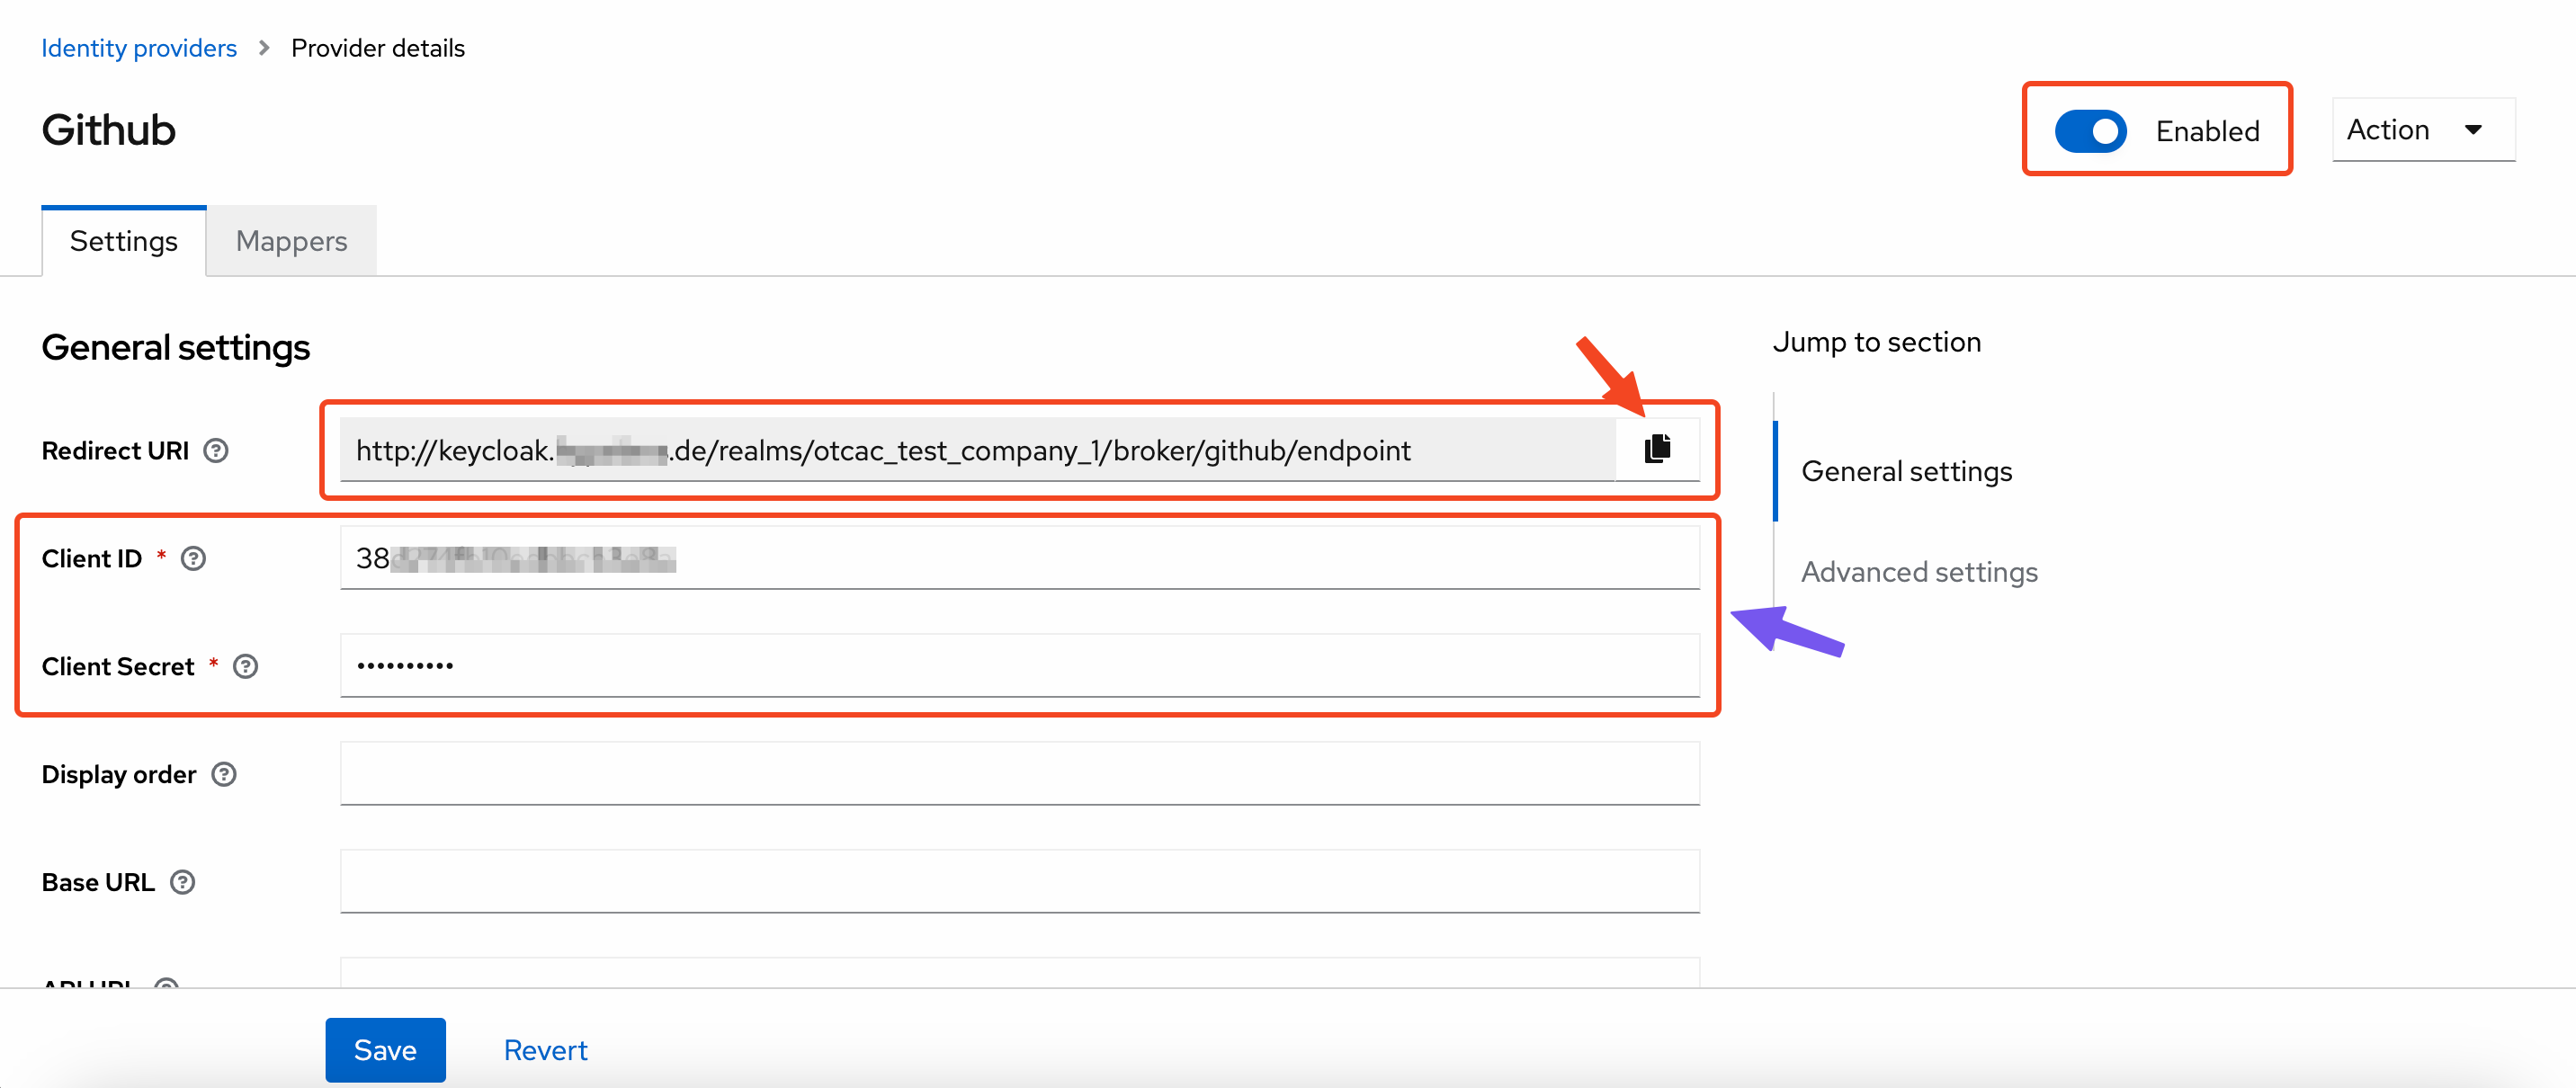
- Client ID: the Client ID of the GitHub OAUth app we just created
- Client Secret: the Client Secret of the GitHub OAUth app
Configuring the IAM Identity Provider Conversion Rules
By default federated users are named FederationUser in the T Cloud Public platform. These users can only log in to
the cloud platform and they do not have any other permissions. You can configure identity conversion rules on the
IAM console to achieve the following:
- Display enterprise users with different names in the cloud platform.
- Assign permissions to enterprise users to use the cloud platform resources by mapping these users to IAM user groups. Ensure that you have created the required user groups.
This can be achieved by editing the Identity Conversion Rules under IAM -> Identity Providers:
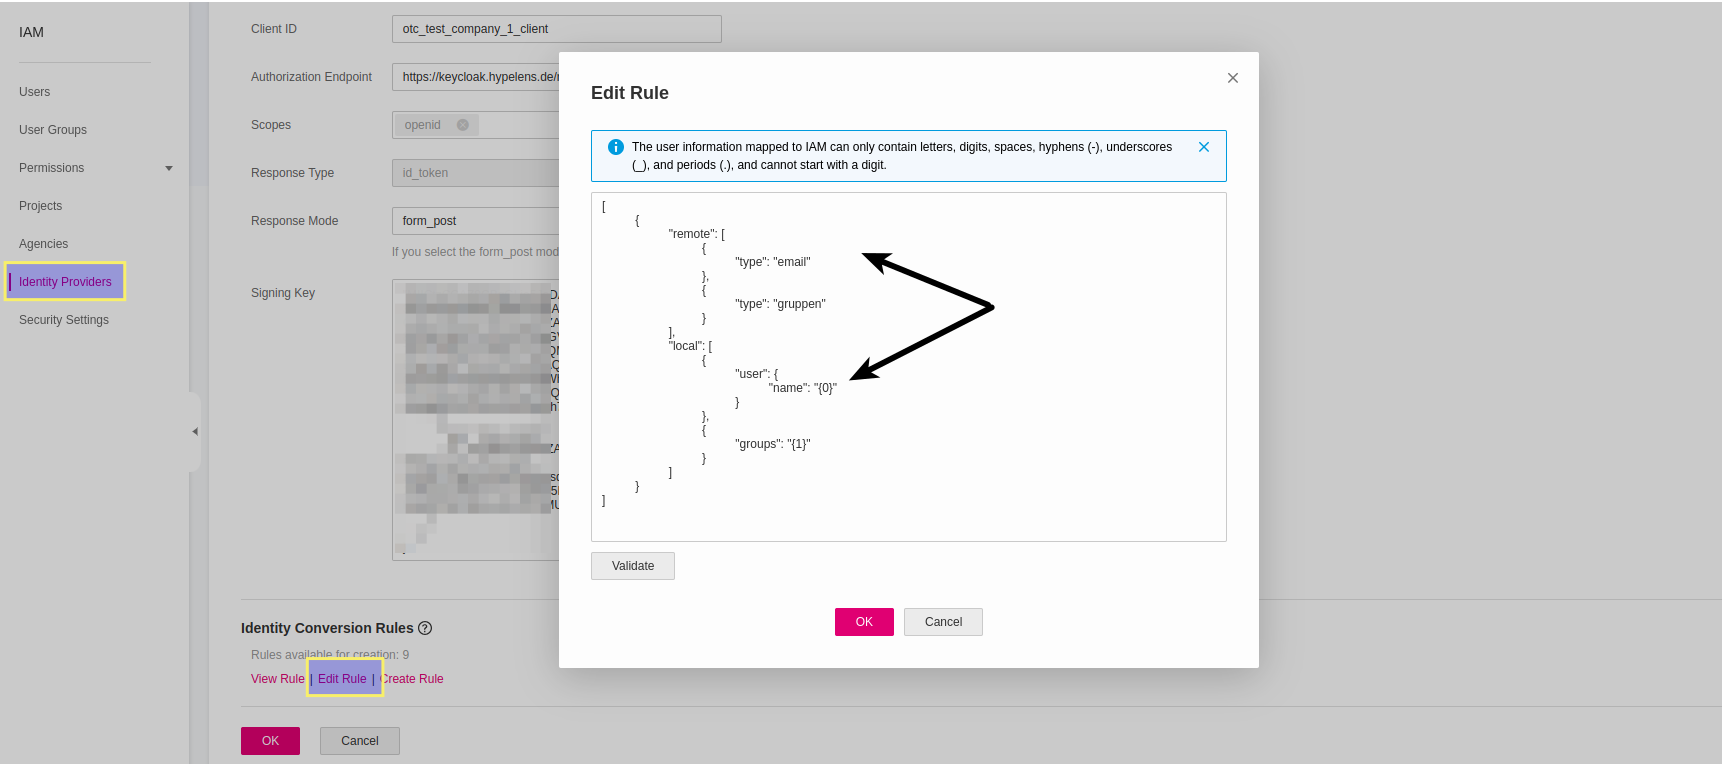
Paste the following conversion rule in the Edit Rule panel:
    [
      {
        "remote": [
        {
          "type": "email"
        },
        {
          "type": "gruppen"
        }],
        "local": [
        {
          "user": {
            "name": "{0}"
          }
        },
        {
          "groups": "{1}"
        }]
      }
    ]
The remote part describes the Predefined Mappers (email and gruppen) we created in KeyCloak Client's configuration.
The local part defines the mapping between the remote properties and the OTC account. The user will get as name
the the value of remote.email and will automatically belong to the groups defined in remote.gruppen.
Bear in mind, that we have to create those OTC groups on before hands so they match 1-1 name-wise in order the mapping to work and our federated user to get the desired permissions.