Combining WAF and Layer-7 Load Balancers to Protect Services over Any Ports
This topic walks you through how to combine dedicated WAF instances and layer-7 load balancers to protect your services over non-standard ports that cannot be protected with WAF alone. For ports supported by WAF, see Ports Supported by WAF.
Protection Scenarios
The following procedure describes how WAF and ELB together protect
www.example.com:9876. Port 9876 is a non-standard port WAF alone
cannot protect.
Prerequisites
-
You have purchased a dedicated layer-7 load balancer. For details about load balancer types, see Differences Between Dedicated and Shared Load Balancers.
cautionDedicated WAF instances issued before April 2023 cannot be used with dedicated network load balancers. If you use a dedicated network load balancer (TCP/UDP), ensure that your dedicated WAF instance has been upgraded to the latest version (issued after April 2023).
-
Related ports have been enabled in the security group to which the dedicated WAF instance belongs.
You can configure your security group as follows:
-
Inbound rules
Add an inbound rule to allow incoming network traffic to pass through over a specified port based on your service requirements. For example, if you want to allow access from port 80, add a rule that allows
TCPand port80. -
Outbound rules
Retain the default settings. All outgoing network traffic is allowed by default.
For more details, see Adding a Security Group Rule.
-
Procedure
-
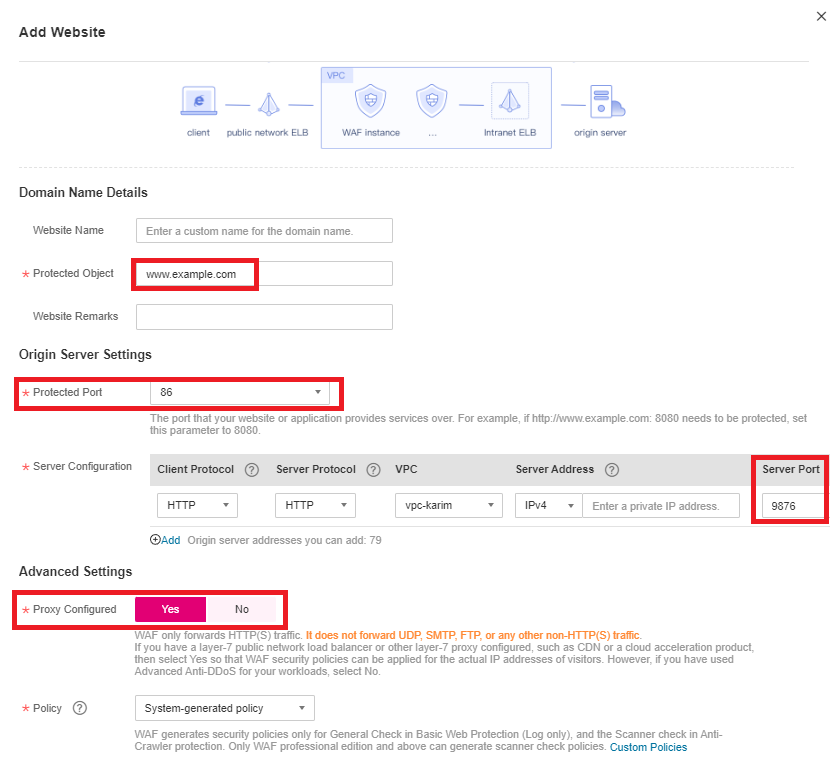
Connect www.example.com to WAF by referring to Adding a Website to WAF (Dedicated Mode). Select any non-standard port as the protected port, for example, port 86, set Server Port to
9876, and set Proxy Configured toLayer-7 proxy.
-
Add listeners and backend server groups to the load balancer.
-
Log in to the management console.
-
Click
in the upper left corner of the management console and select a region or project.
-
Click
in the upper left corner of the page and choose Elastic Load Balance under Networking to go to the Load Balancers page.
-
Click the name of the load balancer in the Name column to go to the Basic Information page.
-
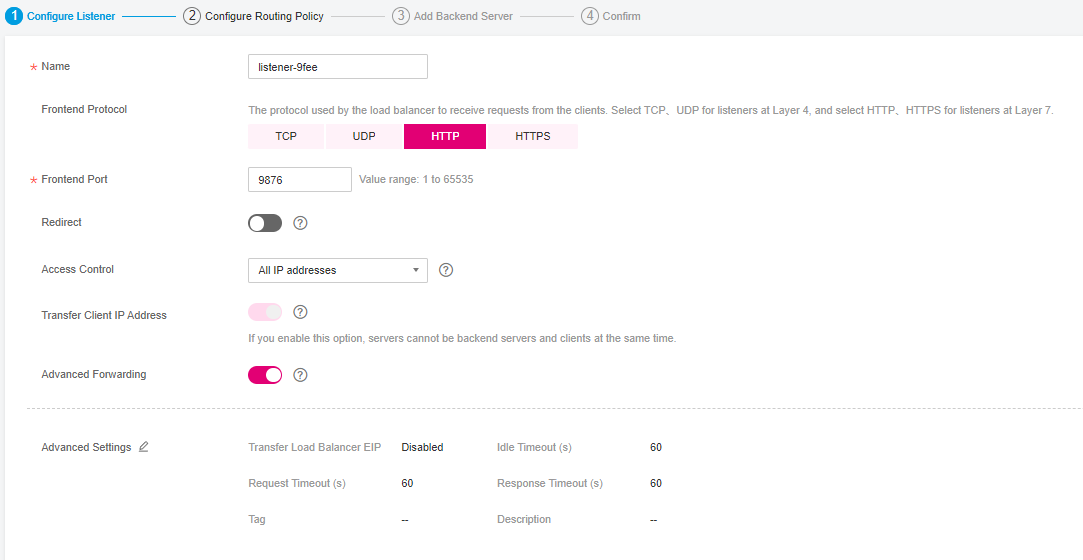
Click the Listeners tab and then click Add Listener. On the displayed page, configure the listener. In the Frontend Port text box, enter the port you want to protect. In this case, enter
9876.
-
Click Next: Configure Request Routing Policy.
 important
- If you select Weighted round robin for Load Balancing Algorithm, disable Sticky Session. If you enable Sticky Session, the same requests will be forwarded to the same dedicated WAF instance. If this instance becomes faulty, an error will occur when the requests come to it next time.
- For details about ELB traffic distribution policies, see Load Balancing Algorithms.
-
Click Next: Add Backend Server and click Next: Confirm.
-
-
Add the WAF instance to the load balancer.
-
Log in to the management console.
-
Click
in the upper left corner of the management console and select a region or project.
-
Click
in the upper left corner, select a region, and choose Security -> Web Application Firewall (Dedicated) to go to the Dashboard page.
-
In the navigation pane on the left, choose Instance Management -> Dedicated Engine to go to the dedicated WAF instance page.

-
Locate the row containing the WAF instance. In the Operation column, click More -> Add to ELB.
-
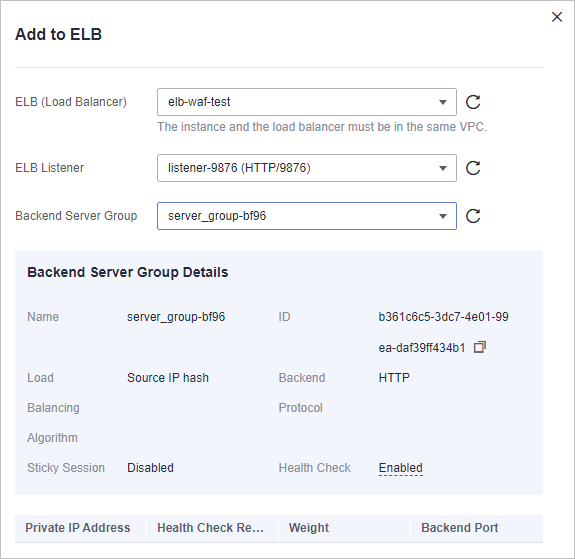
In the Add to ELB dialog box, specify ELB (Load Balancer), ELB Listener, and Backend Server Group based on previous step.

-
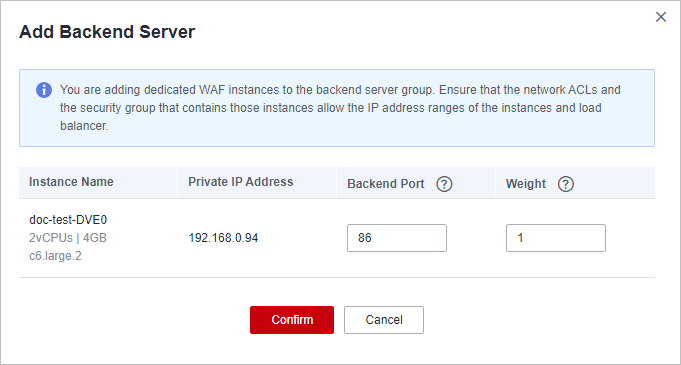
Click Confirm. Then, configure service port for the WAF instance. In this example, configure Backend Port to
86, which is the one we configured in step 2.
-
Click Confirm.
-
How the Combination Protects Traffic
